From Concept to Creation: 3D Character Development Process For Film and Games
Paula García Fernández, currently pursuing pre-doctoral studies, offers insights and inspiration in this article, showcasing her recent work and providing a framework for creating stunning portfolio pieces.
Paula García Fernández is a 3D Artist and recent graduate from Lightbox Academy and more recently, Voxel School, specialised in the development of 3D Characters and Environments for video games. She is currently pursuing her pre-doctoral studies focused on the digital footprint of Contemporary Sculpture. Her sculptural production is based on linking traditional art with digital strategies, such as photogrammetry, Artificial Intelligence or 3D printing. In this article Paula shares one of her recent works and shares a framework for you to follow in hopes to inspire you to create your own stunning portfolio pieces.
Every time I have down time I take the opportunity to start a project that motivates me to continue developing my portfolio and learning new skills on my own. Creating characters is a very good way to learn effectively and achieve aesthetically interesting results, developing my technique and improving little by little. After having spent some time developing sculptures with clay during my studies in Fine Arts, I wanted to learn to also develop them in 3D. This project is a result of the work done on my journey so far.
Workflow and Software
Normally, I use different types of software depending on the needs of 3D modeling and how easy or difficult it is for me to develop that part of the project. Generally my creative processes start like this:
During different work experiences I have had the opportunity to learn different softwares and gradually improve my technique with them. For example, for the last project I developed at OTTOM Ideas I had the opportunity to delve deeper into Grease Pencil with Blender thanks to the help of my colleagues and supervisors.
Taking advantage of each professional experience, whether or not it is in your line of work or style, will always be useful in your professional development and will give you better criteria as an artist in the future.
Phase 1: Idea/Reference
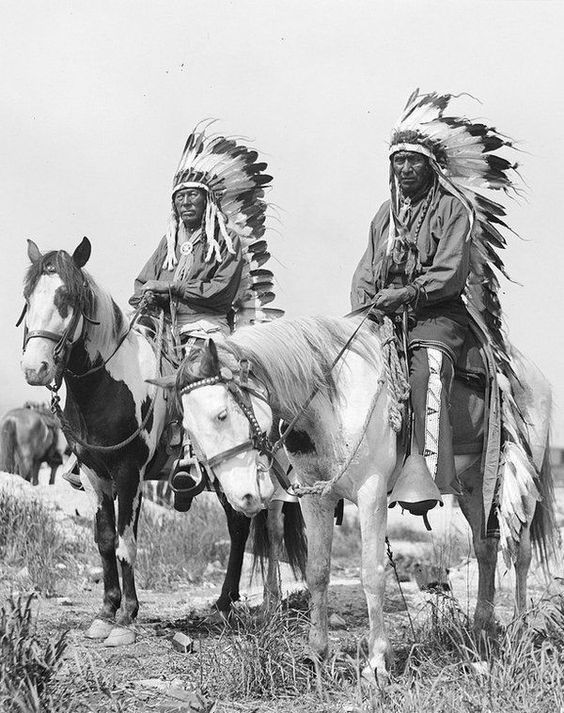
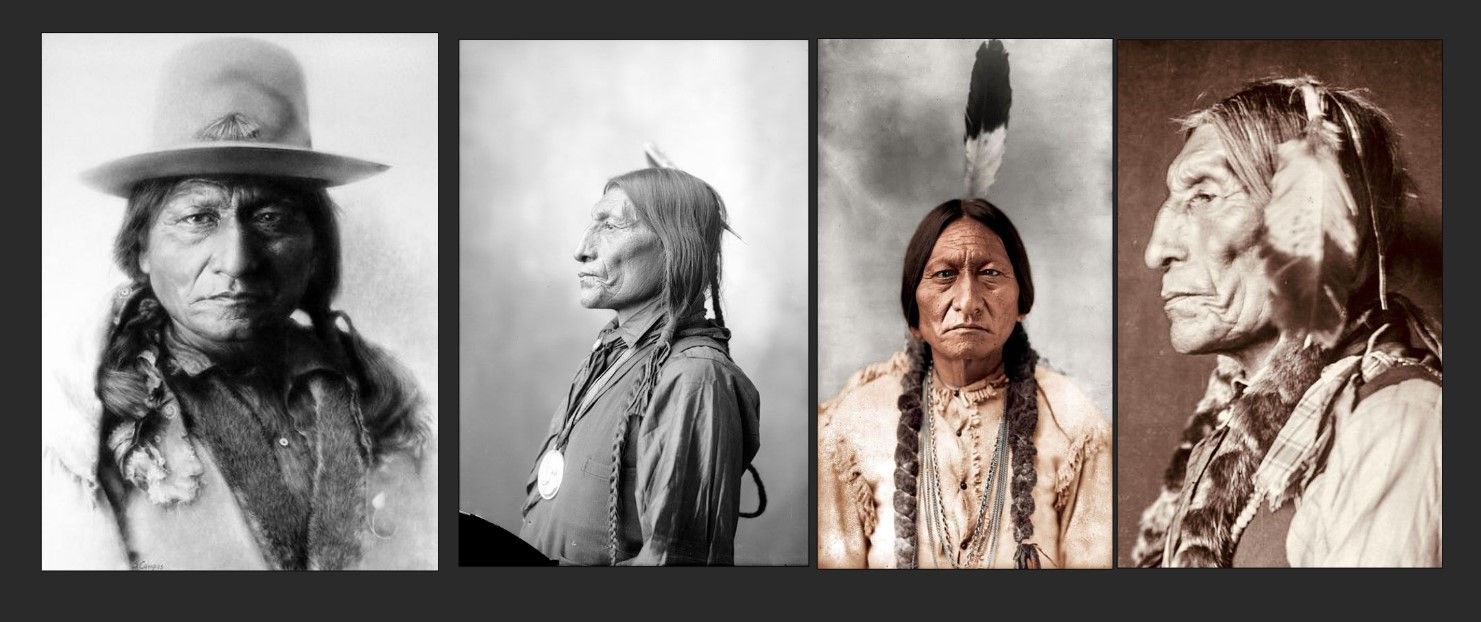
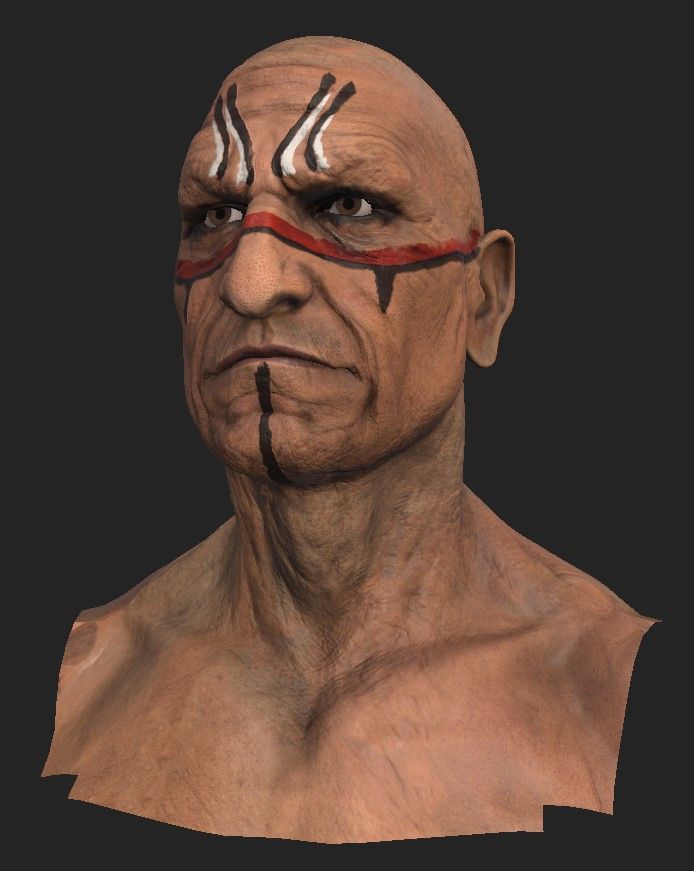
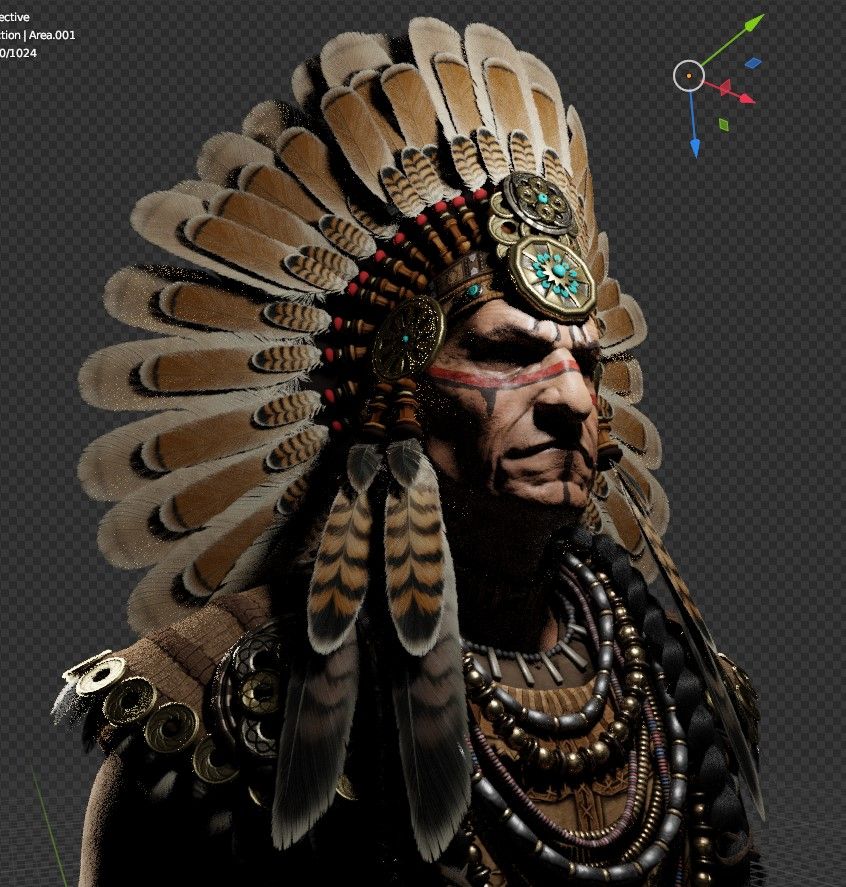
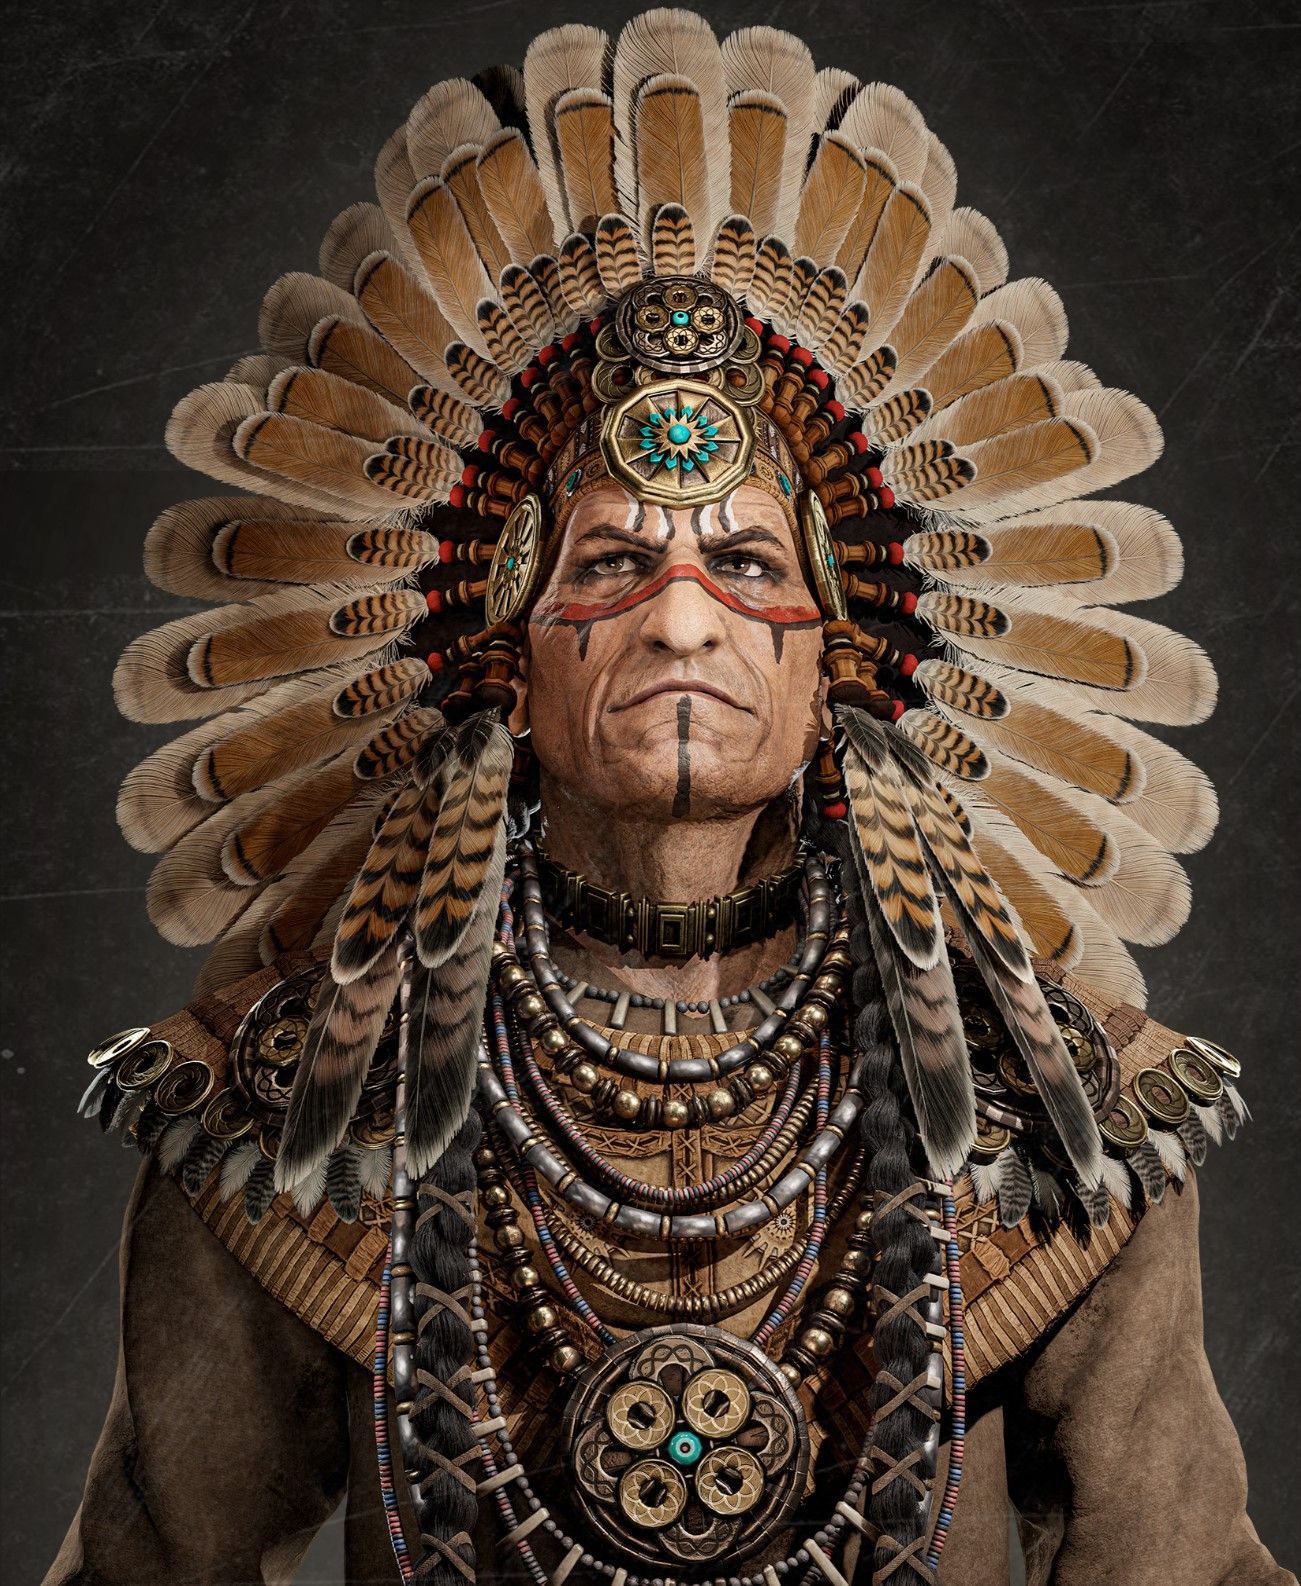
When I was a child, my grandfather spent the summer afternoons watching cowboy movies, which he already knew by memory. The image of the Native American tribal chief always came to mind, with his large feather crown and all his decorative beads. Years later, I decided to develop one in 3D.
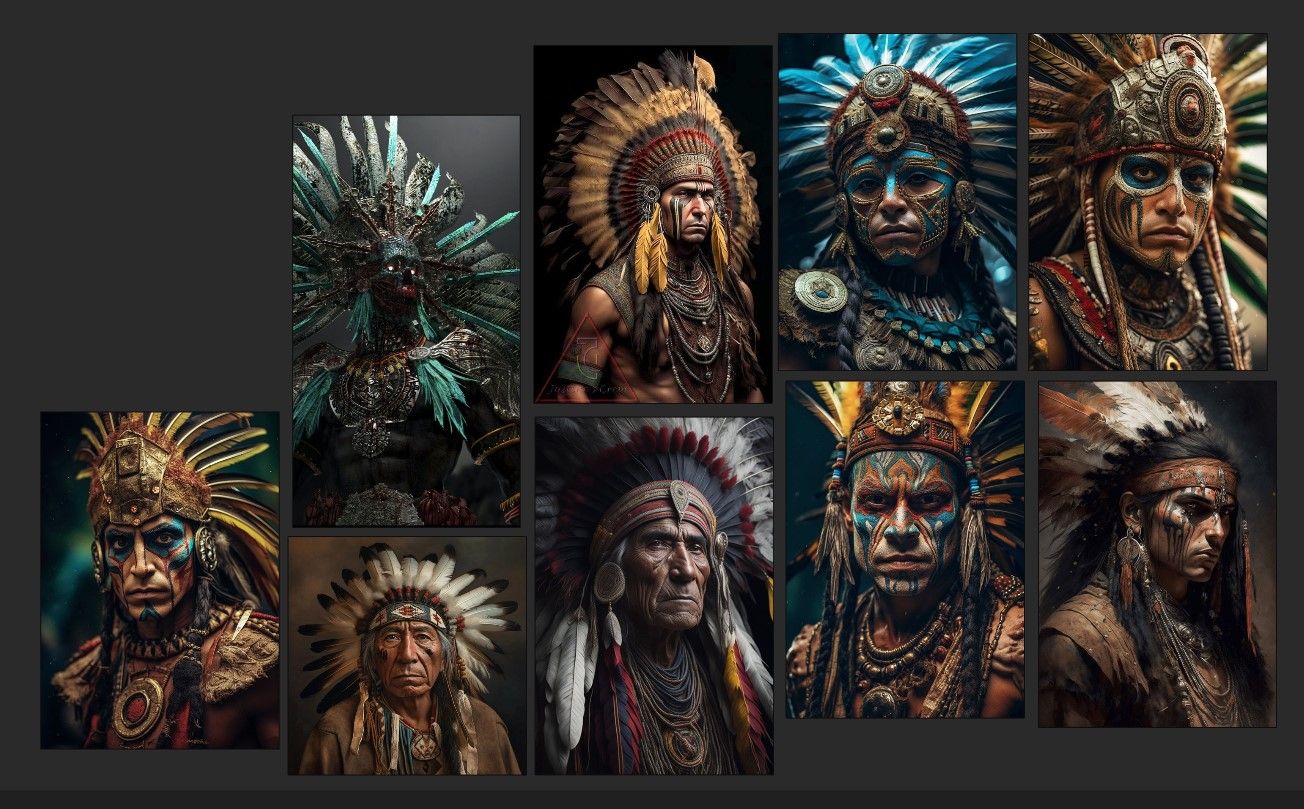
I started searching for references on Pinterest and Google, I also got a couple of examples on Midjourney. It was very useful for me to search on other digital art platforms for examples of what I wanted to create so I could see what line to follow, what were the successes of other 3D artists and what mistakes to avoid.
Of course I didn't find the perfect reference, so I decided to take the elements that I liked the most from each photograph so I could integrate them all into the final model.
Phase 2: Sculpting/Modeling
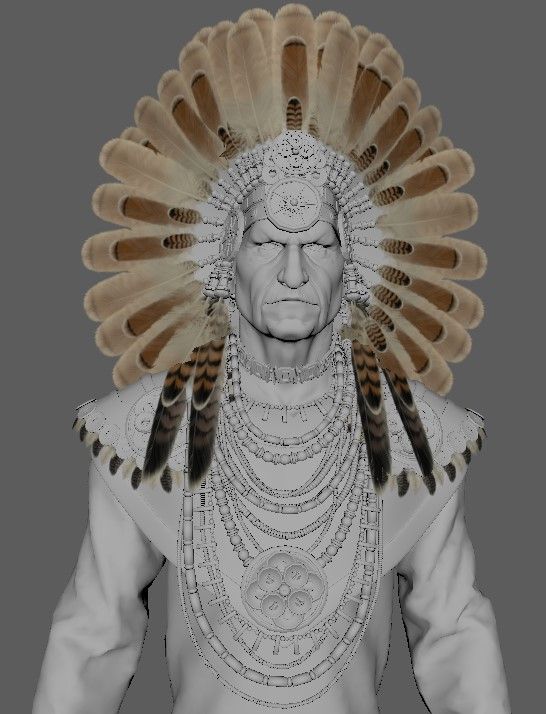
Generally, when I need a mesh base for the body, I usually go to Metahuman Creator since it has a wide variety of models with very different physical appearances and with a very useful geometry to animate them later. I import the model into ZBrush to adapt the facial and body features to those of the required model. Using ZBrush's Dynamic Subdivision option I can make sure that I adapt the facial features of my base model without deforming too much of the model's original geometry.
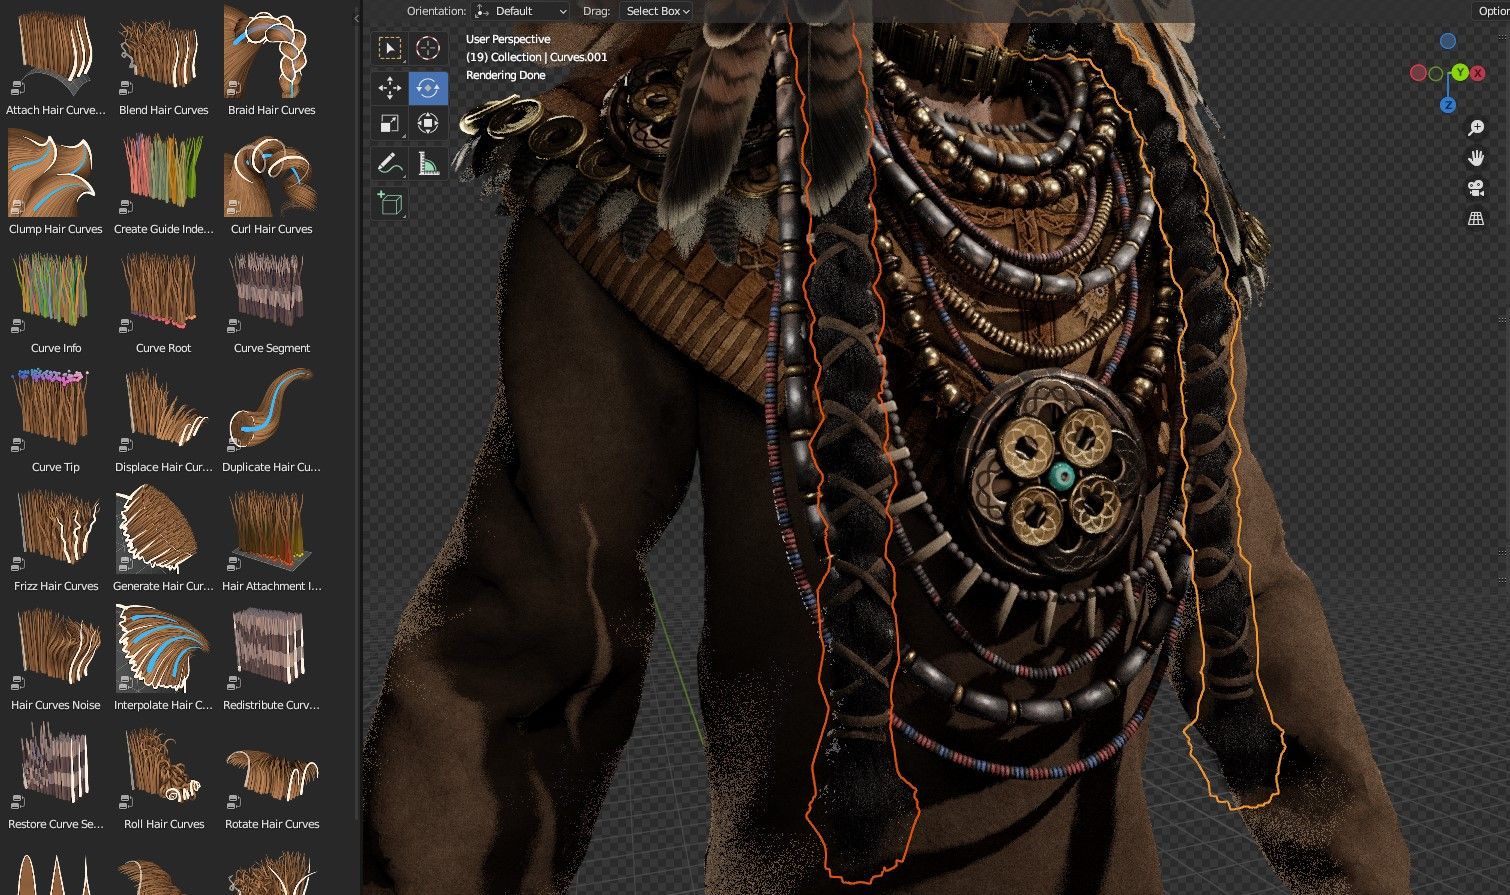
I export the model to Blender or Maya to begin modeling hero props. In this case I mostly used Blender during the modeling process since I wanted to consolidate my technique within this software. I started with the headgear of the head, such as the forehead ribbons, the attachments of the feathers to the crown or the leather ornaments of the chest and shoulder pads. The necklaces were made using Blender's Array and Curve modifiers, duplicating the necklace beads, and editing the curve around the character's neck to adapt each necklace.
As I knew that only the torso was going to be shown in the final render, the top shirt was made in Marvelous Designer, adding a Leather preset to the fabrics to better simulate the physics of the materials.
Making the braids was challenging, since hair physics has always been my handicap. But thanks to Blender and its latest updates to the Hair Presets it was really easy and interesting. For other elements with hair such as eyebrows or eyelashes I used Alpha cards.
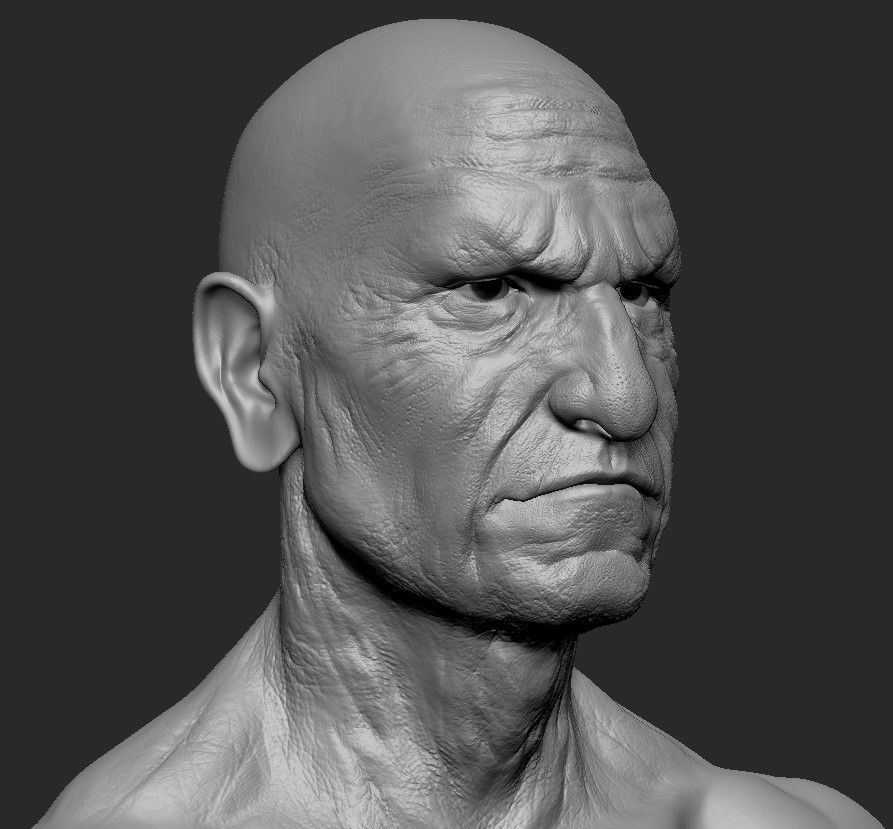
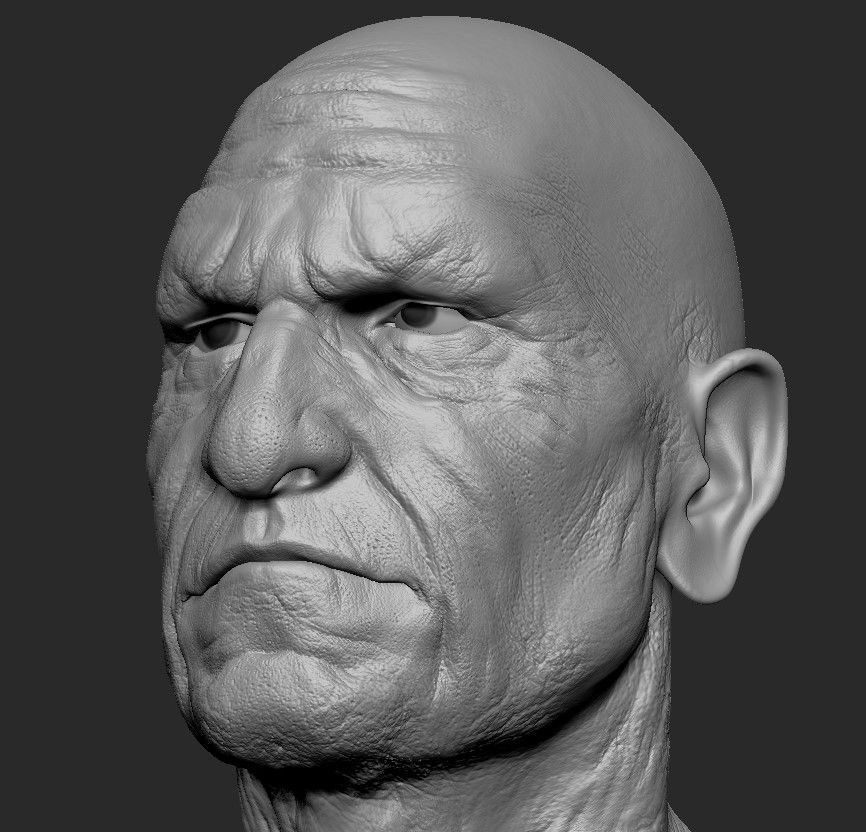
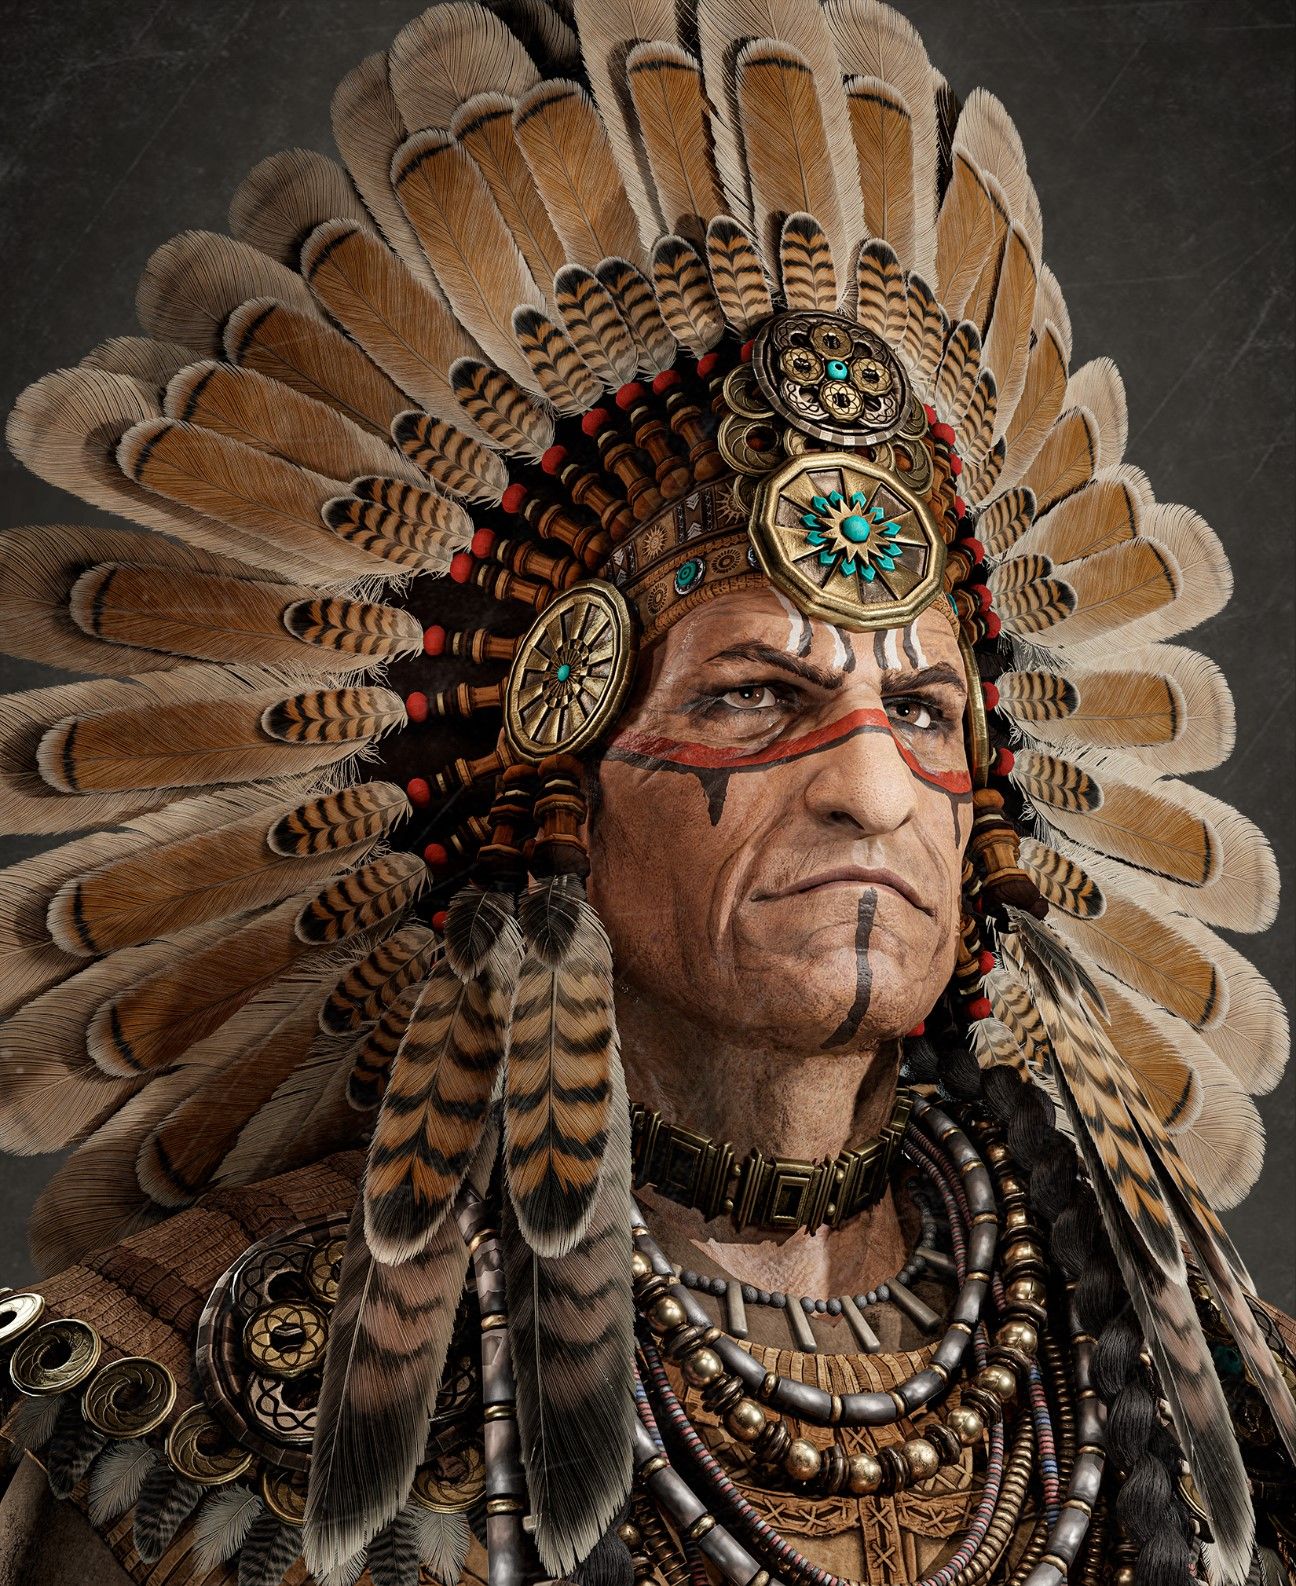
I usually leave the facial sculpting part for the end of the modeling process since it is one of my favourites. Using Alpha maps and skin texture brushes I project symmetrically on the surface of the model with a high subdivision mode. When I have a general base of skin texture I break the symmetry of the model to create unique details such as small wrinkles, warts, scar marks, pores or small pimples that will give the face uniqueness.
Skin details done with ZBrush
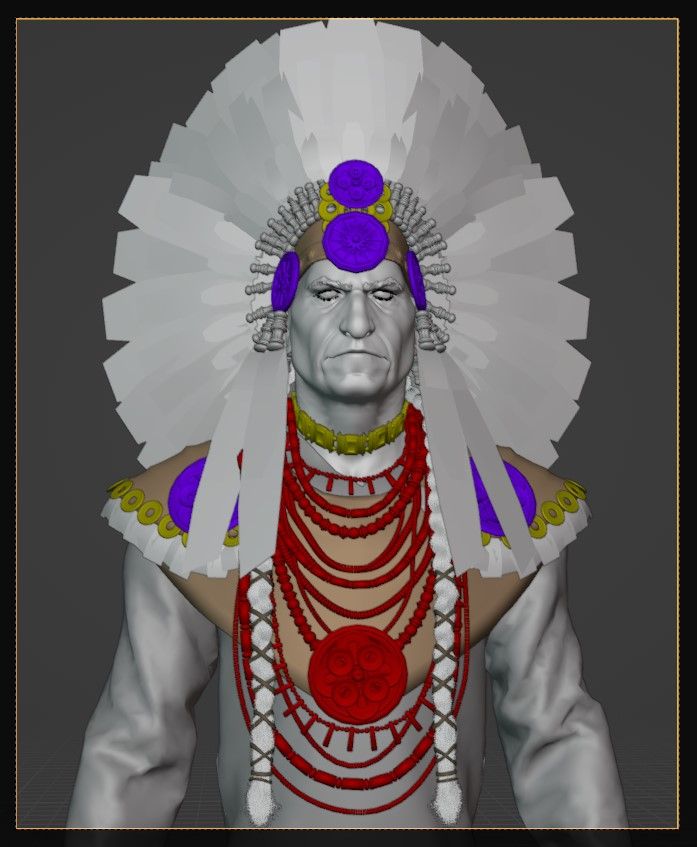
Phase 3: Retopologising/UV Mapping
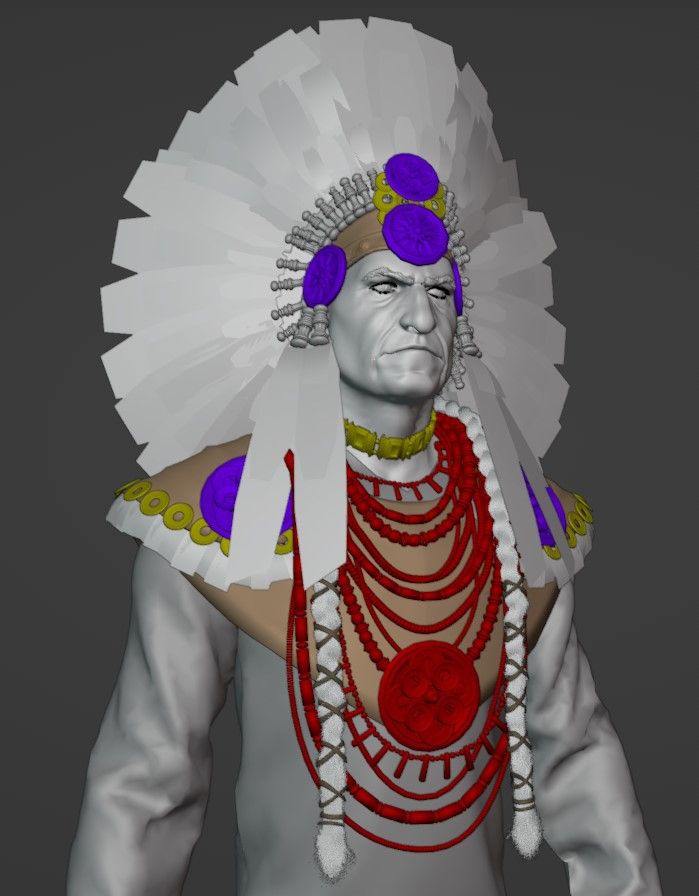
I continued the project by displaying the UVs of the elements. To create UVs I usually use Maya, since I find it more comfortable, faster and easier in my workflow. I must be careful and dedicate the necessary time to each of the elements to create correct UVs and correct FLIP errors. For this reason it is very useful to keep the texture checker activated and be able to check possible errors in time.
In models that have a High and Low version, I usually bake the Ambient Occlusion, Curvature, Thickness, Normal and Opacity maps in Marmoset, this way I usually quickly check that the bakes of the textures in the Low models are looking good.
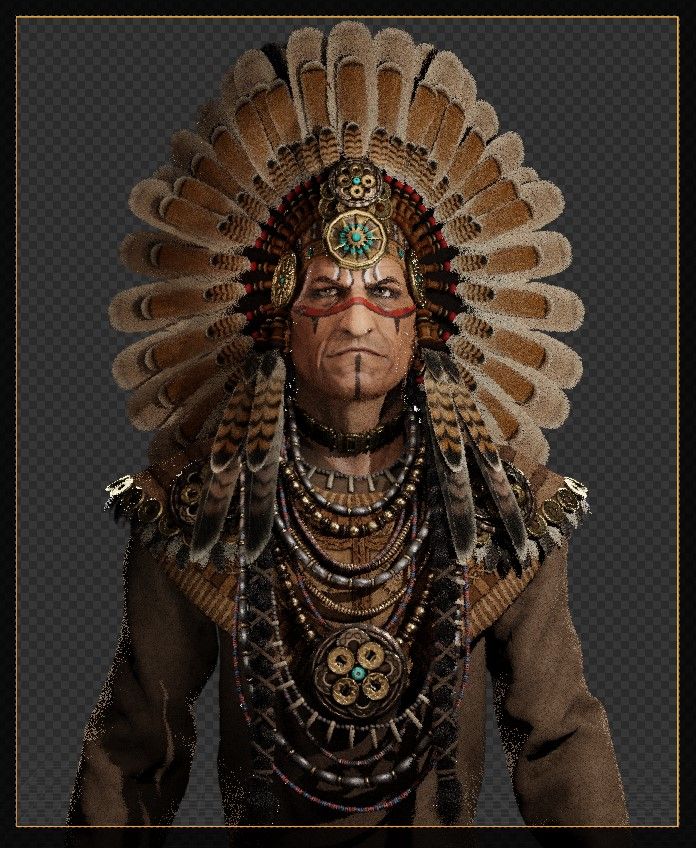
Phase 4: Texturing/Materials
Once all the objects have their correct UVs, I create two Substance 3D Painter files, one to texture the clothes/assets and another to texture the body and skin. Thanks to good references, the texturing process can be speeded up effectively.
Thanks to good references, the texturing process can be speeded up effectively. If there is a preconceived idea and careful analysis it will be possible to achieve more accurate and punctual results.
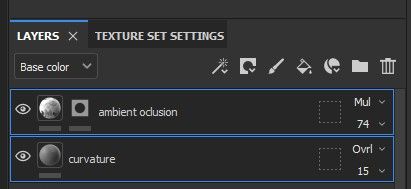
Normally, after texturing each object in detail, I give prominence to two Fill Layers above the rest. In these Fill Layers I activate only the Base Color and put the Ambient Occlusion maps (putting the layer in Multiply mode) and Curvature (putting the layer in Overlay mode). I generally vary the percentage of its opacity and, if necessary, control its effect using levels or contrast filters, depending on the effect I want to obtain.
Phase 5: Posing
In this case, the posing of the character was quite simple since I was looking for a hieratic, hard and challenging appearance. I wanted a symmetrical composition to get more out of the feather bonnet, so all I did was lift the head using ZBrush's transpose master.
Phase 6: Lighting
I believe that lighting is one of the most important and essential steps to communicate all the artistic content, enhance the successes and mitigate the errors of the model. Just as we have references in modeling and sculpting, it is also quite convenient to have them for lighting. For this model I looked for references in the pictorial portraits and traditional analogue photographs taken of the Chiefs of the Native American tribes in order to find the result I was looking for the final appearance of the lighting in the final render.
Phase 7: Rendering/Finishing Touches
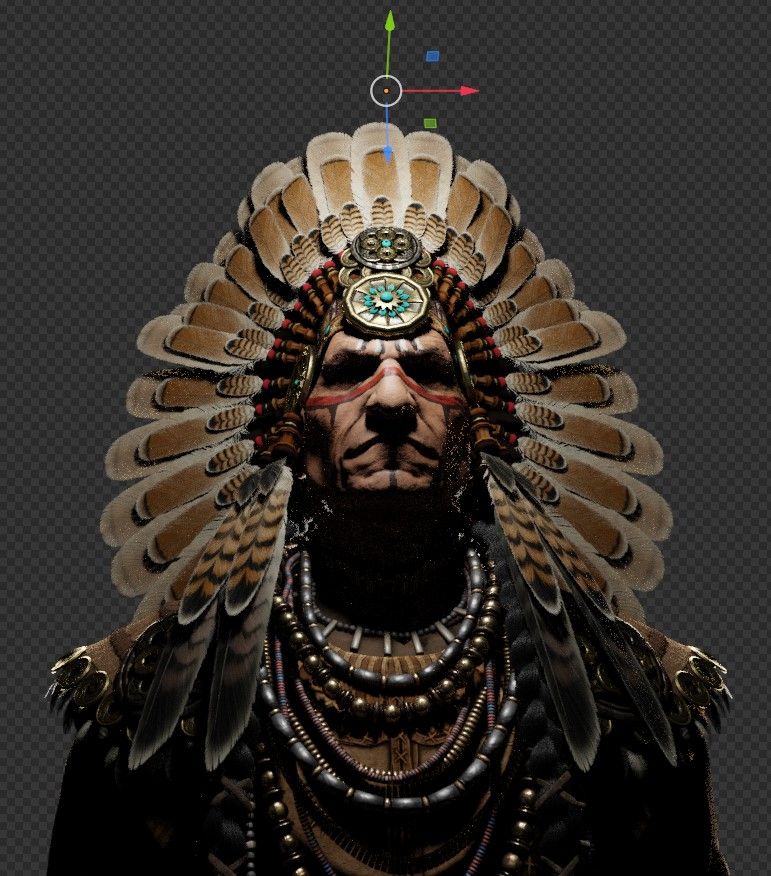
Once the model was finished I started the render in Blender with Cycles. I chose to render without a background since I normally prefer to add effects in the background and be able to play with the silhouette of the model by faking the highlights in Photoshop.
Post-production is a very important phase to achieve the desired finish of our renders. I try Ambient Occlusion and Curvature layers in different modes like Multiply or Overlay creating clipping masks and painting many small details by hand. I always use the Camera RAW filter to more thoroughly edit the small details that will make the difference in our render.
Conclusion
It is normal to see countless failures once we have finished our work, it is a good sign to be critical of our results. Evolving is expensive, improving in those we like should be our motivation. Developing characters individually in my free time has made me evolve little by little in my technique. We must be patient and enjoy the work process and dedicate enough time to the small details of our 3D models, in general being digital artisans. I recommend asking other colleagues and people who don't know about 3D for second opinions on our models (since they may provide another perspective on the appearance of the work and make it interesting).
Thank you for taking your time to read the article, I encourage you to continue dedicating time to improving your artistic journey.
Cheer up and continue working hard!!
Check out Paula's student work via her Rookies profile here, and contact her via LinkedIn.