Peking Opera Singer: From Concept to 3D Creation
Paula García Fernández, Voxel School graduate, breaks down her latest character, from Concept to 3D creation.
Paula García Fernández, Voxel School graduate, breaks down her latest character, from Concept to 3D creation.
Paula García Fernández is a 3D Artist and recent graduate of Lightbox Academy and more recently of Voxel School, specialised in the development of 3D Characters and Environments for video games. She is currently carrying out his predoctoral studies focused on the digital footprint of Contemporary Sculpture, at the Complutense University of Madrid. Her sculptural production is based on linking traditional art with digital strategies, such as photogrammetry, Artificial Intelligence or 3D printing.
Normally, I use different types of software depending on the needs of 3D modeling and how easy or difficult it is for me to develop that part of the project. Generally my creative processes start like this:
Reference: Pinterest - PureRef - Midjourney
Clothing: Marvelous Designer
UVs: Maya
Shading: Substance 3D Painter - Photoshop - Midjourney
Rendering: Blender - Marmoset - Maya
Postprocessing: Photoshop
During different work experiences, I have had the opportunity to learn different softwares and gradually improve my technique with them. For example, for the last project I developed at OTTOM Ideas: WAN. I had the opportunity to delve deeper into Grease Pencil with Blender thanks to the help of my colleagues and supervisors.
Taking advantage of each professional experience, whether or not it is in your line of work or style, will always be useful in your professional development and will give you better criteria as an artist in the future.
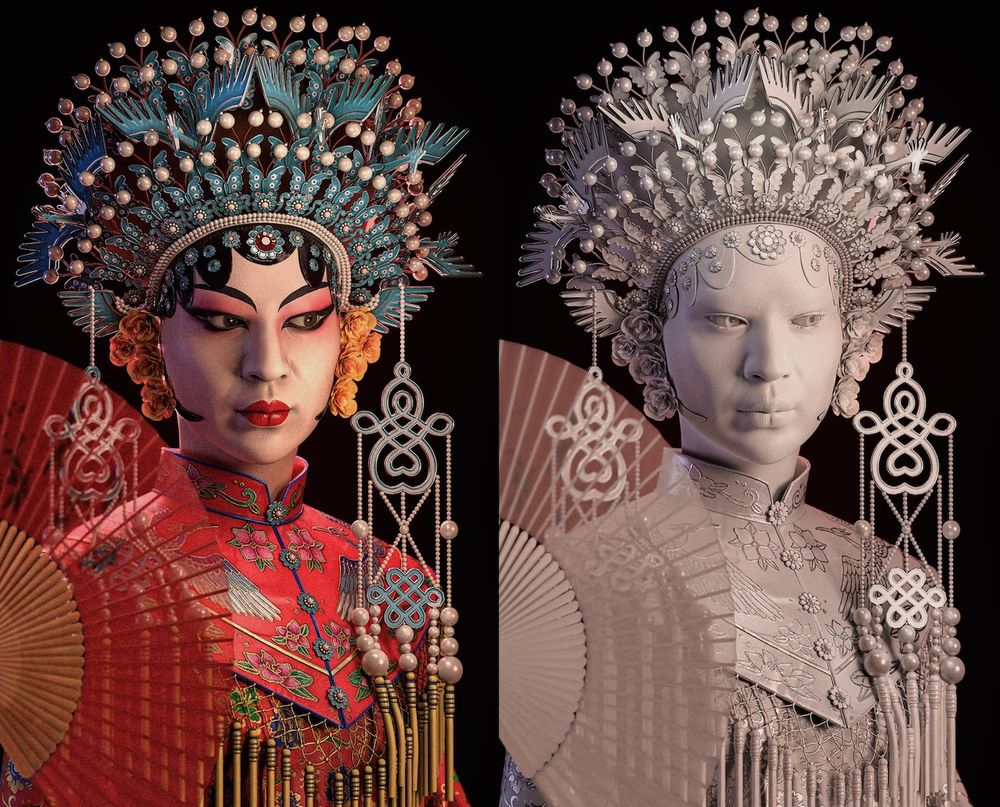
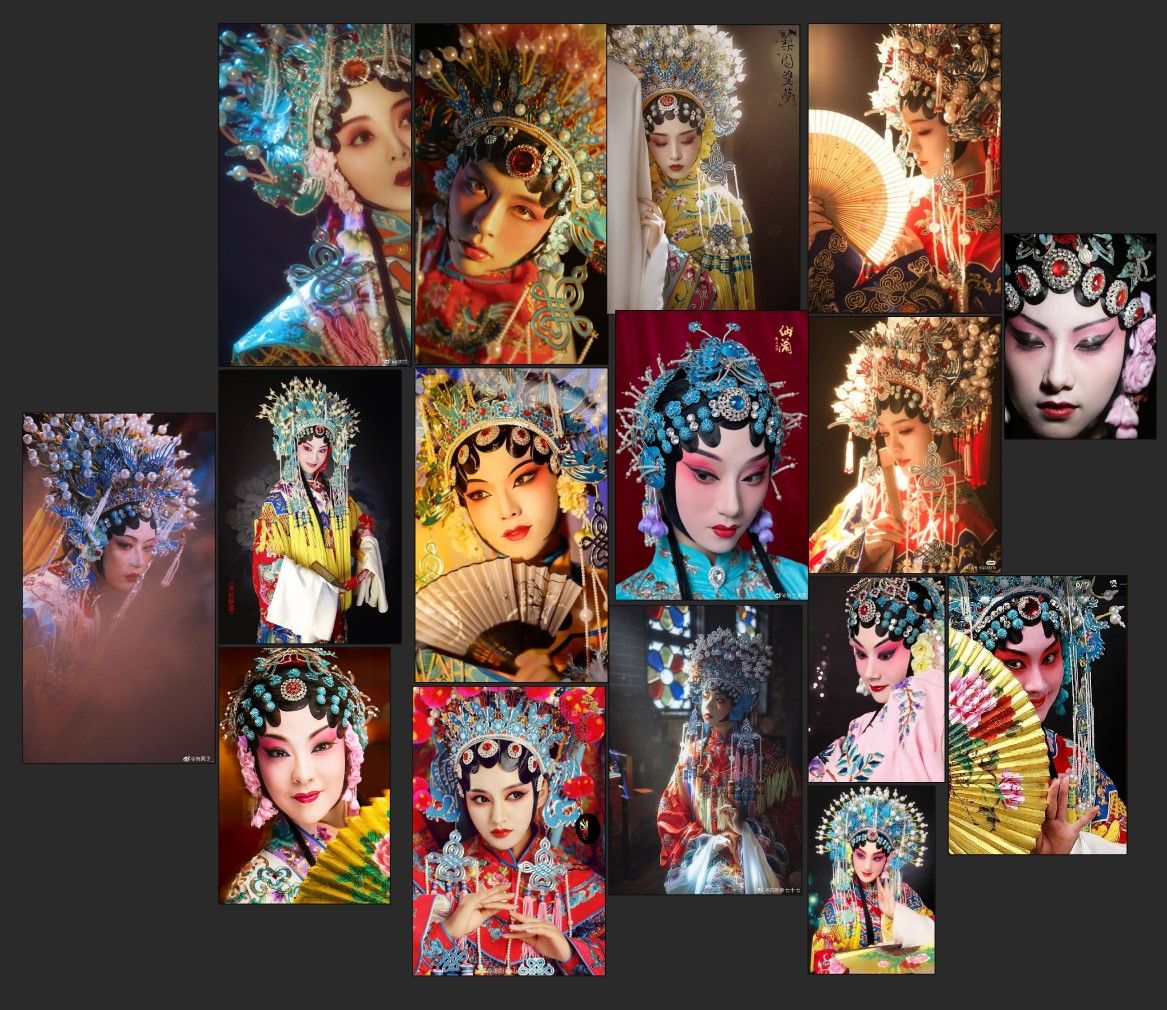
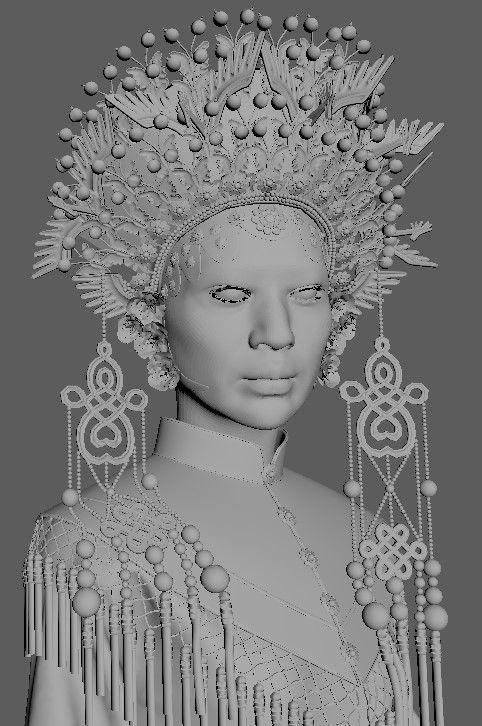
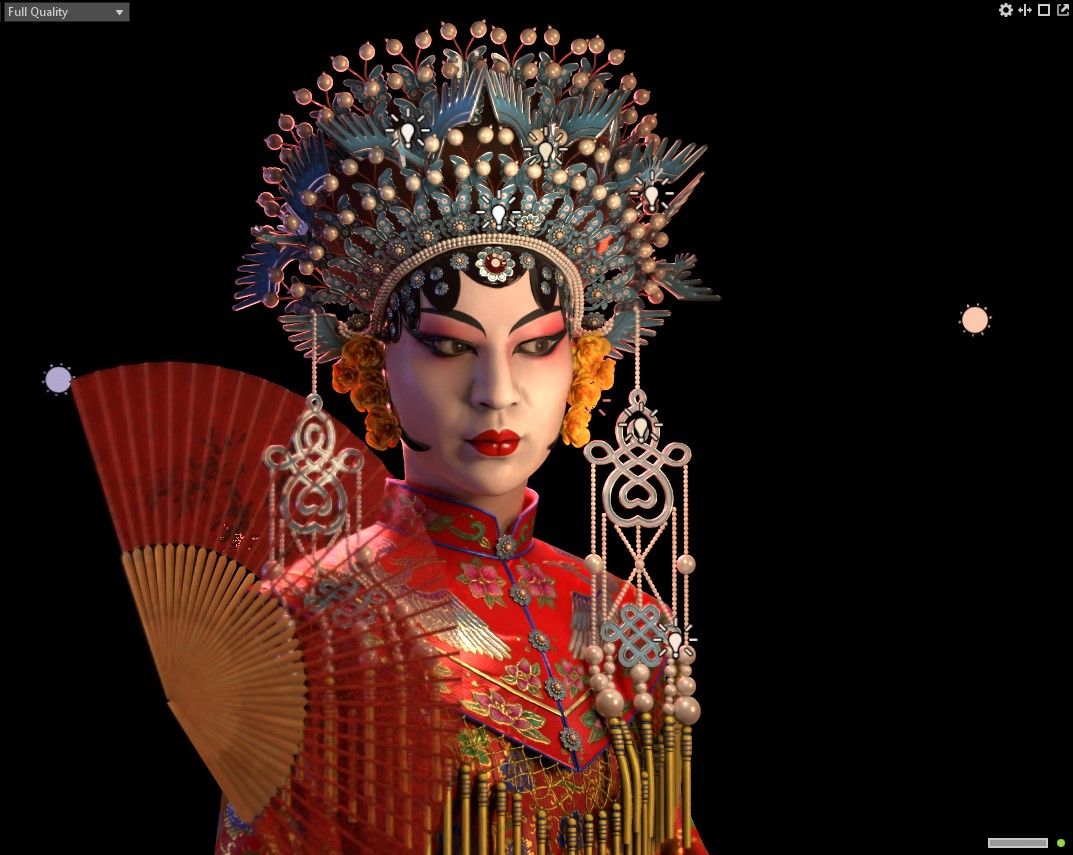
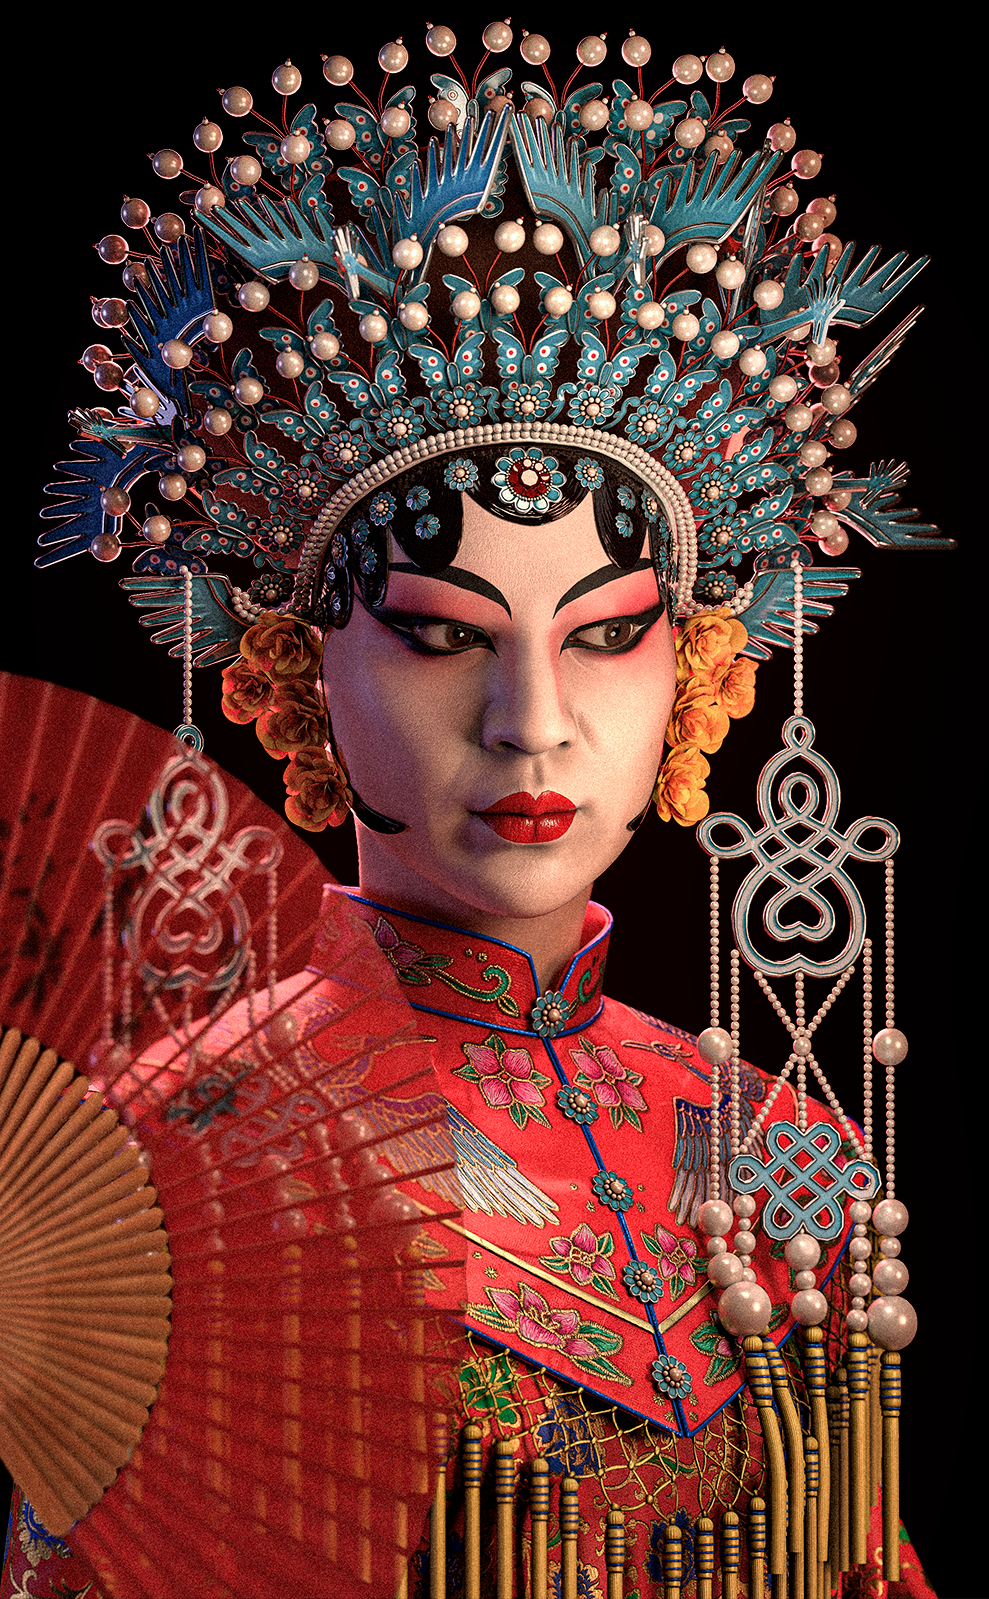
A few months ago I started modeling a series of 3D portraits to improve my skills and expand my portfolio. The traditional singers of the Peking Opera were exceptional to me because of their clothing, makeup and mysticism. These were enough reasons to face the challenge of recreating one in 3D. So I started working on this personal project as soon as I could.

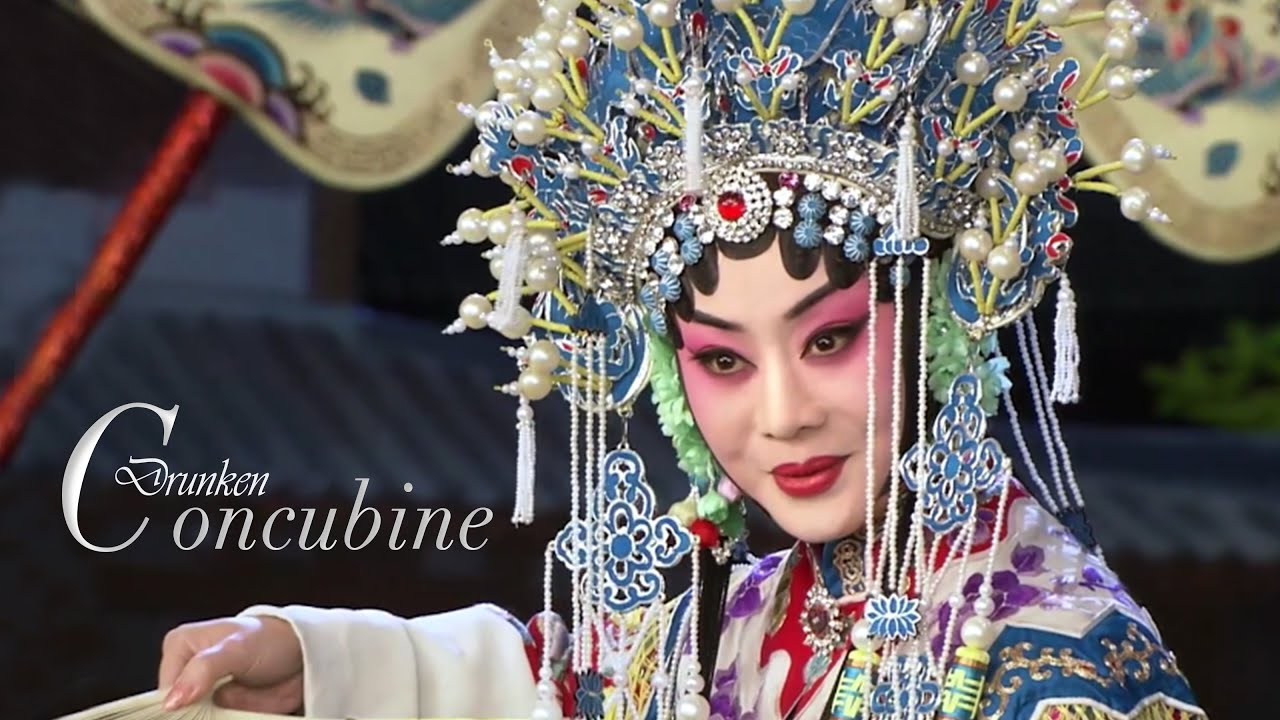

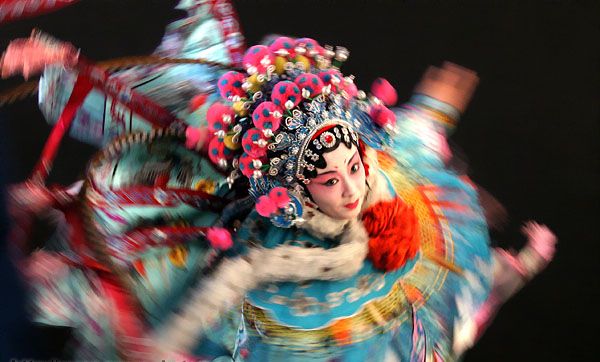
I started searching for references on Pinterest and Google, I also got a couple of examples on Midjourney. It was very useful for me to search on other digital art platforms for examples of what I wanted to create so I could see what line to follow, what were the successes of other 3D artists and what mistakes to avoid.
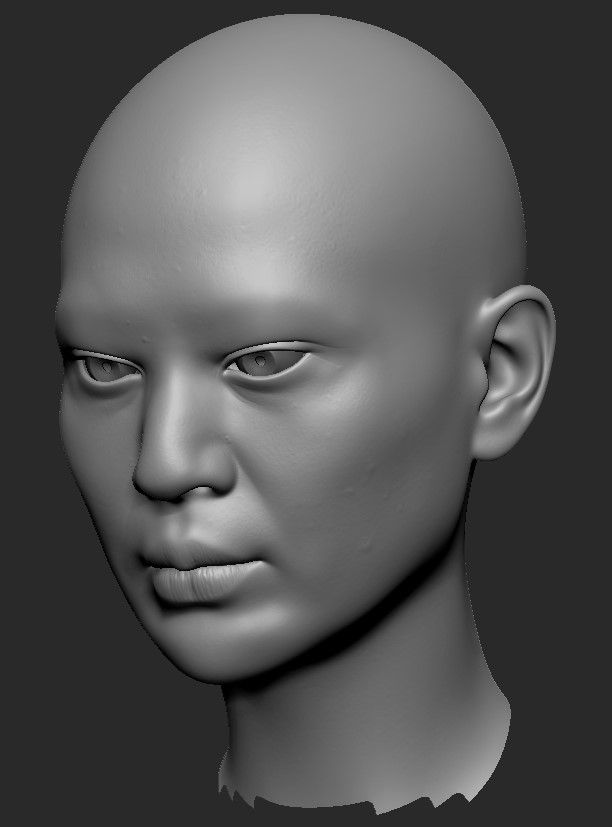
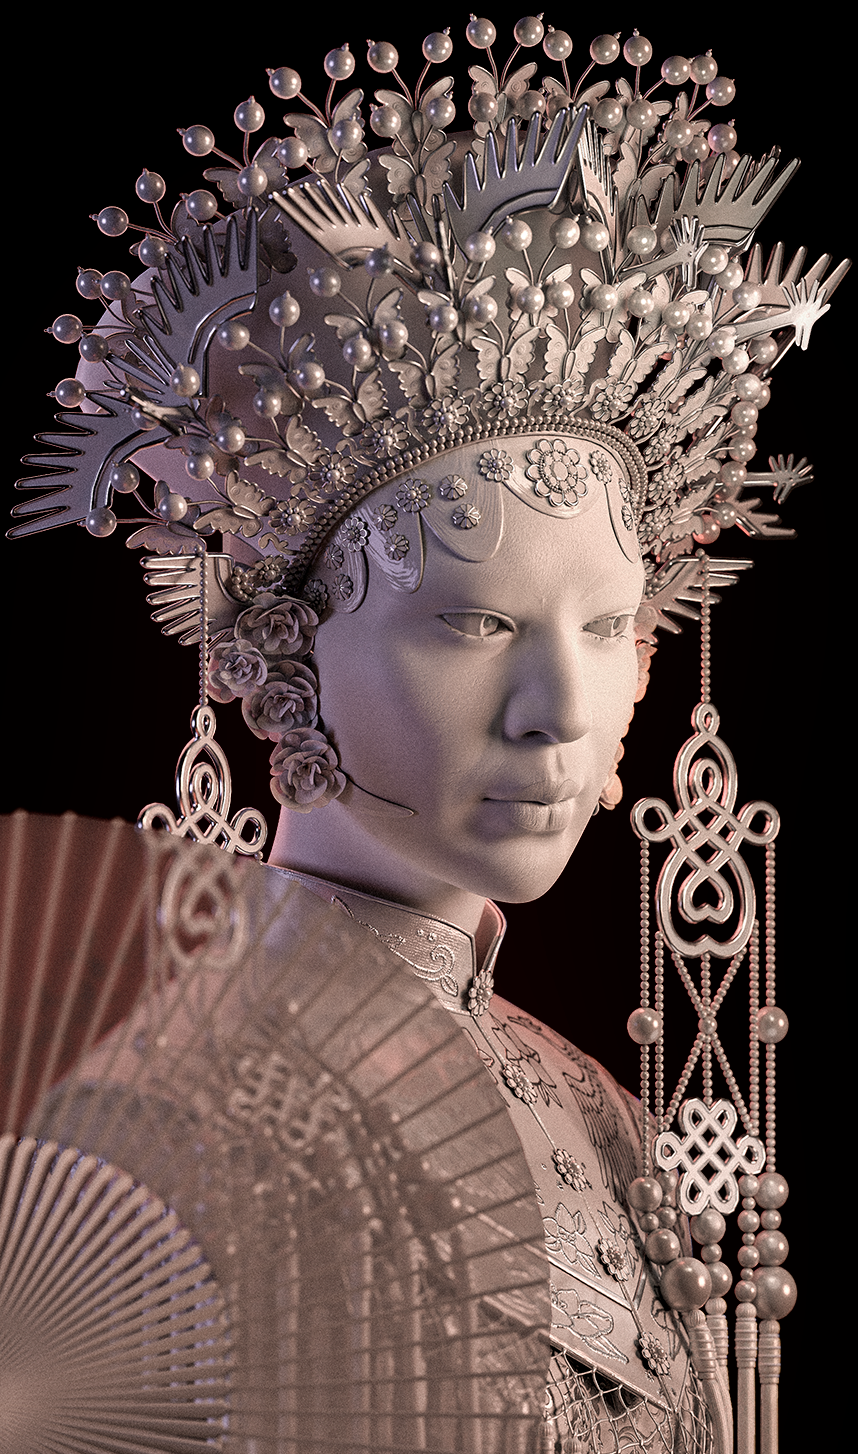
Generally, when I need a mesh base for the body, I usually go to Metahuman Creator since it has a wide variety of models with very different physical appearances and with a very useful geometry to animate them later. I import the model into ZBrush to adapt the facial and body features to those of the required model. Using ZBrush's Dynamic Subdivision option I can make sure that I adapt the facial features of my base model without deforming too much of the model's original geometry.
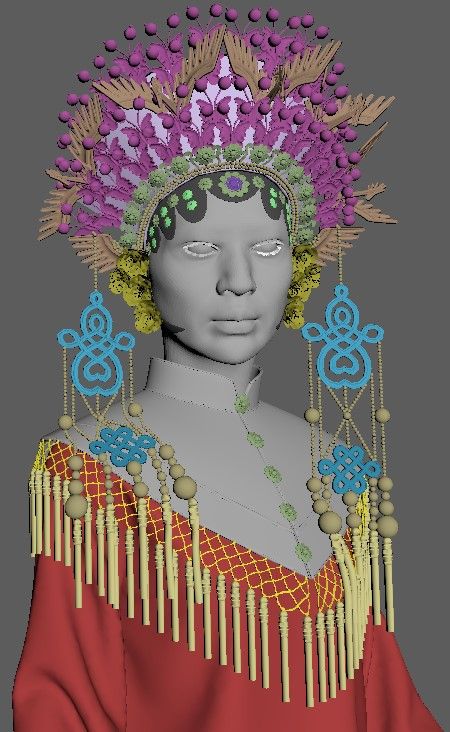
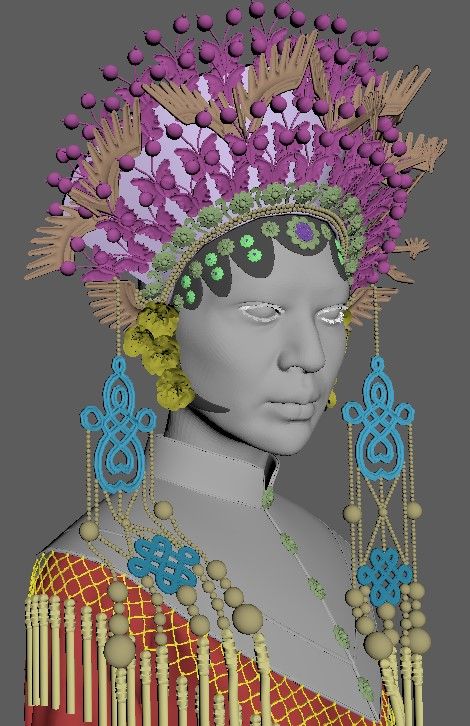
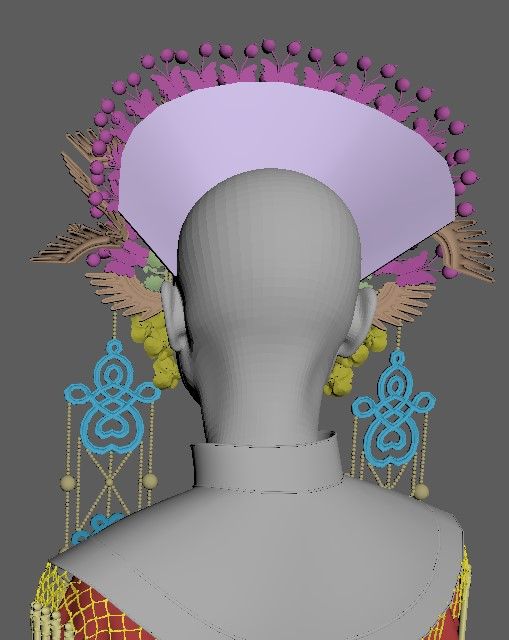
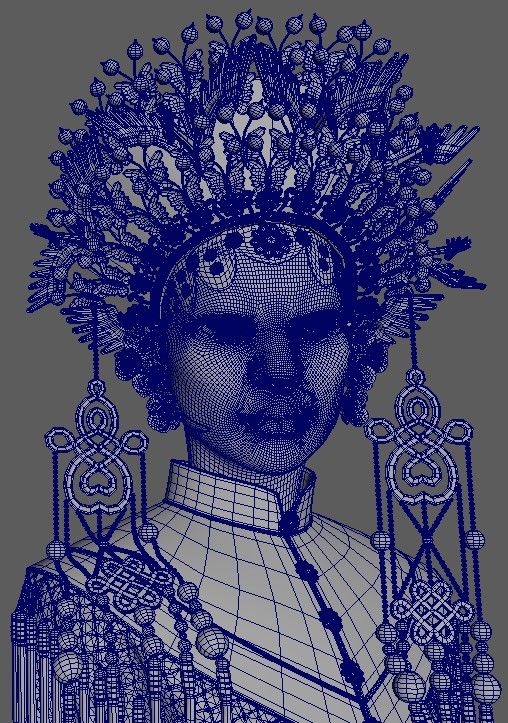
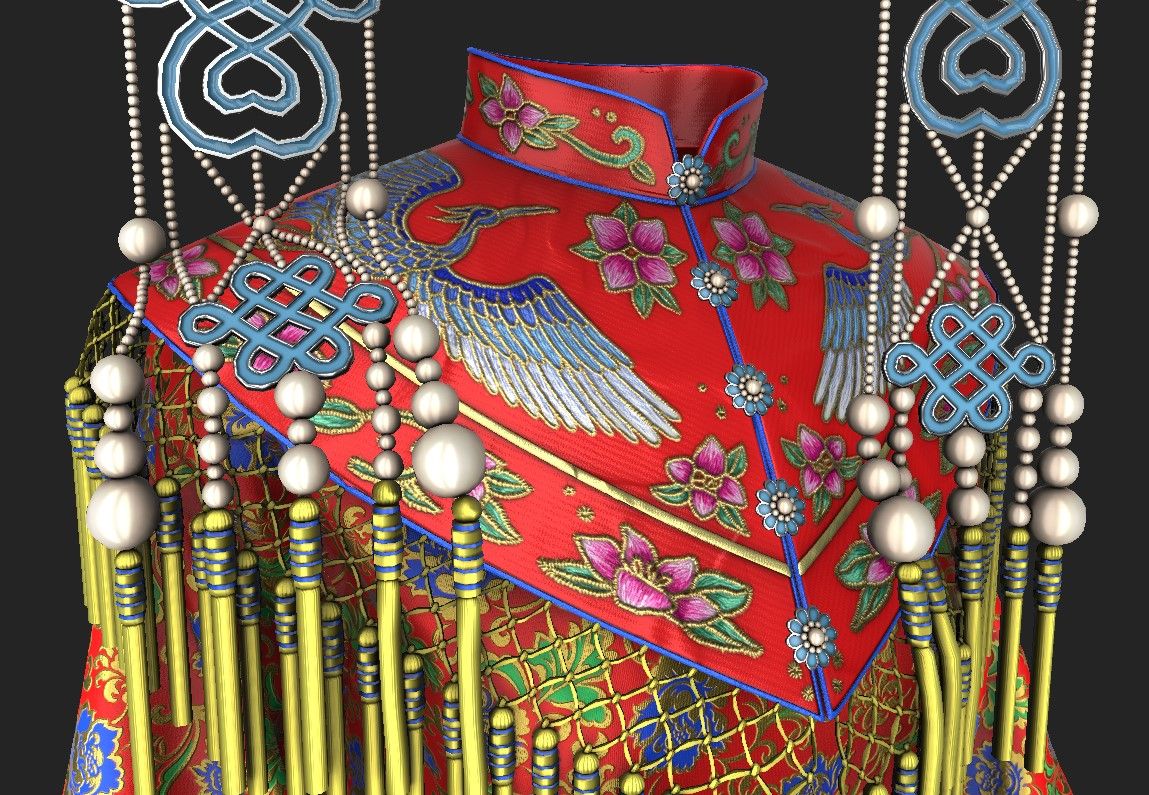
I export the model to Blender or Maya to start modeling hero props. In this case I mainly used Blender during the modeling process since I wanted to consolidate my technique within this software. I started with the headdresses, such as the structure of the crown, the unions of the pearls with the ornaments and the lace of the flowers. While duplicating the decorative elements, I was creating the UVs of the 3D objects, to strengthen and make the workflow faster and more fluid.
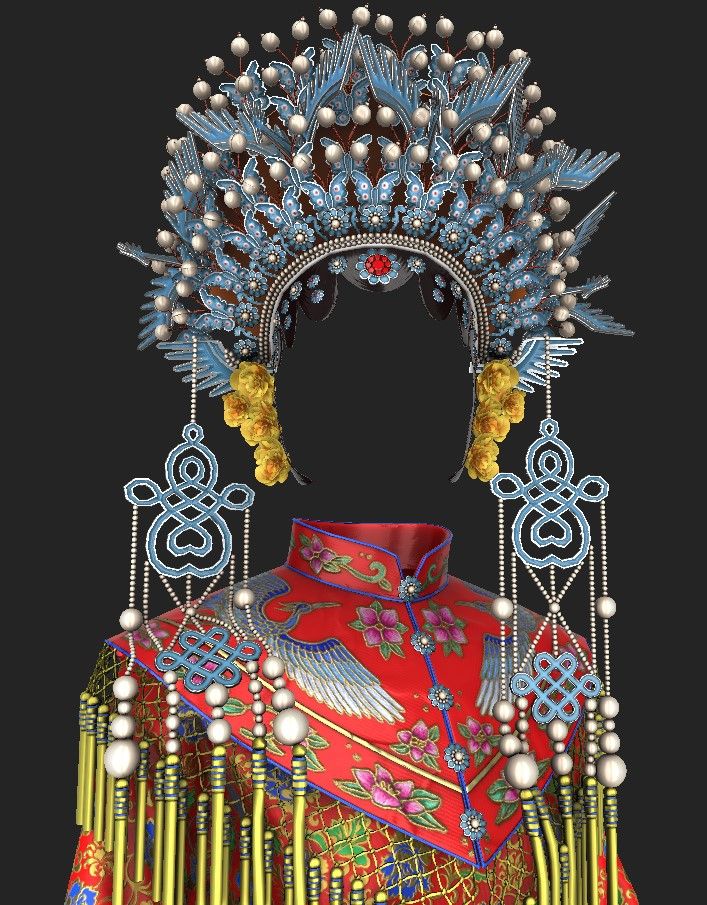
As I knew that only the torso was going to be shown in the final render, the top shirt was made in Marvelous Designer, adding a Silk preset to the fabrics to better simulate the physics of the materials.
For the floral details and the drawing of the heron that appear embroidered on the clothing. It was necessary to make them by hand in ZBrush, using references and different brushes that simulated the sewn ones it was possible to achieve the effect.
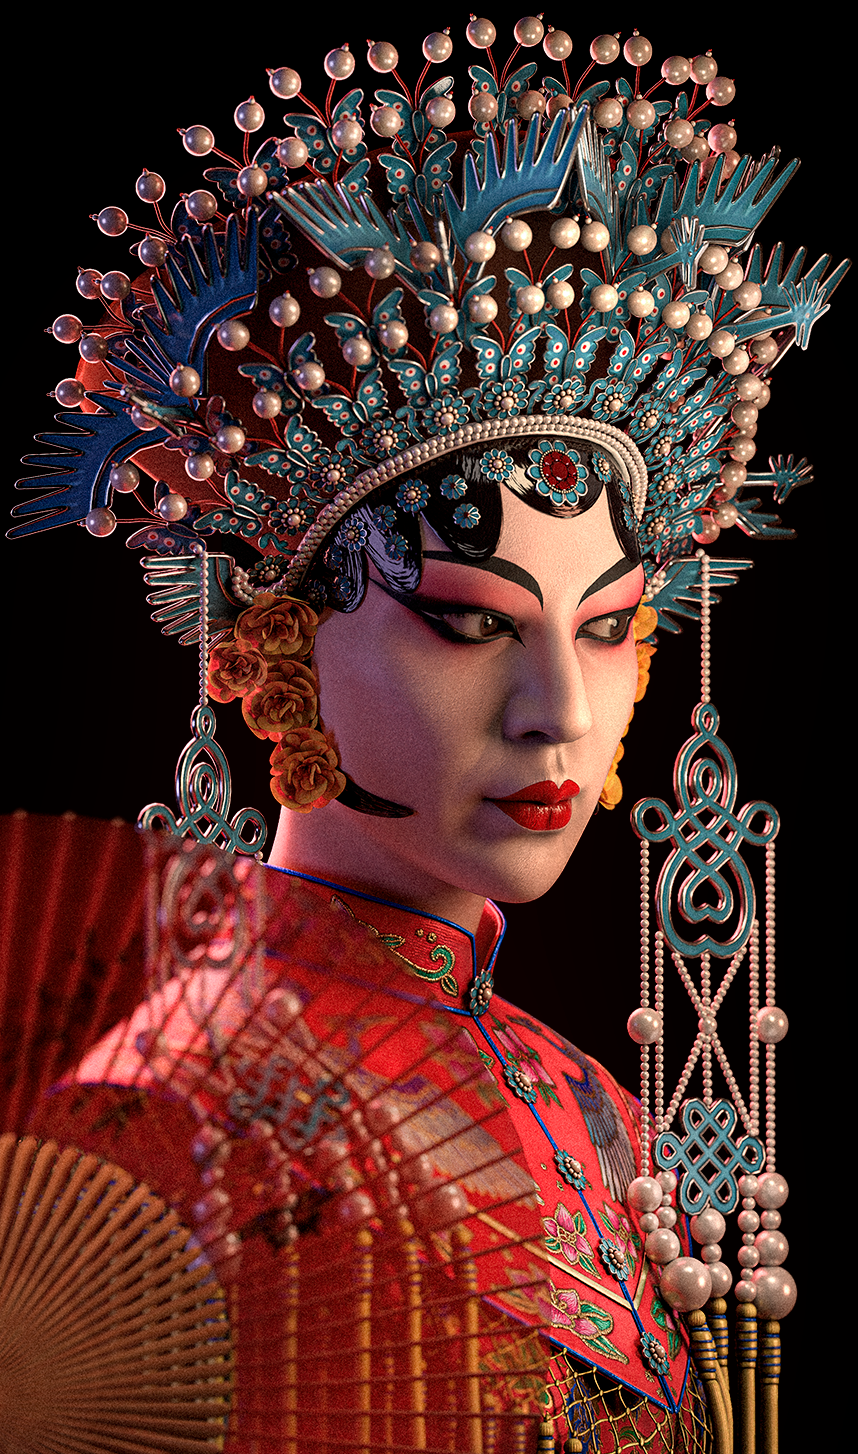
I usually leave the facial sculpting part for the end of the modeling process since it is one of my favourites. Using Alpha maps and skin texture brushesI project symmetrically on the surface of the model with a high subdivision mode. When I have a general base of skin texture I break the symmetry of the model to create unique details such as small wrinkles, warts, scar marks, pores or small pimples that will give the face uniqueness.
I continued the project by displaying the UVs of the elements. To create UVs I usually use Maya, since I find it more comfortable, faster and easier in my workflow. I must be careful and dedicate the necessary time to each of the elements to create correct UVs and correct FLIP errors. For this reason it is very useful to keep the texture checker activated and be able to check possible errors in time.
In models that have a High and Low version, I usually bake the Ambient Occlusion, Curvature, Thickness, Normal and Opacity maps in Marmoset, this way I usually quickly check that the bakes of the textures in the Low models are looking good.

Once all the objects have their correct UVs, I create two Substance 3D Painter files, one to texture the clothes/assets and another to texture the body and skin. Thanks to good references, the texturing process can be speeded up effectively.
Thanks to good references, the texturing process can be speeded up effectively. If there is a preconceived idea and careful analysis it will be possible to achieve more accurate and punctual results.
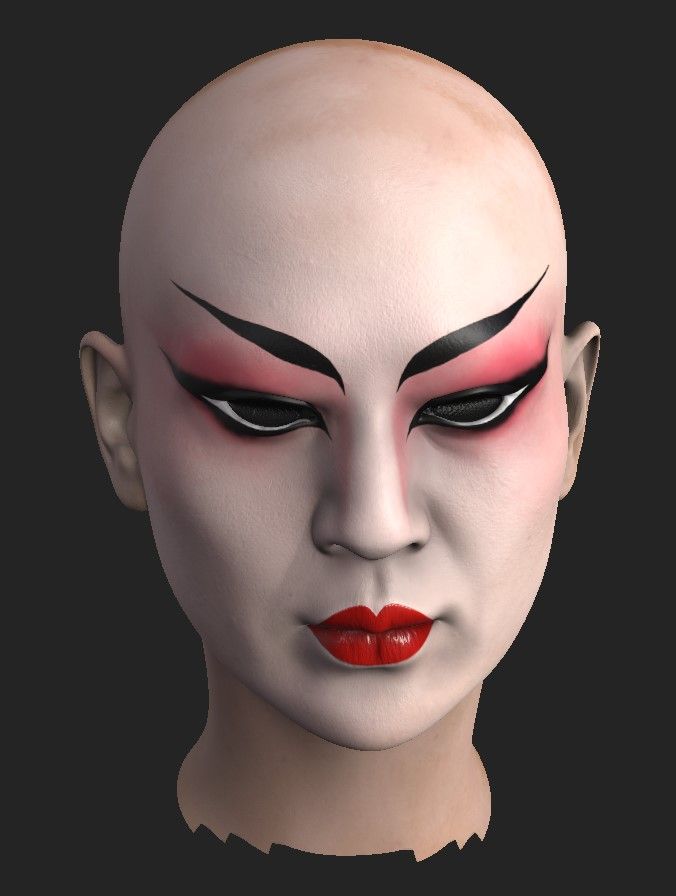
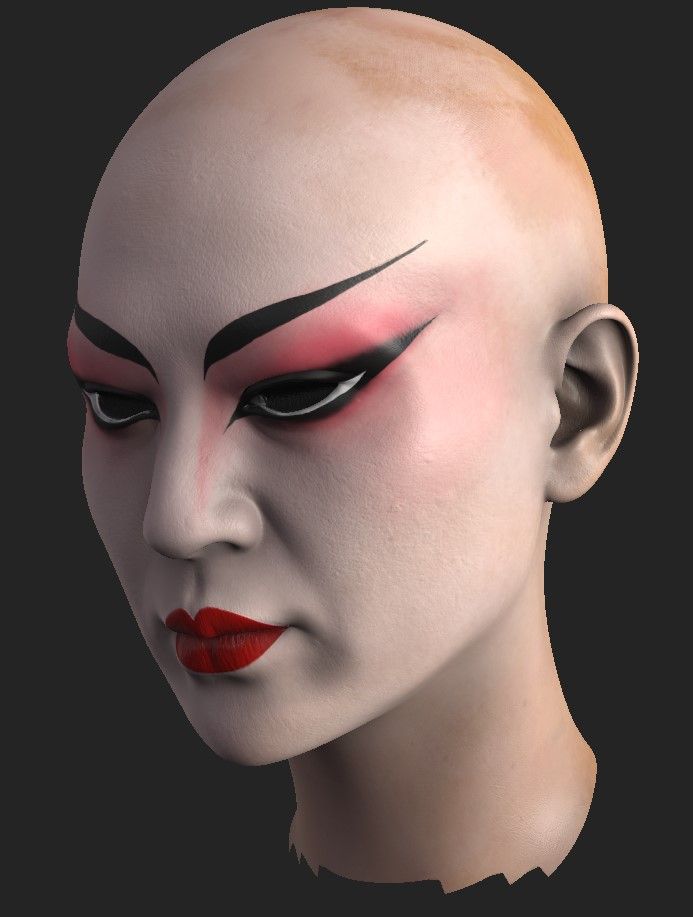
In this case, the posing of the character was quite simple since I was looking for a hieratic, hard and challenging appearance. I wanted a symmetrical composition to get more out of the feather bonnet, so all I did was lift the head using ZBrush's transpose master.
I believe that lighting is one of the most important and essential steps to communicate all the artistic content, enhance the successes and mitigate the errors of the model. Just as we have references in modeling and sculpting, it is also quite convenient to have them for lighting. For this model I looked for references in the pictorial portraits and traditional analogue photographs taken of the Pekin Opera Singers in order to find the result I was looking for the final appearance of the lighting in the final render.
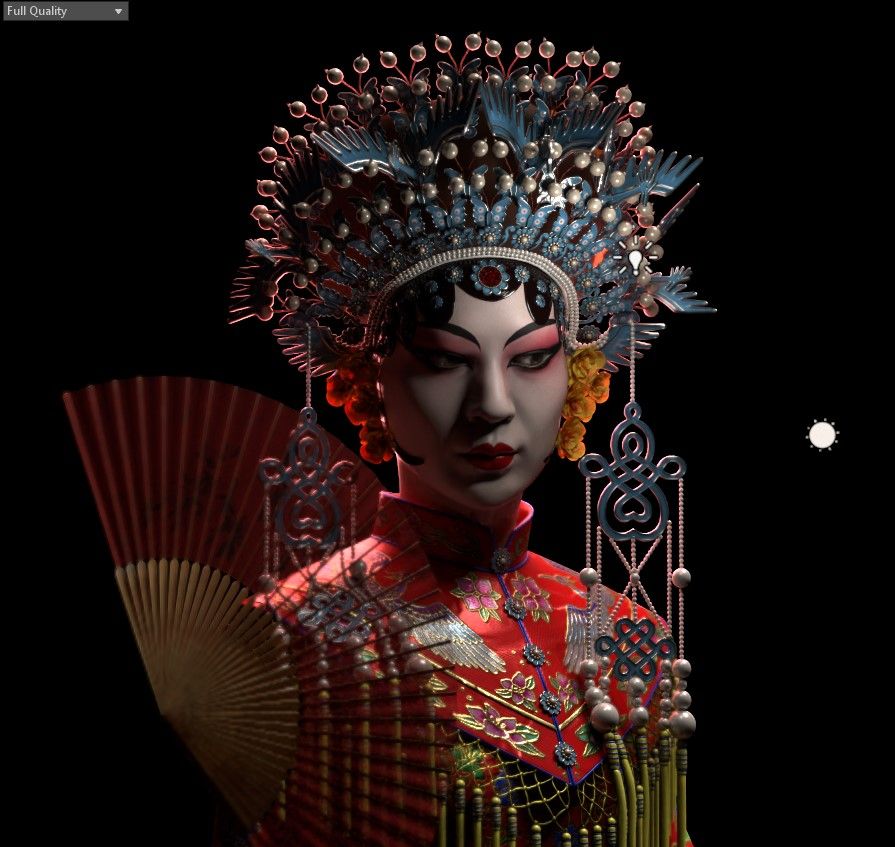
Once the model was finished I started the render in Marmoset. I chose to render without a background since I normally prefer to add effects in the background and be able to play with the silhouette of the model by faking the highlights in Photoshop.
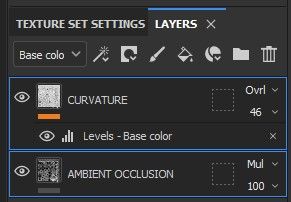
Post-production is a very important phase to achieve the desired finish of our renders. I try Ambient Occlusion and Curvature layers in different modes like Multiply or Overlay creating clipping masks and painting many small details by hand. I always use the Camera RAW filter to more thoroughly edit the small details that will make the difference in our render.

Thank you for taking your time to read the article, I encourage you to continue dedicating time to improving your artistic journey. Please feel free to connect via LinkedIn.