Whispers of Autumn: A Stylised Cartoon Diorama
Eva Fernández Valero, an ESAT second-year Art for Video Games student, explores a 3D Modeling assignment, crafting a stylized cartoon diorama.
Eva Fernández Valero, an ESAT second-year Art for Video Games student, explores a 3D Modeling assignment, crafting a stylized cartoon diorama.
Eva Fernández Valero, a second-year student at ESAT pursuing a degree in Art for Video Games, shares insights into a project stemming from an assignment for a 3D Modeling course. The task involved creating a stylised and cartoonish diorama.
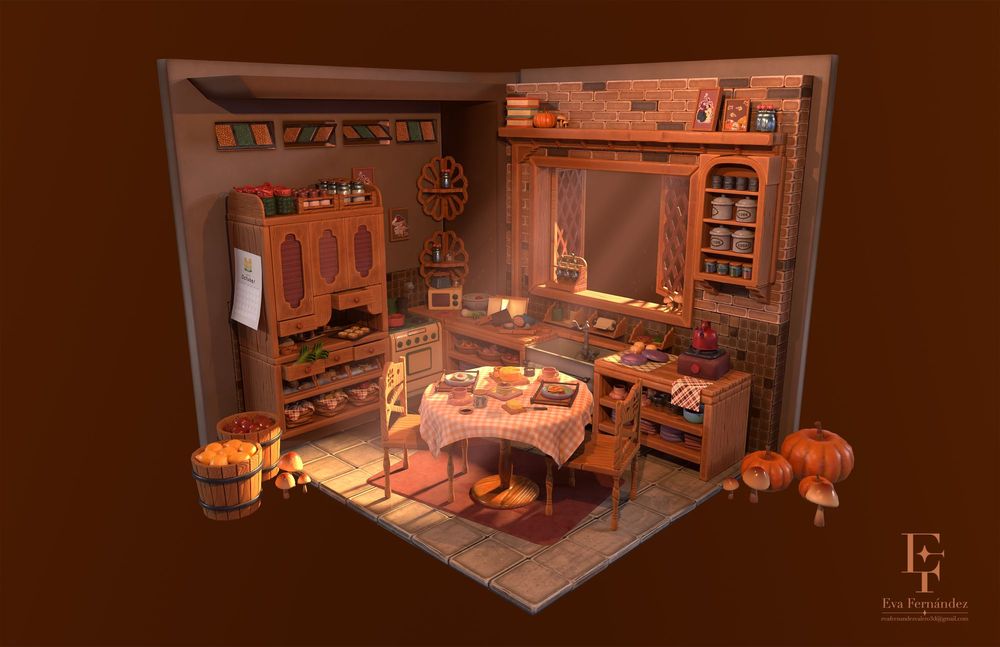
From the beginning, I knew I was aiming for a cozy and warm aesthetic for my diorama. Before starting the first phase of the project I created a reference board to gather inspiration with a similar aesthetic, as well as style references for the props.

The first thing I had to do was to create a sketch that would help me structure the scene and calculate the number of props I needed to model. I was aiming for a scene filled with many different elements, so I had to calculate the time I had in order to organise the tasks at hand, and allow me to achieve a general balance for greater working quality. As for the renders, I wanted the main render to be from an isometric view, like the references above in order to show all key elements properly.

After sketching out my idea, I began the 3D modeling process by creating a block out in 3dsMax, positioning the main structures, such as big furniture pieces or windows. Afterward, I created the basic shapes of the scene's assets, using simple cubes for certain elements. I made sure to establish the main shapes with the correct scale from the beginning to avoid errors in sizing and the elements not fitting inside the furniture. This would have also been useful if I had decided to add characters to the scene in the future, ensuring they would maintain correct proportions.
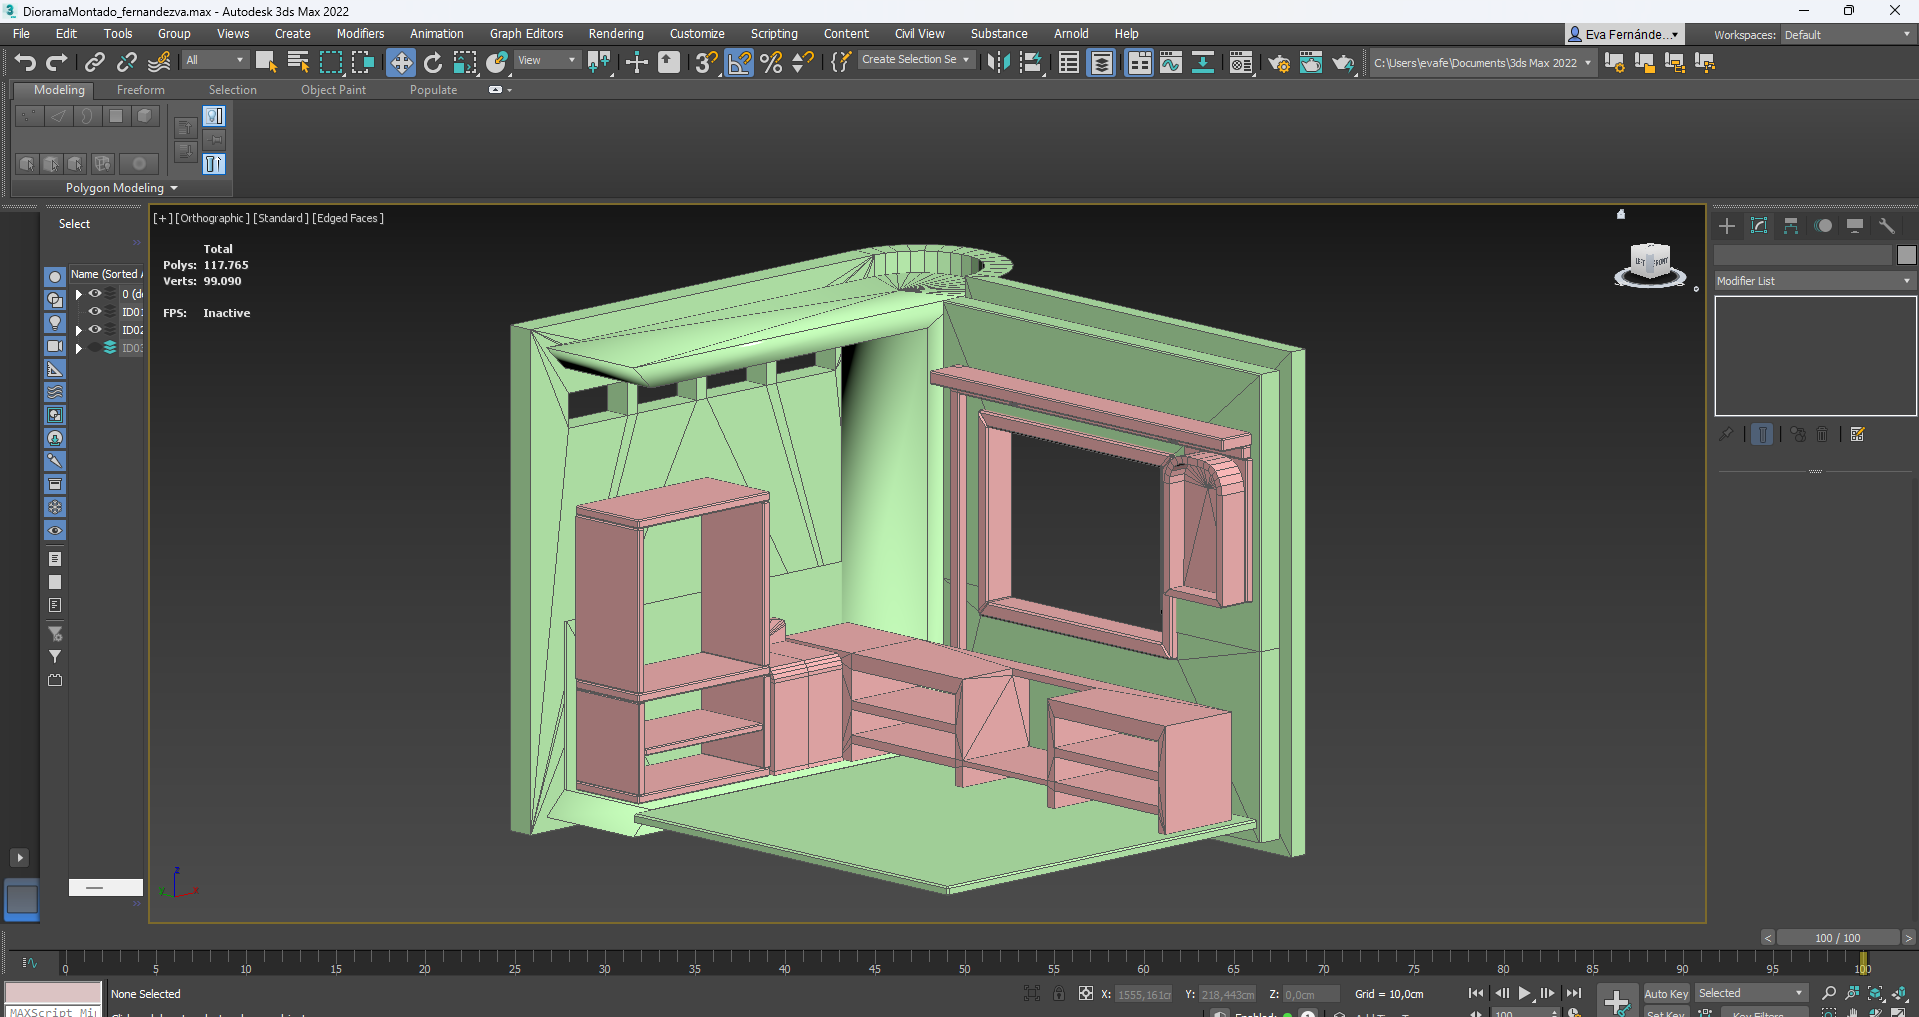
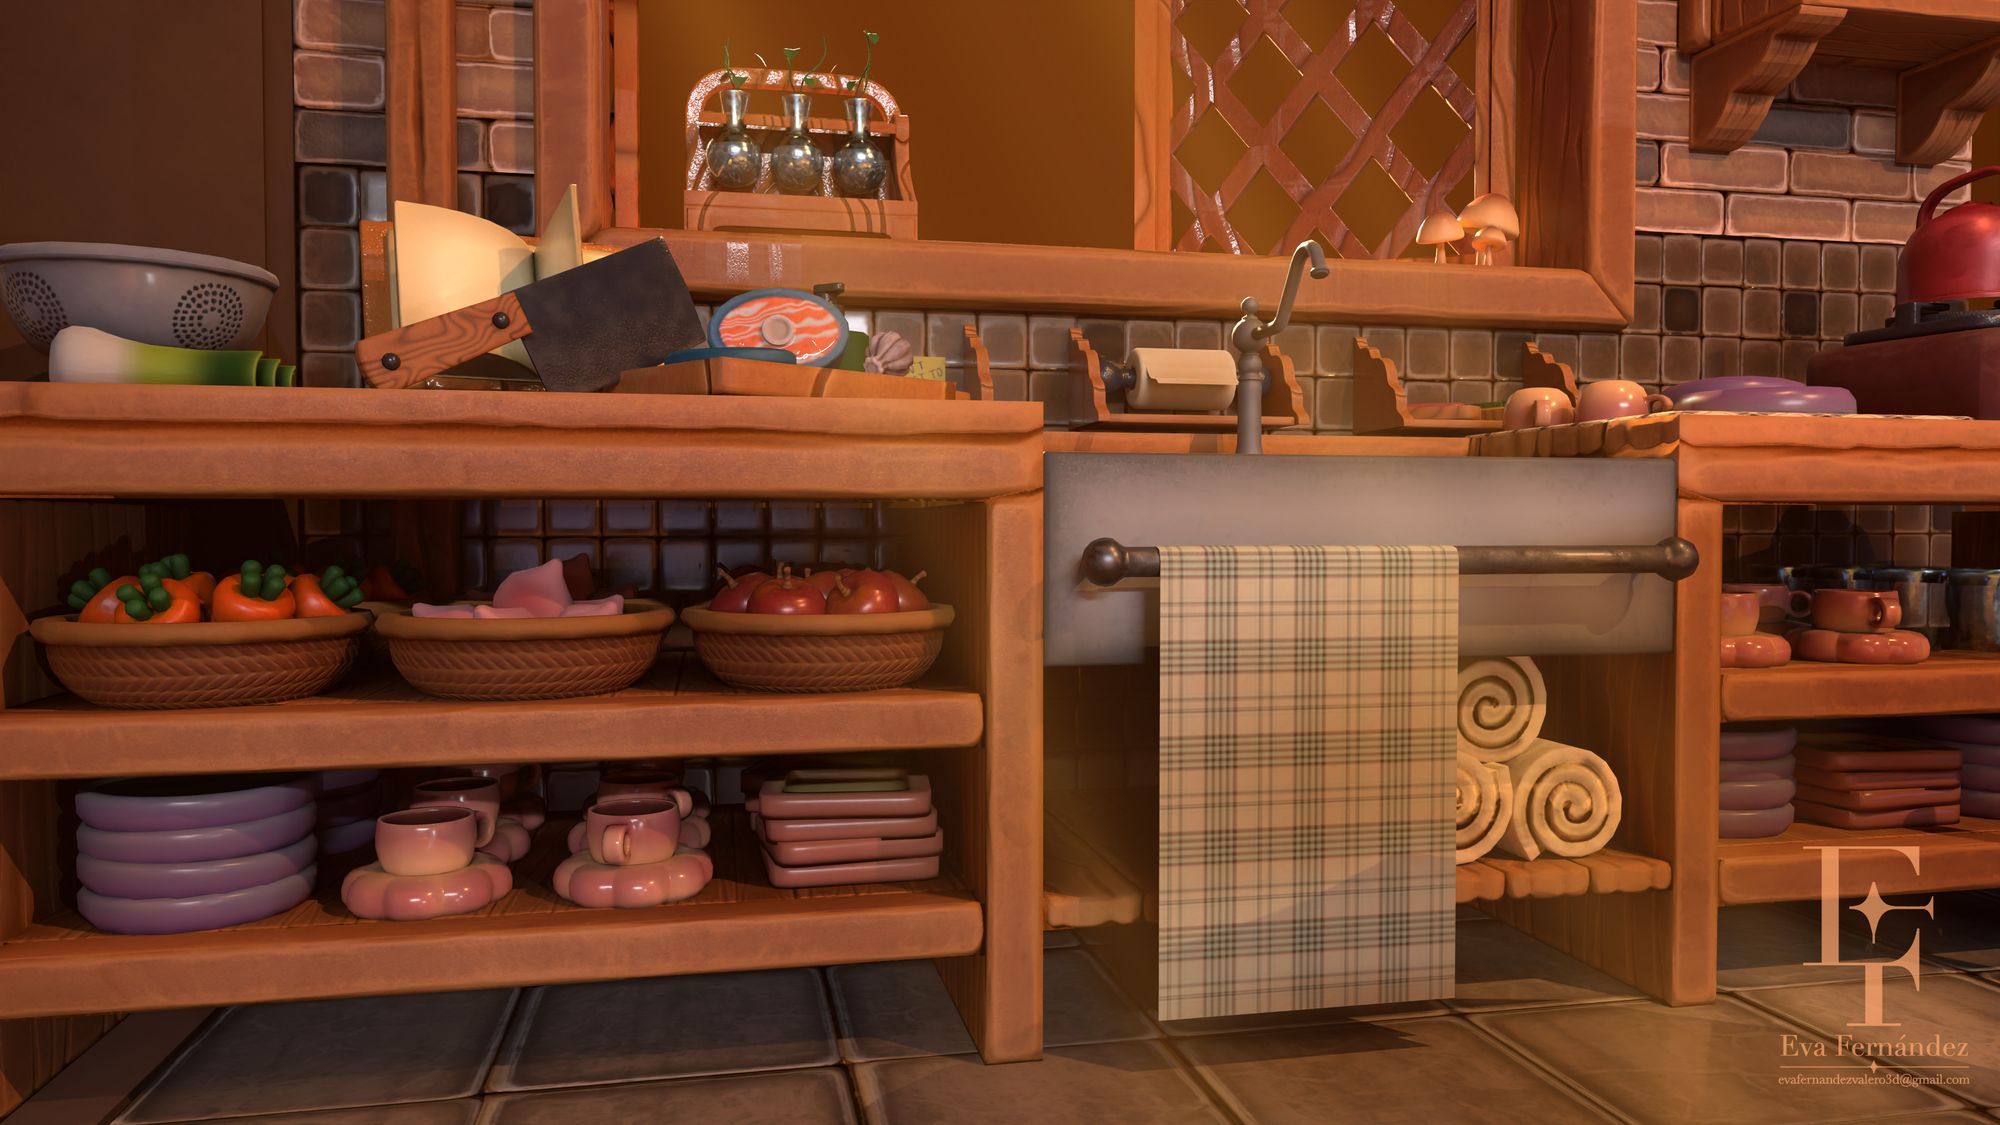
The main idea was to have half of the kitchen inside a book or a box, as I was initially inspired by the concept of evergreenqveen. However, my professor recommended removing one of the walls as it improved and cleaned up the composition.
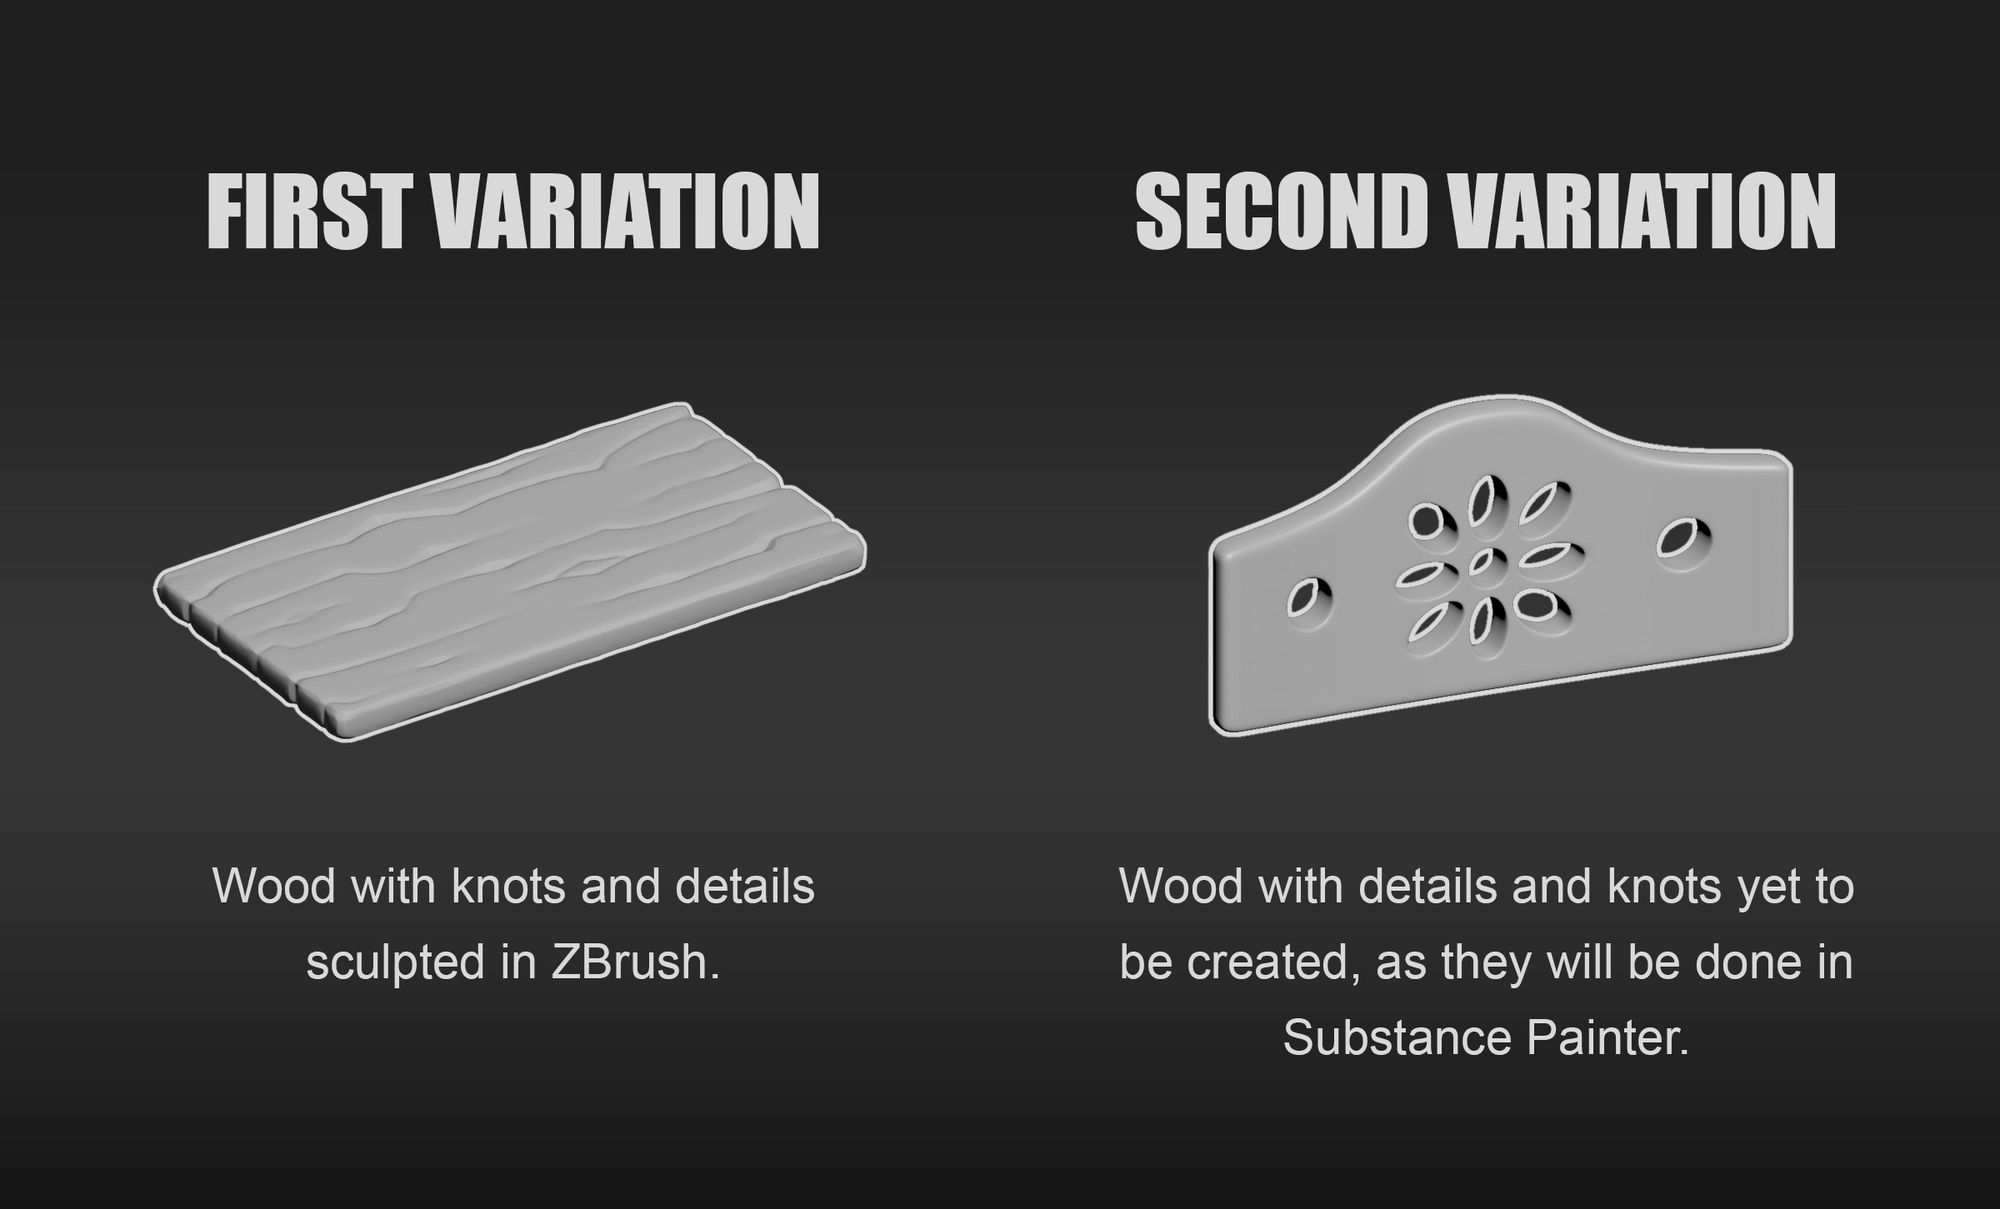
About the modeling process, I could have opted for Mid Poly meshes for most of the pieces. Regardless, I decided to create the majority in High Poly mesh to incorporate finer details through baking. To have contrast and prevent scene saturation , I decided to create two types of wood. The first variant, used for the main furniture pieces, was sculpted in ZBrush, using stylised wood alphas to achieve a more compelling result. As for the second one, I applied it to elements like chairs or shelves, creating the knot patterns using Substance 3D Painter.
I also created props by making stylised versions based on real references. In general, I focused on synthesis while ensuring I was giving them a clean and rounded look, with a pleasant and cute appearance.
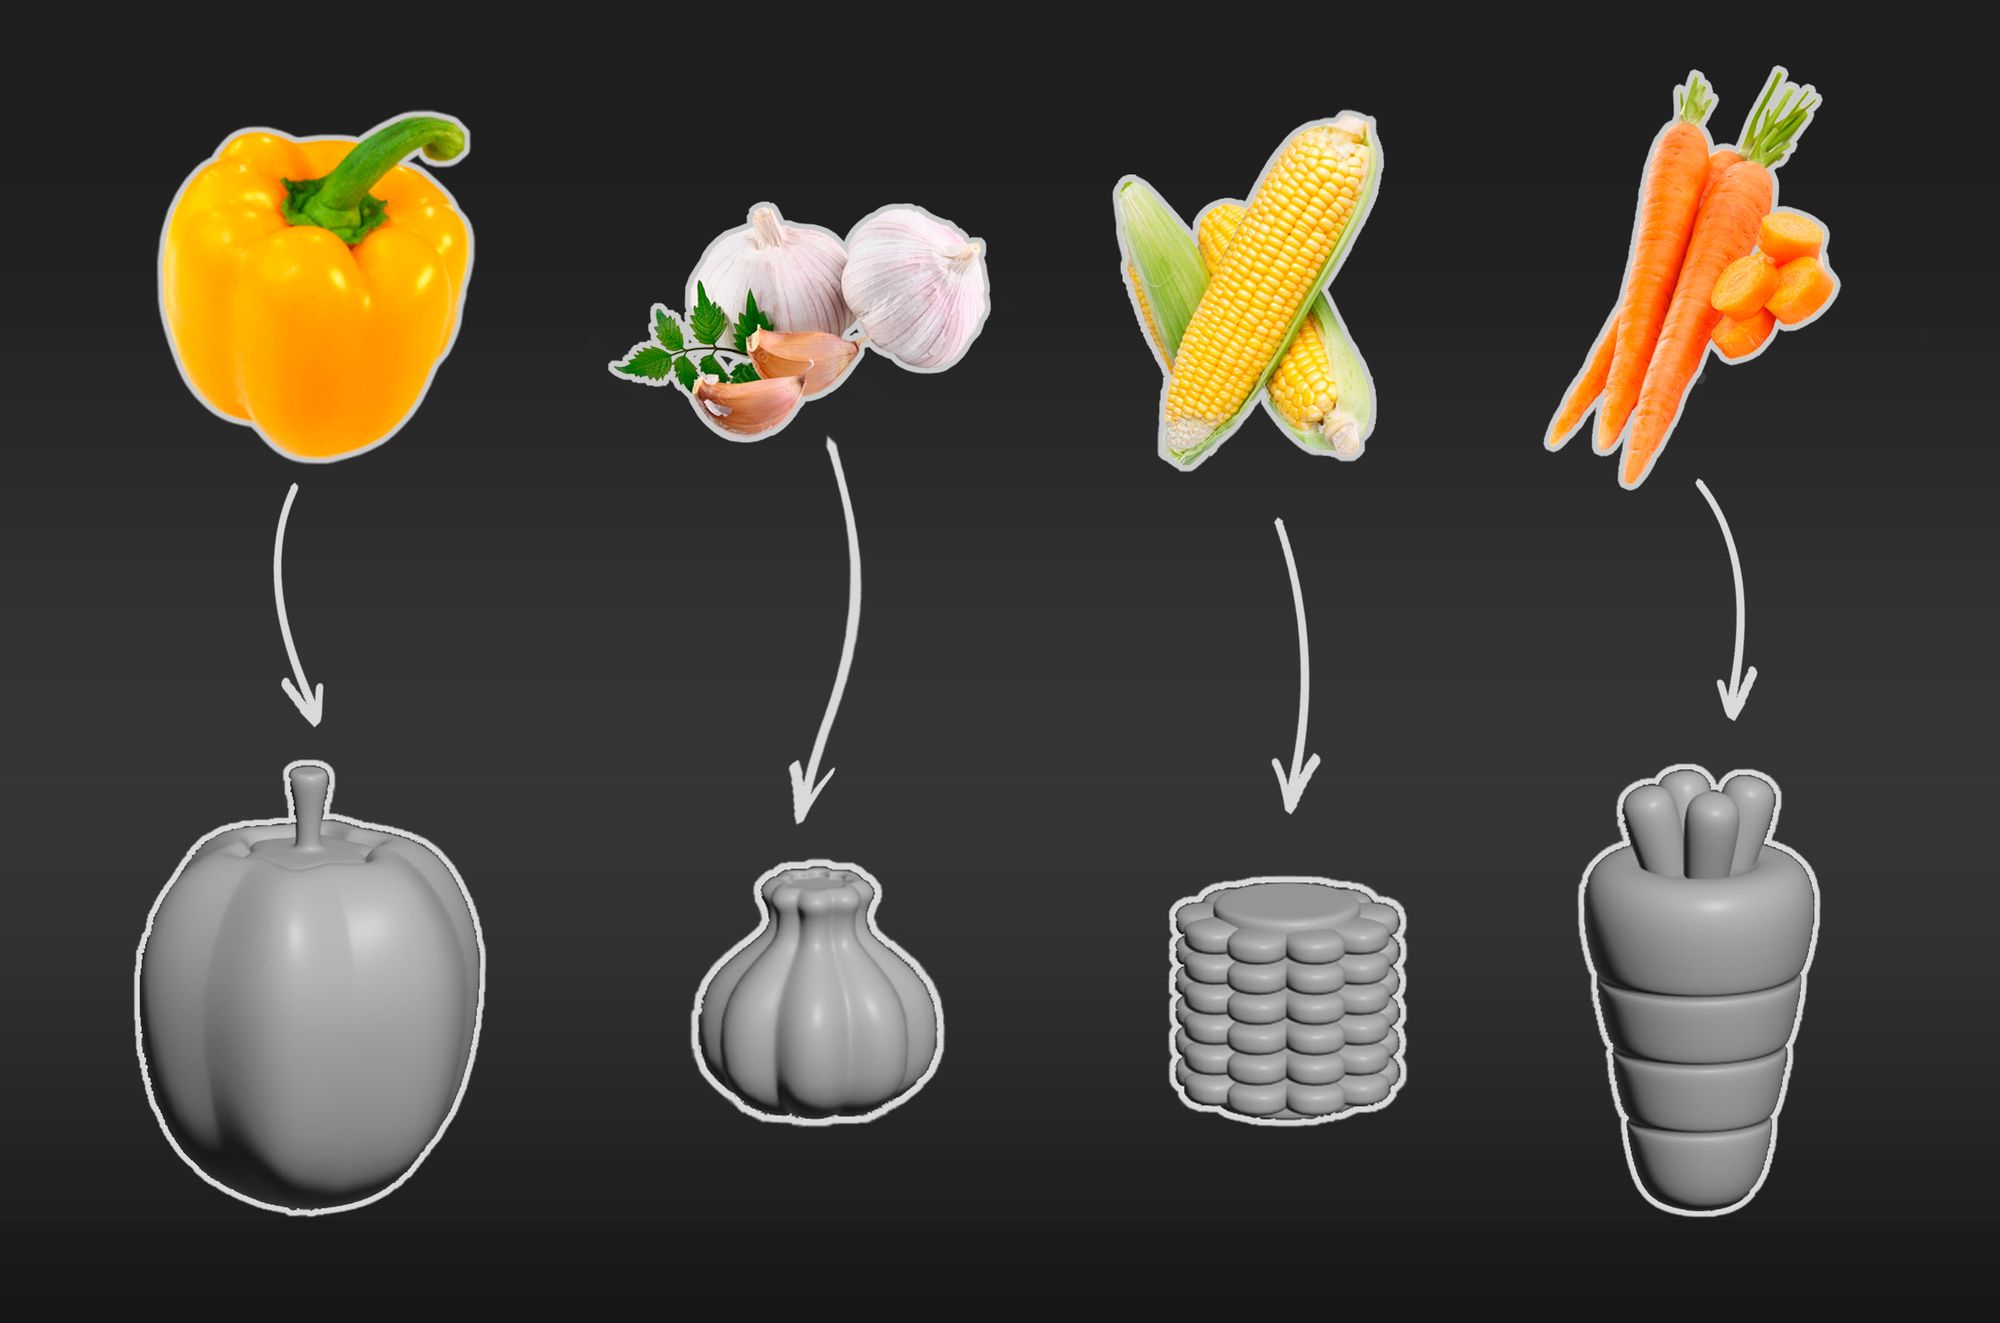

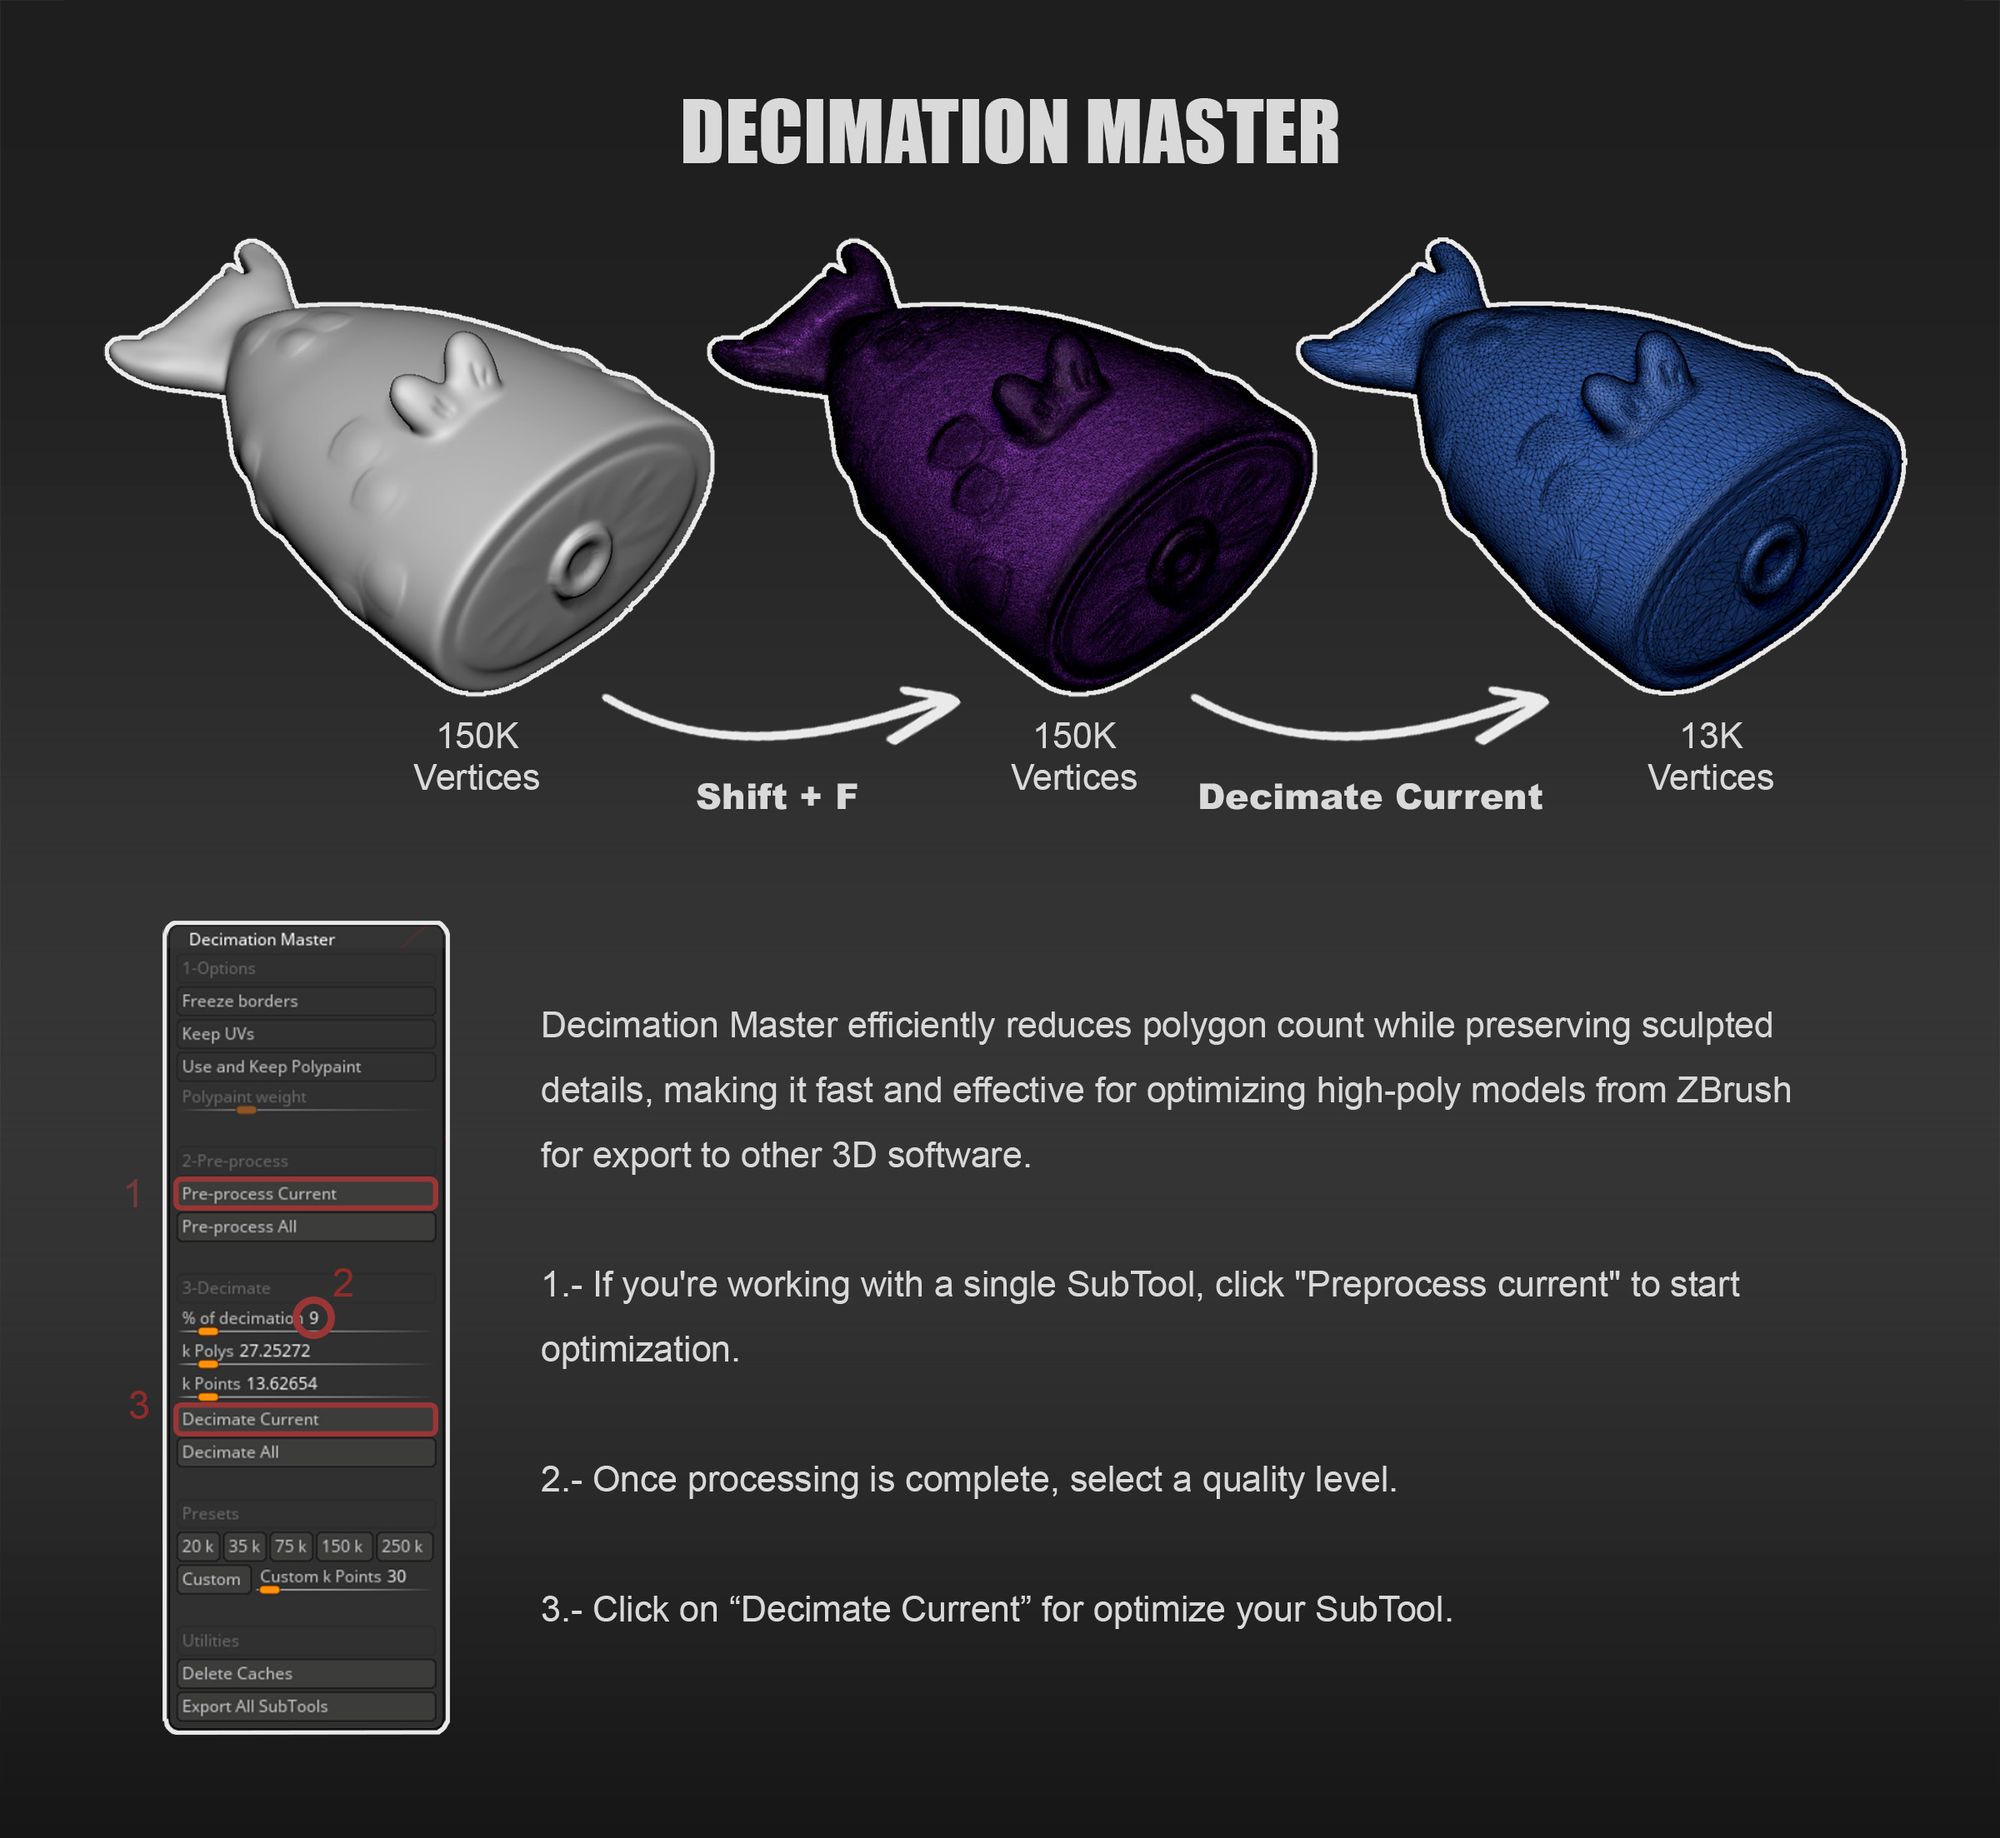
Many of the pieces that make up the scene were quite simple to create in a cartoon style. Props that were more tedious to make were modeled using tools like Array, such as the shelf and some of the vegetables. Other elements like the fish were sculpted in ZBrush, and then a low topology model was created with the help of the Conform tool in 3dsMax.

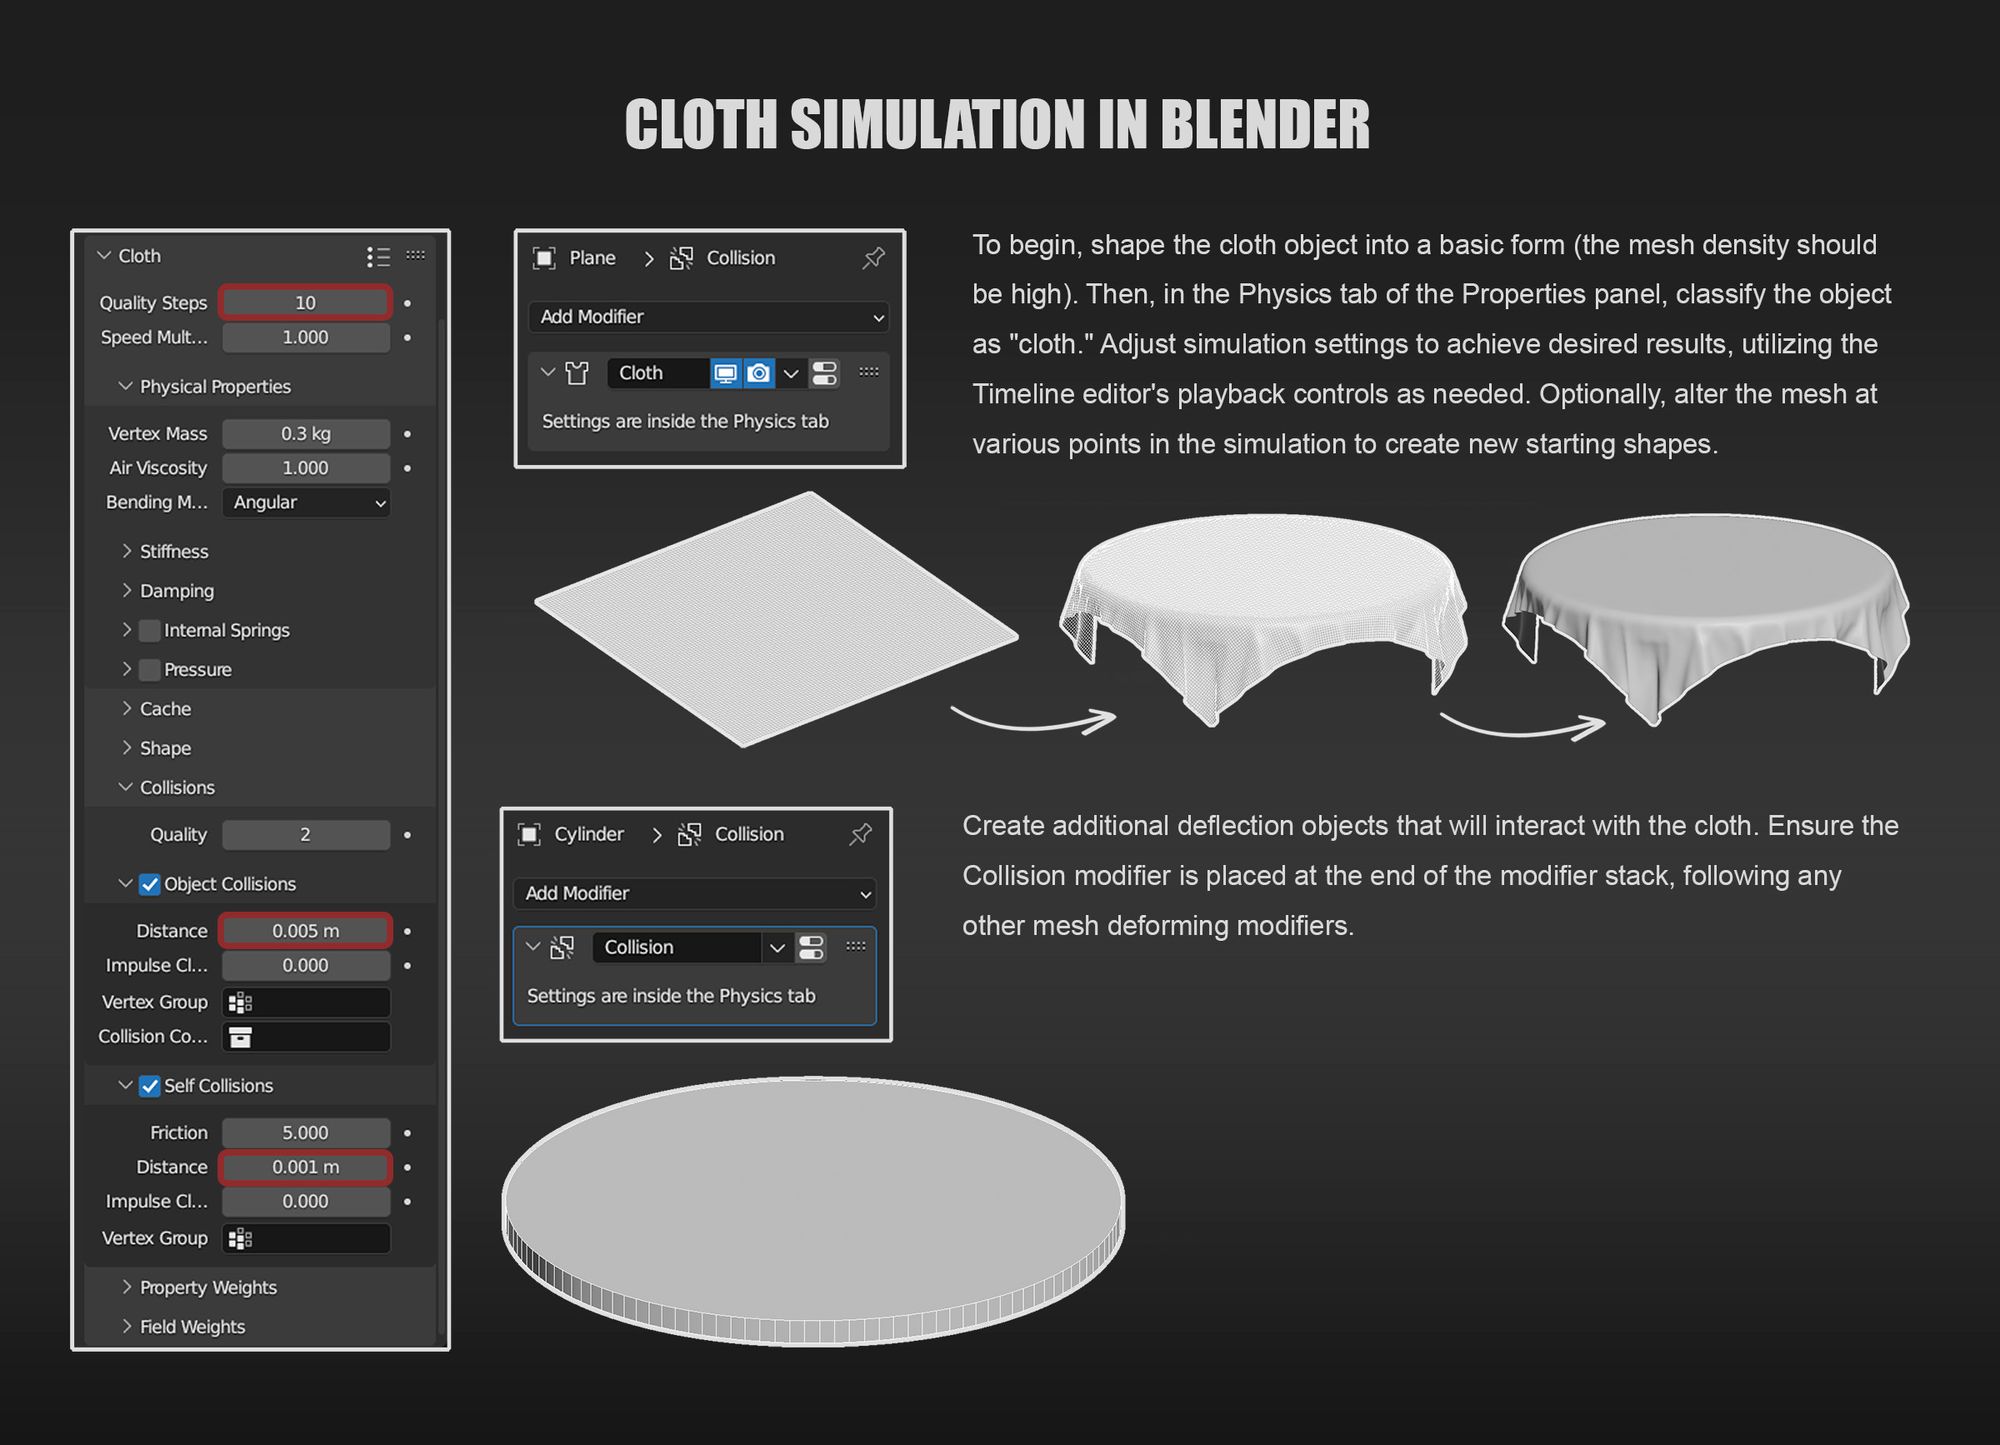
Some of the fabrics were simulated in Blender to obtain correct physics. In some cases, instead of High Poly meshes for projection, I used Weighted Normals, for example, in the carpet. Since there were no deformations or physics simulation required, the mesh didn't need to have a high density Polycount.
Regarding retopology, I employed two methodologies. The first involved utilising the mesh used for creating the highpoly model but removing the TurboSmooth modifier. My task was to eliminate support loops and, in some instances, add more geometry in curved areas. This prevented projection errors and avoided excessive faceting of the object. If the mesh proved inadequate, I would simply use it as a base for proper retopology. This approach provided a volume reference, making it much easier to work on.
Once I completed the retopology, I proceeded to unwrap the UVs. I ensured to cut in less visible areas to avoid texture continuity issues and preferred cutting at 90-degree angles to minimise errors. After all cuts were made and the UV islands were correctly laid out, I verified the texture using a checker map to ensure it wasn't distorted and once I confirmed everything was correct, I organised them. My methodology involves placing them orthogonally to minimise diagonals that cause aliasing and ensuring proper texel density. I always aim to leave minimal space between islands to maximise resolution.
Since my main focus for this project was to create a dynamic render capable of showcasing close-ups of the scene, I decided to create three texture IDs. This allowed me to maximise resolution usage and generate visually appealing textures that would make the most out of the project. I divided them into categories: the structure, the furniture, and the smaller props.
Thanks to the Textools tool, which ensured that the smoothing groups were based on the UVs, I encountered no errors during the baking process. Except for a few issues with the cage that I could easily resolve by adjusting it. I also utilised the Skew Paint tool for pieces with protruding elements, where orientation errors with normals arose. Consequently, I was able to proceed directly to Substance 3D Painter without any further complications.
ID01 - STRUCTURE

Texturing the structure was really simple as I wasn't aiming for a highly intricate result, since I wanted the viewer's attention to focus on the scene's decoration and smaller props. I began with a simple flat colour as the base, complemented by the application of grunge textures to introduce subtle variations in colour and surface imperfections. To enhance the tactile feel and visual interest, I layered a noise texture with a slightly heightened Height parameter, imparting a sense of roughness and tactile depth to the surfaces.
Moving on to the floor and bricks, a similar methodology was employed. Again, starting with a foundational base colour, I integrated grunge textures to diversify the tones and introduce organic irregularities. To accentuate the three-dimensional qualities of the surface, I utilised Curvature and Metal Edge Wear generators, applying them to highlight the recesses and edges of each brick and tile. Furthermore, to break up the uniformity and add visual intrigue, I introduced random variations by generating some pieces with a darker tone. They were placed to create contrast and disrupt any potential monotony in the pattern.
While the same principles were applied to texturing the floor, I opted not to incorporate darker-toned tiles as seen in previous examples, maintaining consistency with the overall aesthetic but ensuring variation across different surfaces within the scene.
ID02 - FURNITURE
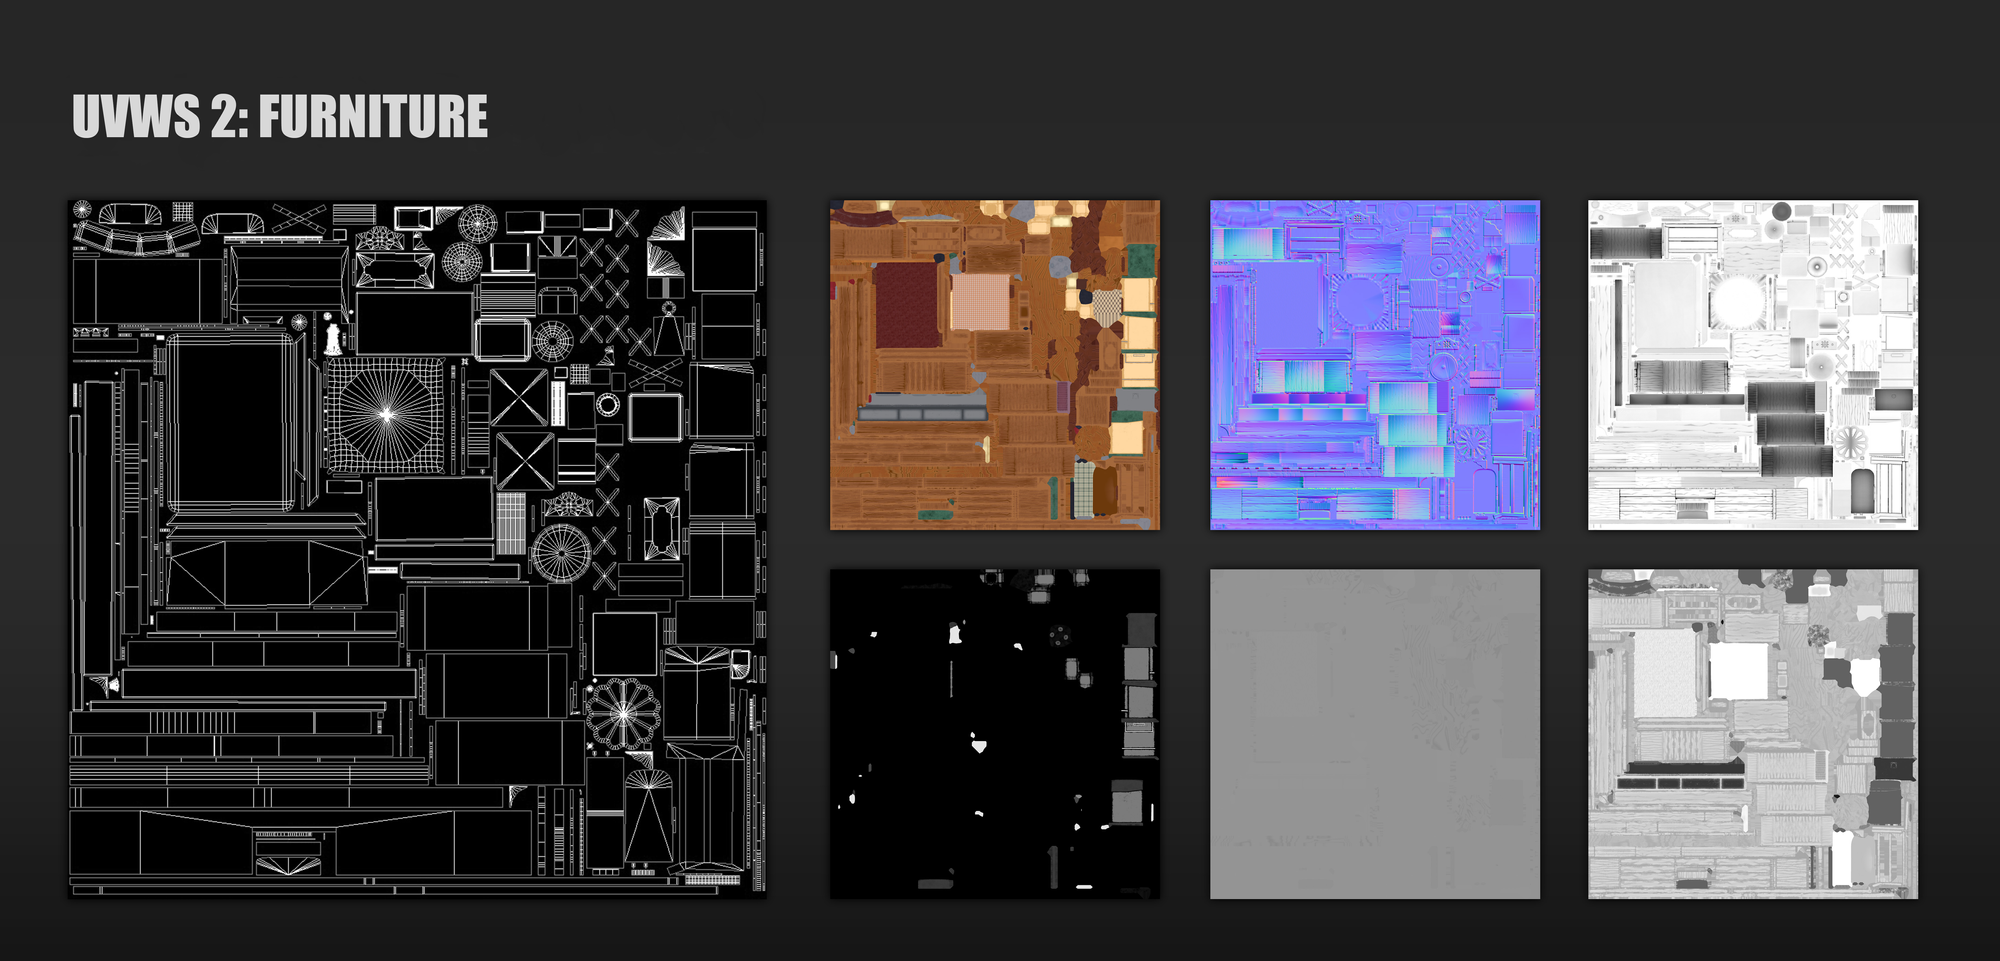
As mentioned earlier, I created two textures based on the type of wood. For the ZBrush pieces, where the knots were already included in the normal map, I used an orange-brown colour as the base and generated tonal variations with different textures. I darkened the deeper areas and lightened the contours using the same generators I used for the bricks and tiles. Additionally, I added a Blue Noise Fast texture to add roughness.
For pieces that didn't have knots included by default, the process was similar until I had to generate them. I used the Grunge Damas texture, adjusting the direction and distortion according to the piece. I also corrected continuity errors with a paint layer. Like with the previous woods, I added a noise texture as the final step.
The metals were generated with a base colour and very low Roughness, along with Fill Layers of grunge textures, with the Roughness near 1 to reduce shine in some areas and simulate that the elements weren't completely clean.
The cloths and tablecloths were generated using a checkered texture with Roughness set to 1 and a noise texture to simulate the fabric material.
For the book pages, I decided to add directional textures to simulate the small crevices that pages create when stacked.
The rest of the textures followed a very similar procedure, meaning base colours with colour variations and a layer of texture to add relief depending on the piece.
ID03 - DECORATION

Most of the pieces follow a very similar pattern to what I've explained earlier. There are some exceptions where I've used a more HandPainted technique to create certain details that couldn't be achieved through masks, such as the syrup on pancakes or the frosting on the donut.
However, the majority were created using different textures. For example, I used the Liquid texture for the foam pattern on the water; Grunge Dusty Powder Mass for the jams or honey; a tiled braid texture for the basket where fruits and vegetables would go; Grunge Damas for the salmon pattern; or Cells for the crystal pattern.
The paintings and the calendar are composed of different illustrations with a high Roughness to simulate photographic paper. Finally, I played with the Roughness and Metallic of the different elements to better convey what object they represented.
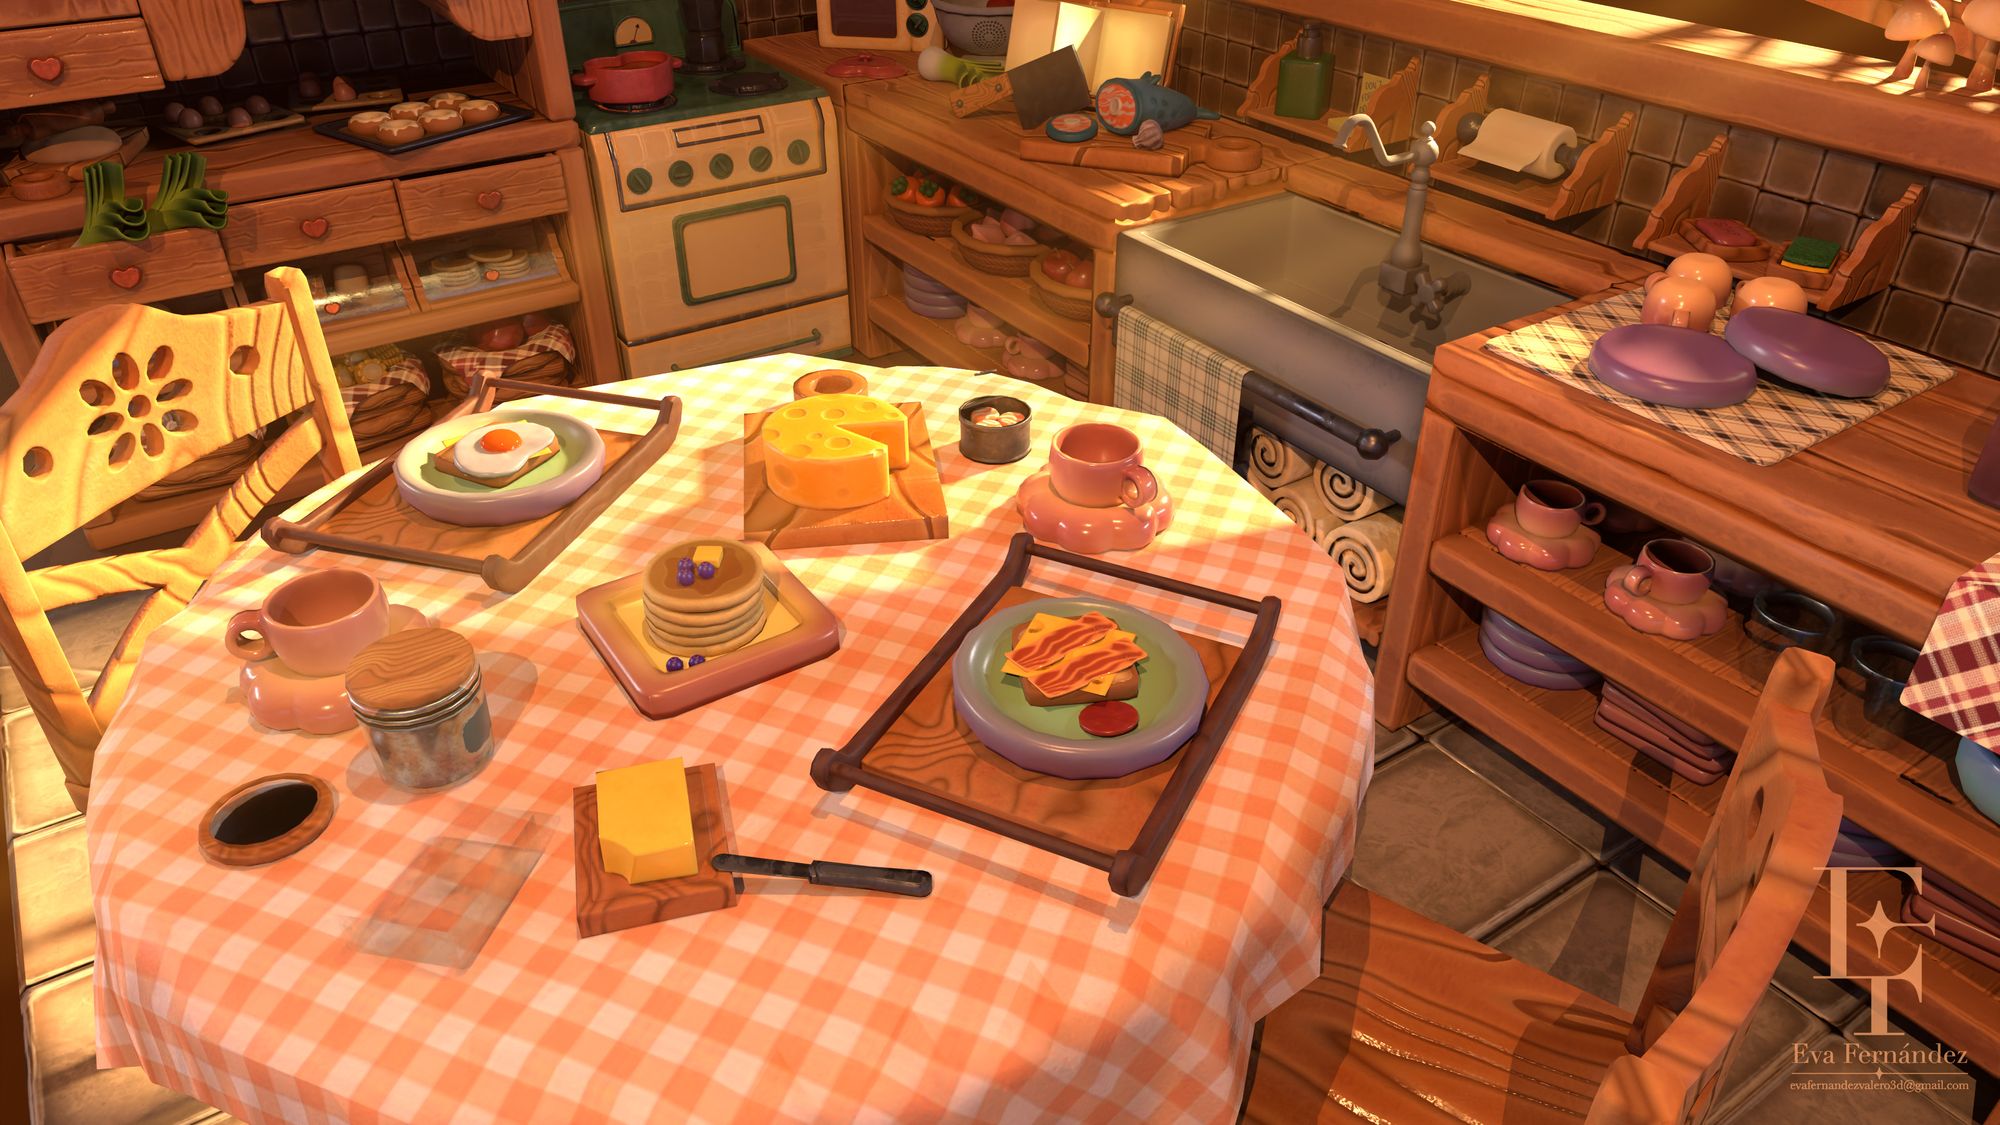
The renders were meticulously crafted using Marmoset. Employing a Spot Light to stream natural light through the scene's windows, coupled with an Omni light for overall illumination, I sought to capture the essence of a tranquil autumn sunset.

Following the render, a subtle touch of post-production in Photoshop enhanced the scene with God Rays, delicate light speckles, and intricate details like wisps of steam rising from the coffee maker. Moreover, subtle adjustments were made to saturation and contrast levels, ensuring each element harmonised seamlessly within the composition.


If you would like to see more of Eva's work, check out her Rookies portfolio here.