Beyond the Lens: Exploring the Depths of VFX, Filmmaking, and Short Films
Self-taught FX Artist Clement Arlotti aims to join studios, aspiring to contribute to films like Dune. Dive into the world of visual effects through his short film, 'Promise Me I'll Leave (Promettez-moi que je partirai).
Self-taught FX Artist, Clement Arlotti is looking to make an impact at a studio, contributing to feature films like Dune. In this article he explores the depths of visual effects through his short film, "Promise Me I'll Leave (Promettez-moi que je partirai)."
In my childhood, I explored drawing, painting, collage, and various other forms of plastic and graphic art. Music also played a significant role in my life; I performed percussion in an orchestra and drums in a group. Around my 17th birthday, I began experimenting with my dad's Pentax camera, figuring out the basics of camera techniques: shutter speed, ISO, exposure, sensor, and lens. Learning to develop images on Lightroom marked my initial foray into post-production.
Cinema held a special allure for me from an early age. I dabbled in recording with my camera and began honing my editing skills using Pinnacle (RIP) and later Adobe Premiere Pro. Venturing into VFX with Adobe After Effects and C4D, inspired by luminaries like Andrew Kramer and the motion design community, broadened my horizons. As I matured, I had aspirations of joining the VFX industry.
One fateful day, I stumbled upon a VFX breakdown of a war movie featuring aerial battles, introducing me to Houdini and Nuke simultaneously. The procedural system's flexibility and step-by-step nature resonated deeply with my mindset. Embracing the mantra of Houdini users that 'the only limit is your knowledge,' I embraced these industry-standard tools wholeheartedly.
Though I'm not yet working in a studio, Houdini and Nuke continue to provide the flexibility I crave. Armed with these powerful tools, I'm confident in my ability to tackle any shot, knowing that a wealth of resources awaits online. For the longest time, matchmoving remained a mystery to me; its sparse online documentation made it feel like an arcane art. The few tracking tools I encountered in After Effects proved inadequate or relied on costly plugins. Enter SynthEyes: the most accessible professional matchmove software in my eyes. While its interface may require some getting used to, its speed, affordability, and stability make it a worthwhile investment."
Promise Me I'll Leave
The Project
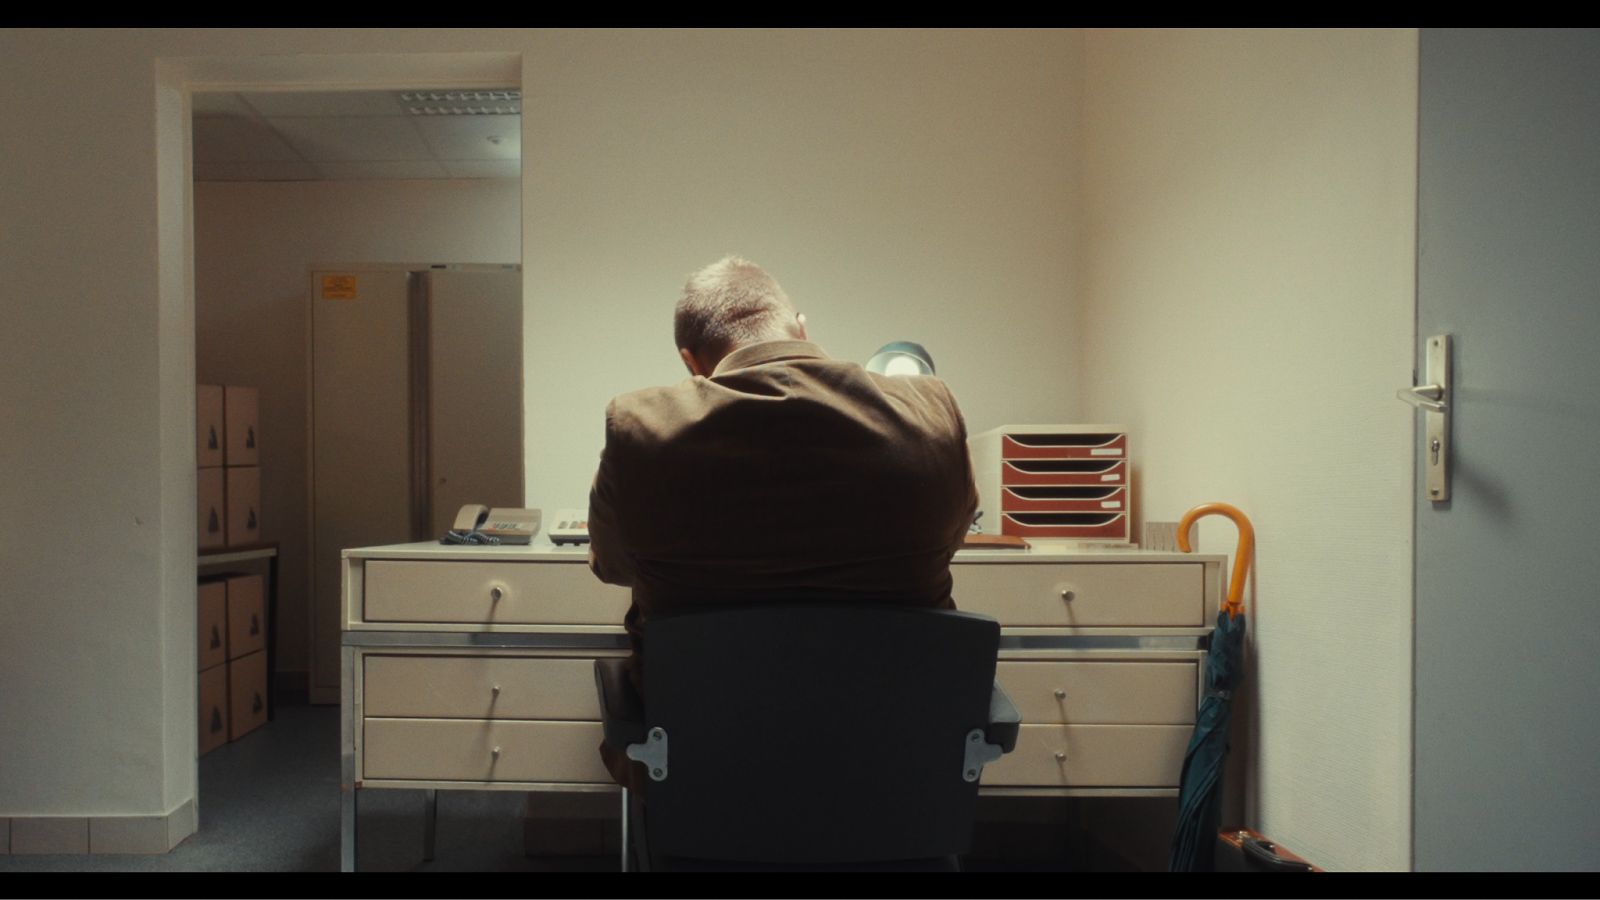
Promise Me I'll Leave (Promettez-moi que je partirai) is a short film created for the Nikon Film Festival, a French festival with an annual theme. This year's theme was "fire." Originally, I had planned to focus solely on cinematography. However, as the initiator of this project, I became involved in many aspects, from writing and planning to overseeing post-production and handling film festival applications. Our on-set team consisted of just six people, including the actor, with an additional compositor and sound mixer/sound designer joining us for post-production.
Aymeric Haefflinger - Screen Writer & Director Arnaud Diemer - Actor Antoine Pfleger - 1st Camera Assistant Antoine Ducrot - Sound Operator Mathilde Incerti - Costume, script, Global helper Clement Arlotti - Producer, Cinematographer, Editor, VFX, Post-Production Stephan Debien - Sound Mixer & Sound Designer Ramon Fossati - Music Composer
As I was alone for the whole post-production, our guideline was to avoid VFX as much as possible and focus on essential VFX that enhanced the story by doing impossible things on set. VFX should support the story. Because in the end, the story is the only thing that matters.
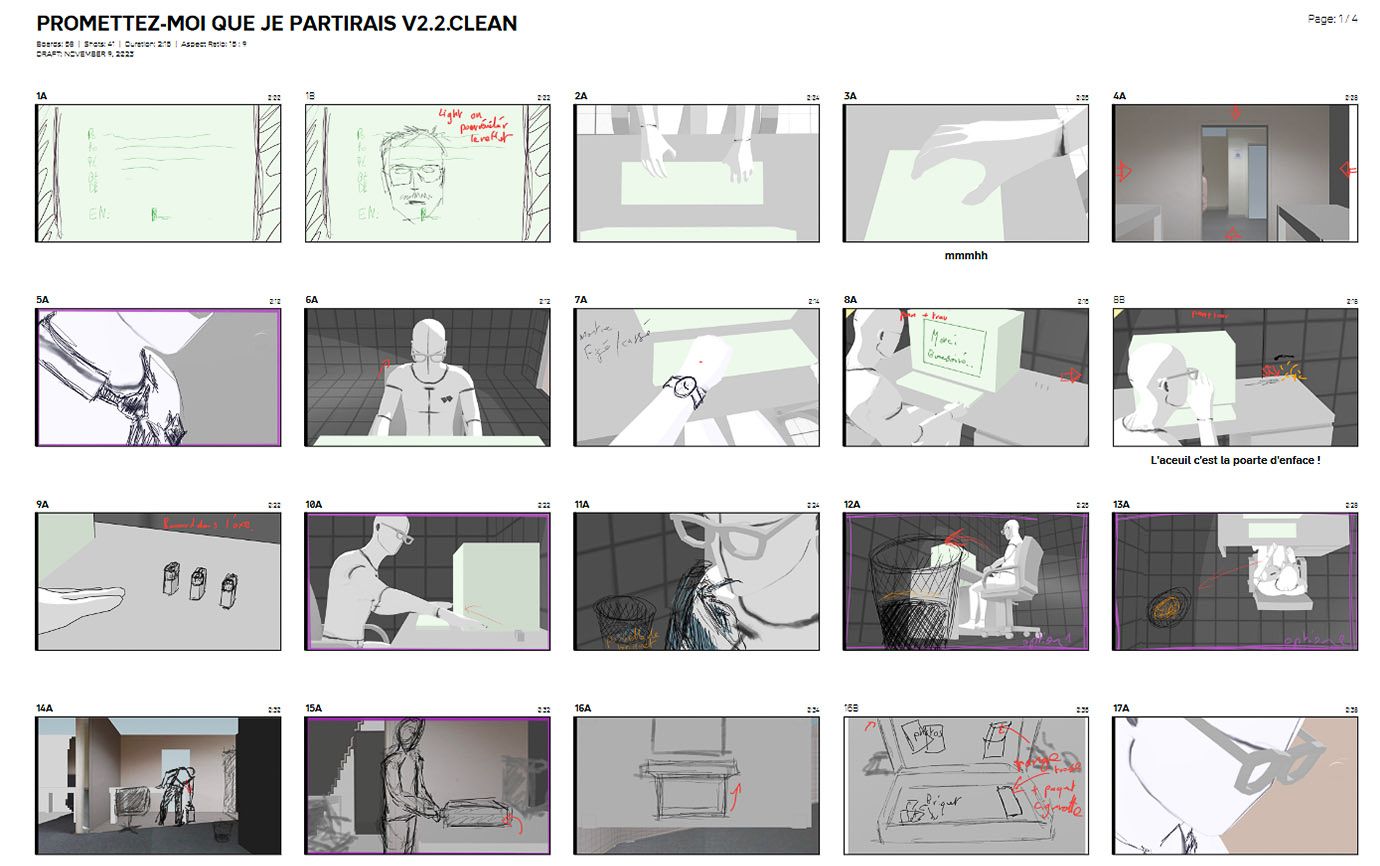
Pre-production
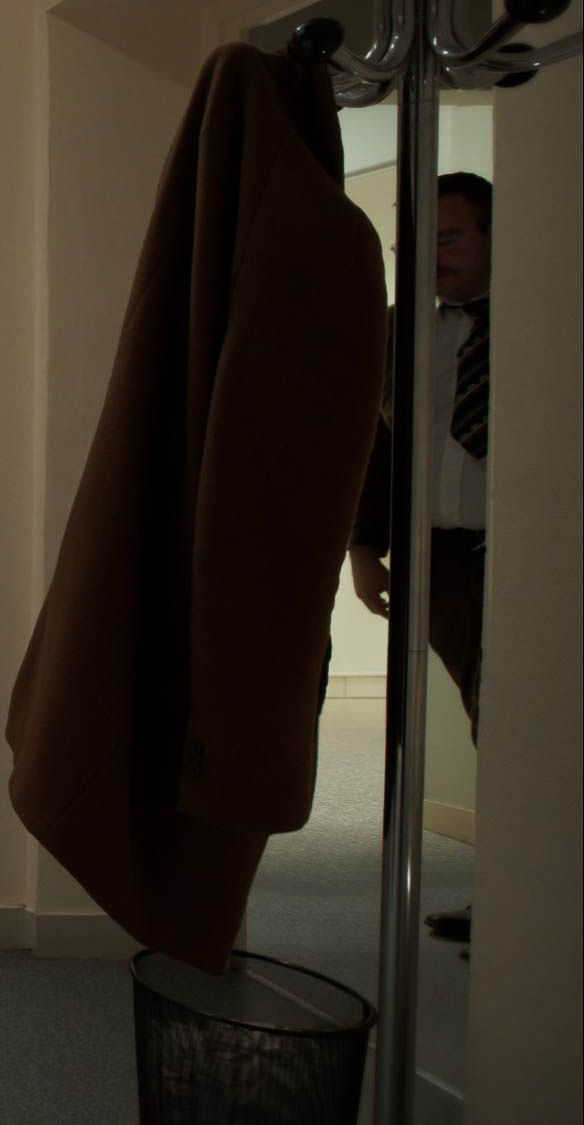
During the storyboarding process, we identified several elements that would require VFX. The lighter plays a crucial role in the film, symbolizing Prometheus's affinity with fire, reflecting the character's madness, intensifying the absurdity of the situation, and exerting a sense of omnipotent control in the office setting. As for the broken watch, with only one prop available and no assurance of achieving a visually appealing glass fracture practically, I opted to handle it in post-production.
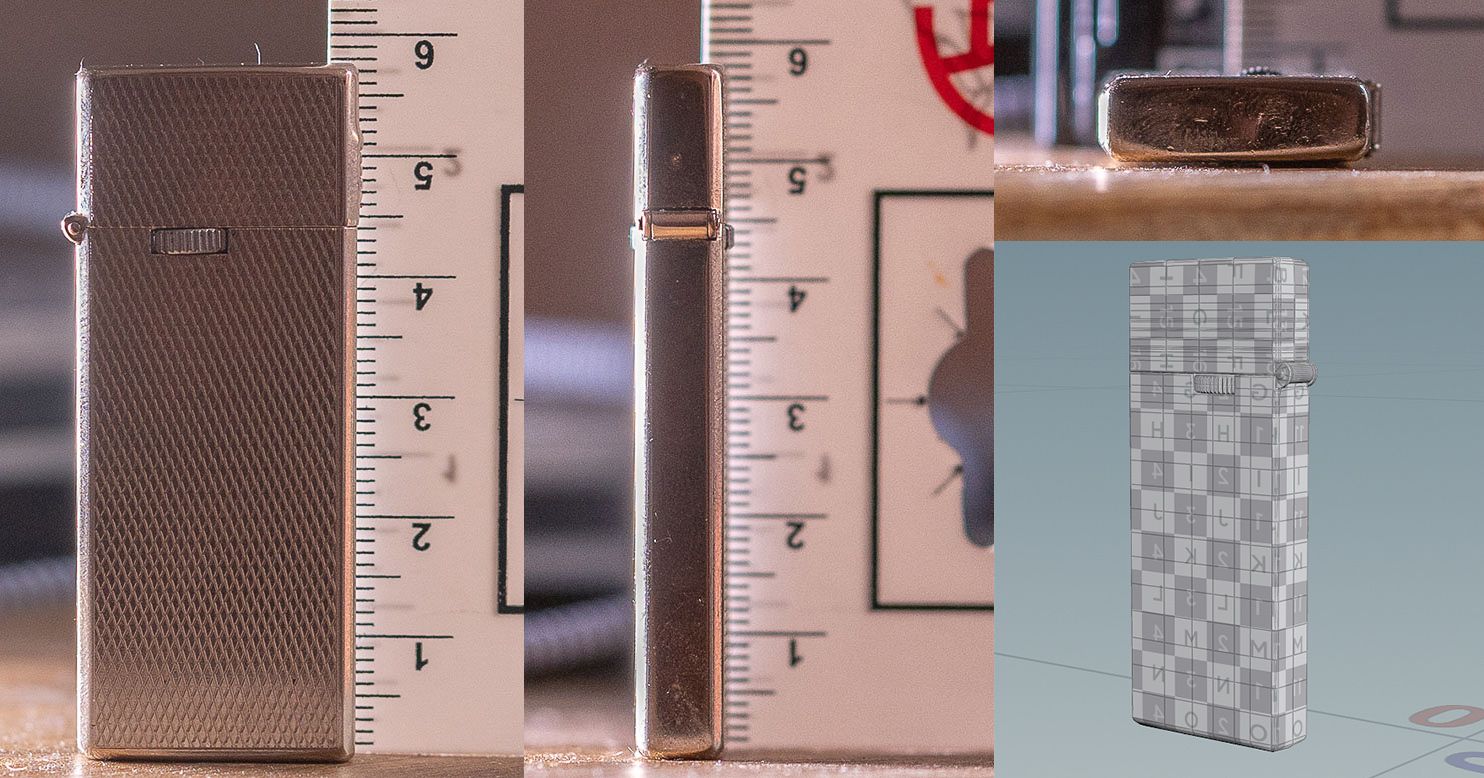
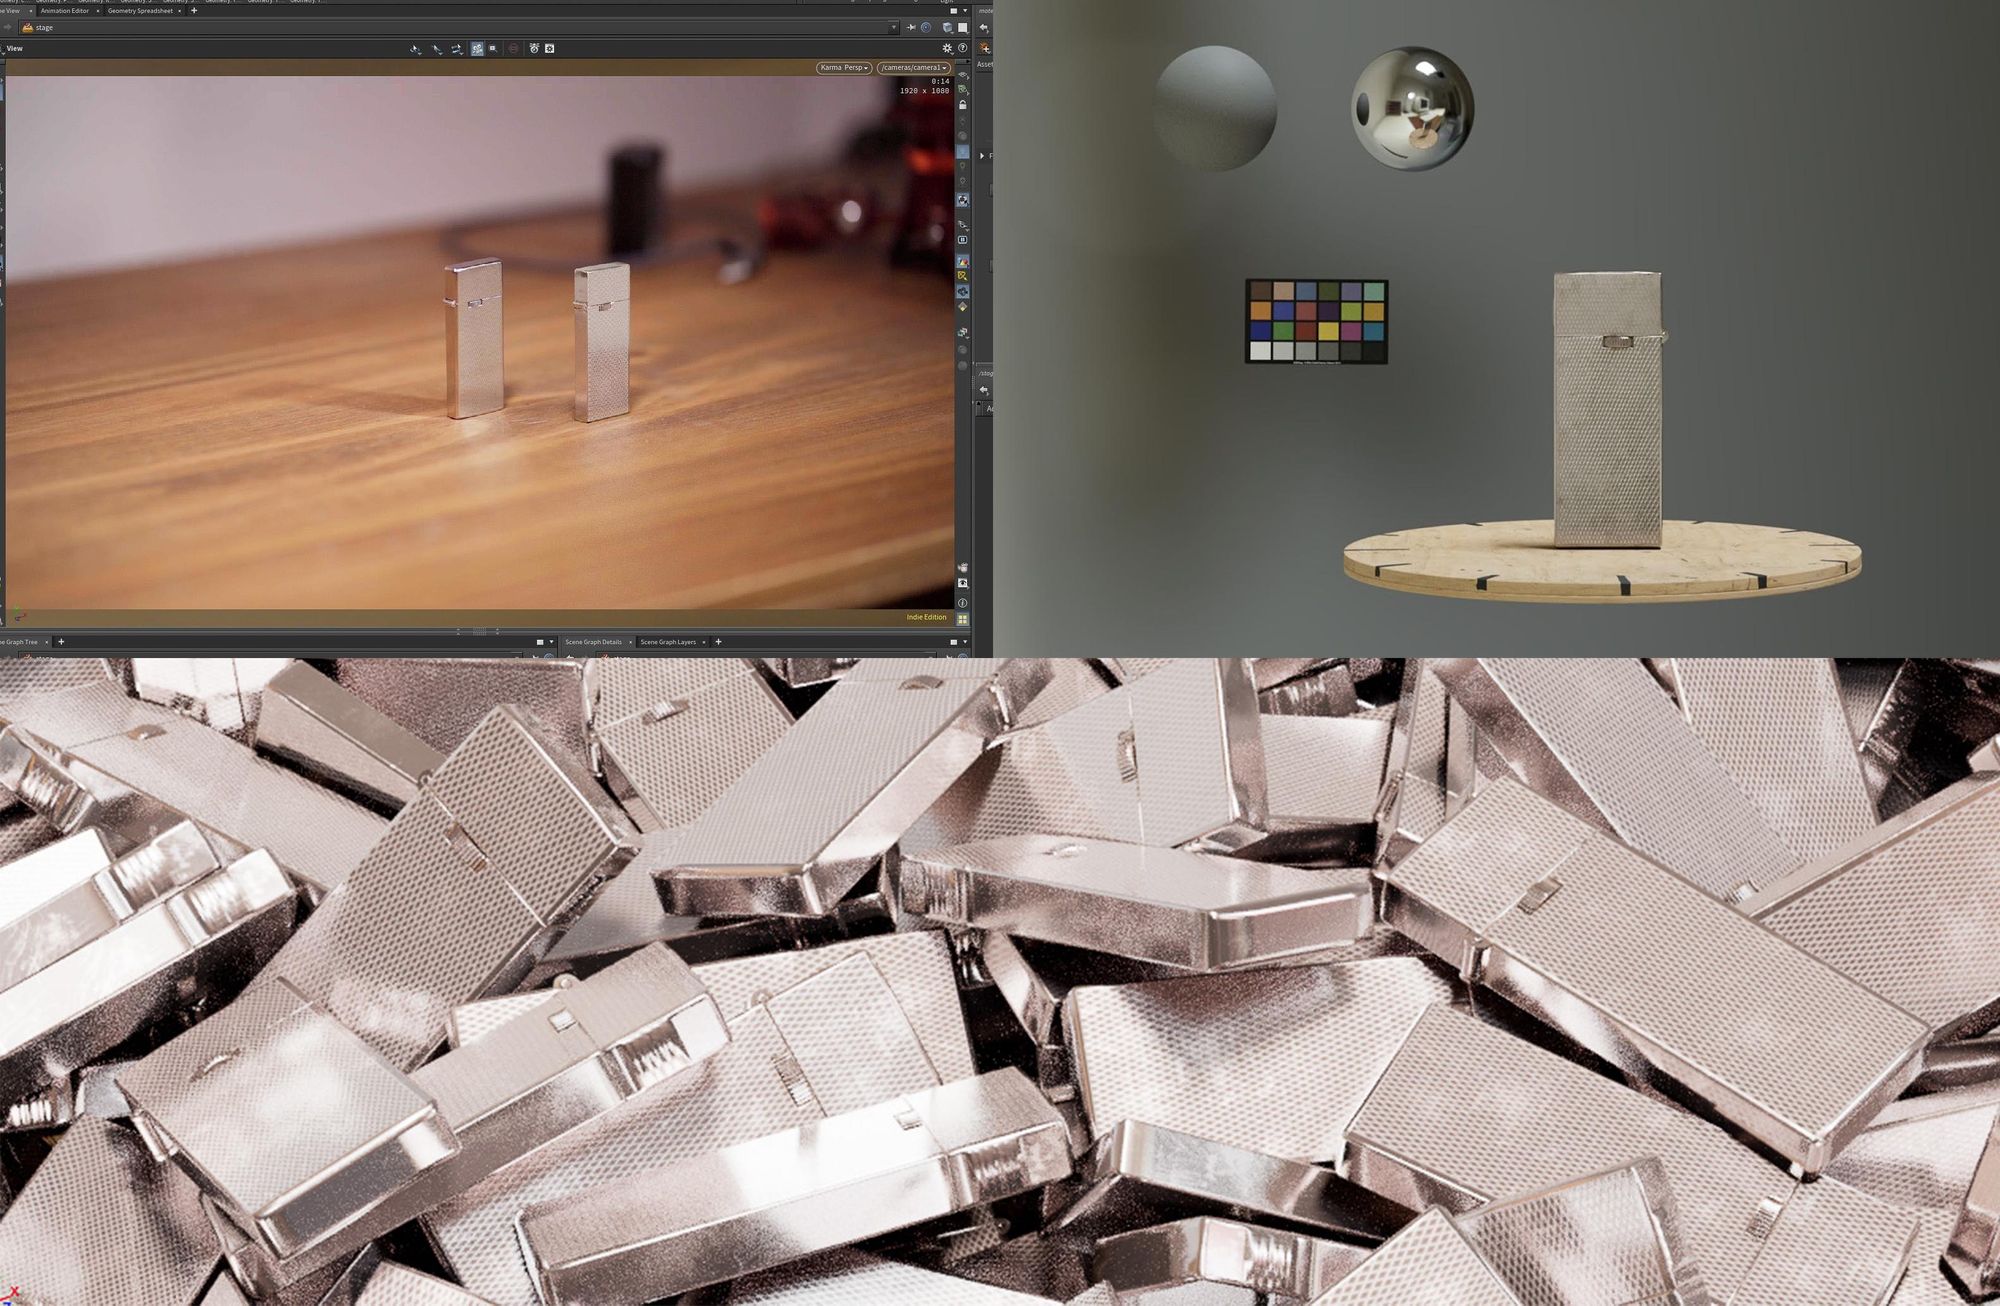
For the corridor scenes, as well as any necessary changes and cleanup work, I wanted to ensure the feasibility and quality of creating the lighter in 3D. To convince my colleagues that it wouldn't appear cheap, I meticulously replicated and examined the lighter before the screenplay was finalized. Using Houdini, I modeled it with real-world scale references, ensuring accuracy and realism.
This aspect is particularly crucial for VFX. Our goal is to replicate reality, seamlessly blending and concealing any digital manipulation. Light behaves and diminishes in a specific manner, necessitating that we adhere to physics by accurately placing CG objects at the correct scale within our scenes. Additionally, this practice helps maintain consistency across different shots.
For texturing, I utilised Substance 3D Painter. The base layer consists of a Nickel smart material, supplemented with adjustments such as dirt and smudges.
The raw render is convincing enough. The multiple lighters are well-validated in the script!
The day of the shoot!
As both the Cinematographer and VFX Supervisor (admittedly, not the ideal combination), I possess detailed knowledge of my light and camera setups, enabling me to anticipate possibilities in post-production and plan accordingly. I ensured that the script included lens information in the technical breakdown, crucial for tracking and compositing plate neutralization later on.
Next, I gathered pertinent information and reference images, meticulously measuring the room and desk to accurately reproduce them in post. Maintaining consistent size information across shots is essential for preserving world scale in camera tracks. In SynthEyes, I easily constrained two track markers with distance information to ensure accurate scaling. In cases where this affected camera calibration, creating proxy geometry matching the environment's size facilitated rescaling and scene replacement across all shots.
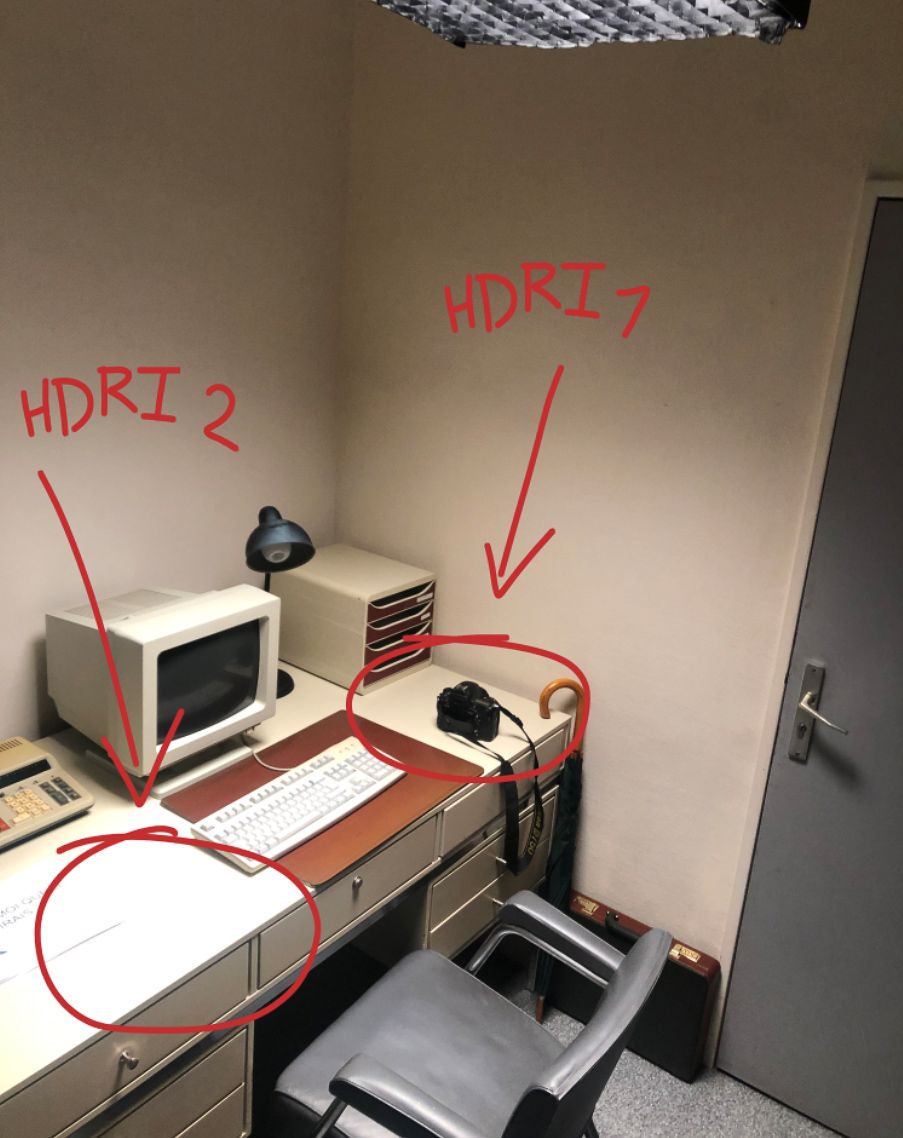
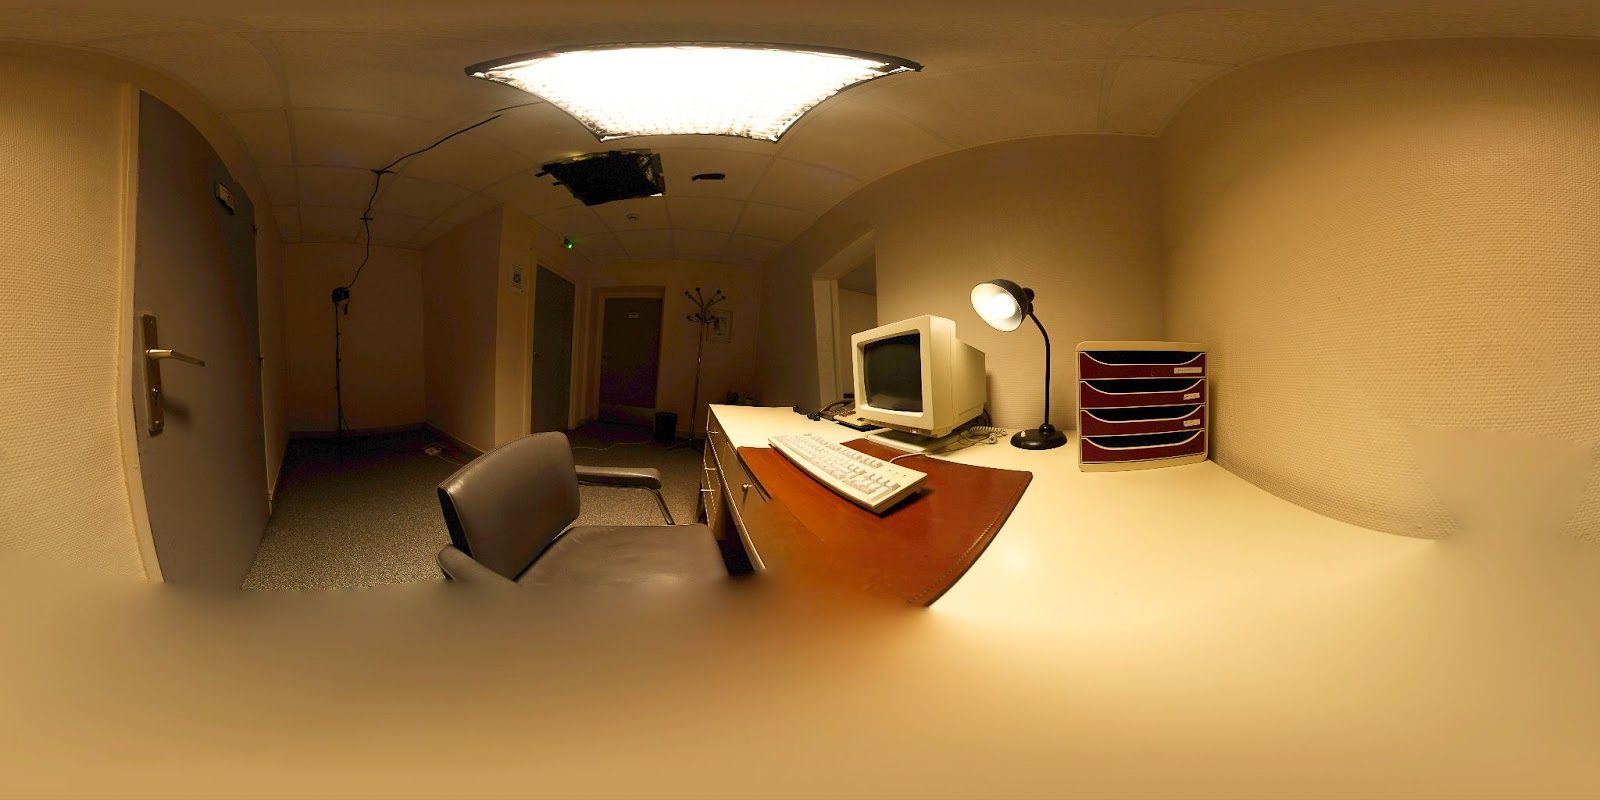
Although I only captured one HDRI of the office room for augmenting lighters, ideally, I would have taken an HDRI at every location where CGI integration was planned. However, when juggling multiple responsibilities simultaneously, such as on this project, it can become complicated.
During filming, it's imperative to gather as much information as possible, even if it might not seem immediately relevant. Every detail matters, especially considering I won't have the opportunity to return to the set. Therefore, capturing essential information, including camera specifications, reference photos, clean plates, witness cameras, measurements, and HDRI data, ensures a smoother post-production process.
Post-production
Editing
The editing process proved quite complex! With a runtime of just 2 minutes and 20 seconds, our screenplay, originally suited for a 3-minute film, required extensive retiming and sharp cuts. Leveraging jump cuts with cropping allowed us to maintain coherence in the editing while adhering to the 2.20-minute runtime.
All editing was conducted in DaVinci Resolve. Having transitioned from Premiere Pro to DaVinci Resolve several years ago, I find it to be a highly cost-effective option with a one-time payment model. Being fully GPU-accelerated, DaVinci Resolve offers superior speed and is considered one of the gold standards for colour grading. This is particularly crucial for VFX work, where proper colour management tools are essential when switching between different software platforms. Additionally, DaVinci Resolve seamlessly integrates Fusion's compositing tools, adding another layer of versatility to the editing process.
The juicy part: VFX
Only after the final validation of the editing by Aymeric and me, I started the VFX process. Also, with the lighting already set up in the pre-production phase, the rig was ready to be used.
HDRI
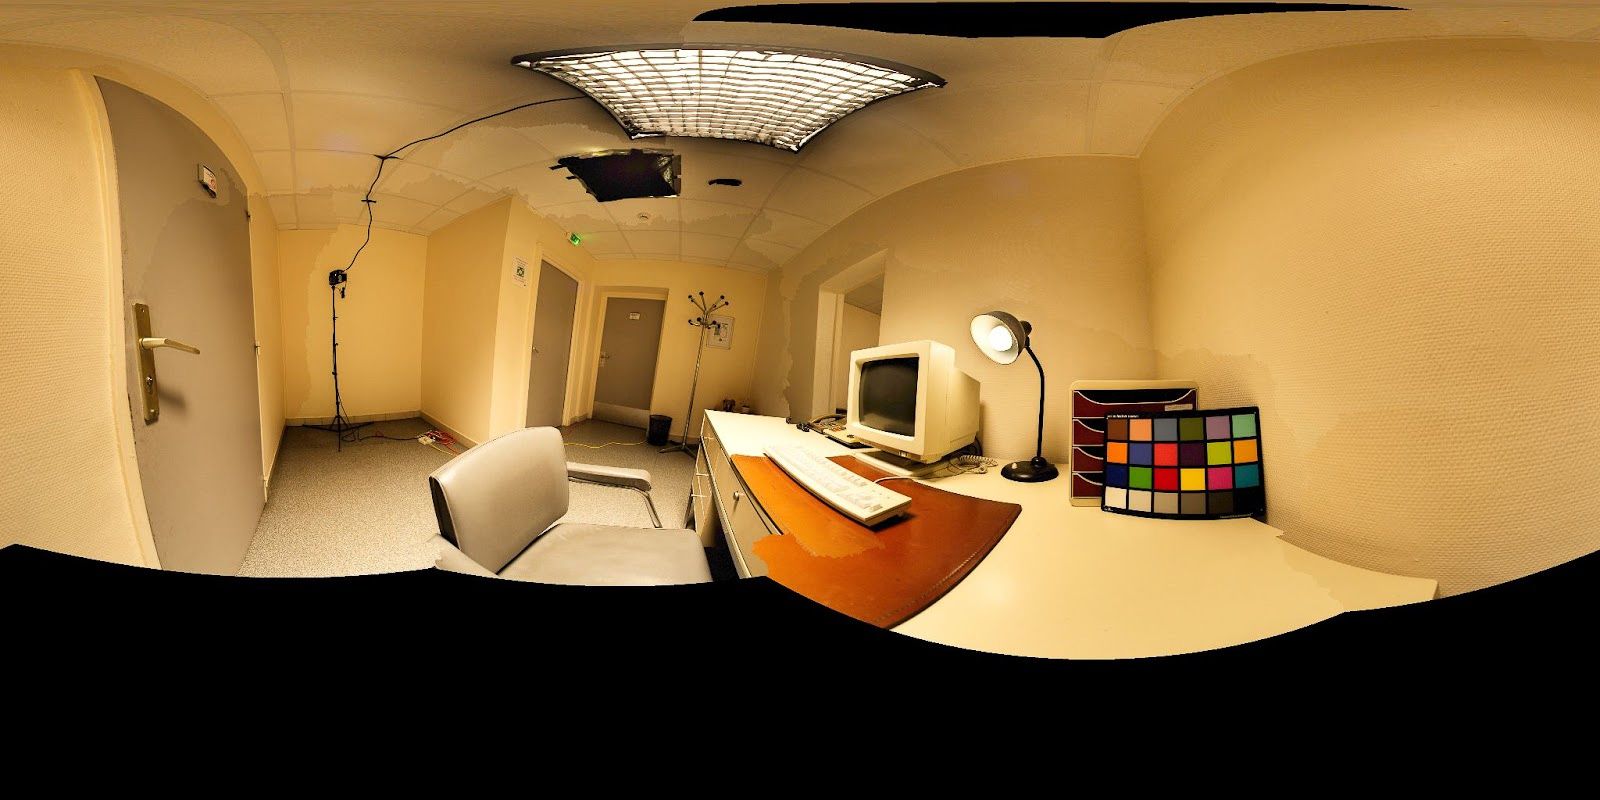
I could only manage to capture one HDRI, which I must admit was subpar. Initially, I had meticulously planned (thanks to pre-production) to create separate HDRIs for each area of the desk where the lighters would be positioned. This approach would have ensured better light reproduction on the lighters. However, due to time constraints on set, I was only able to capture a single HDRI.
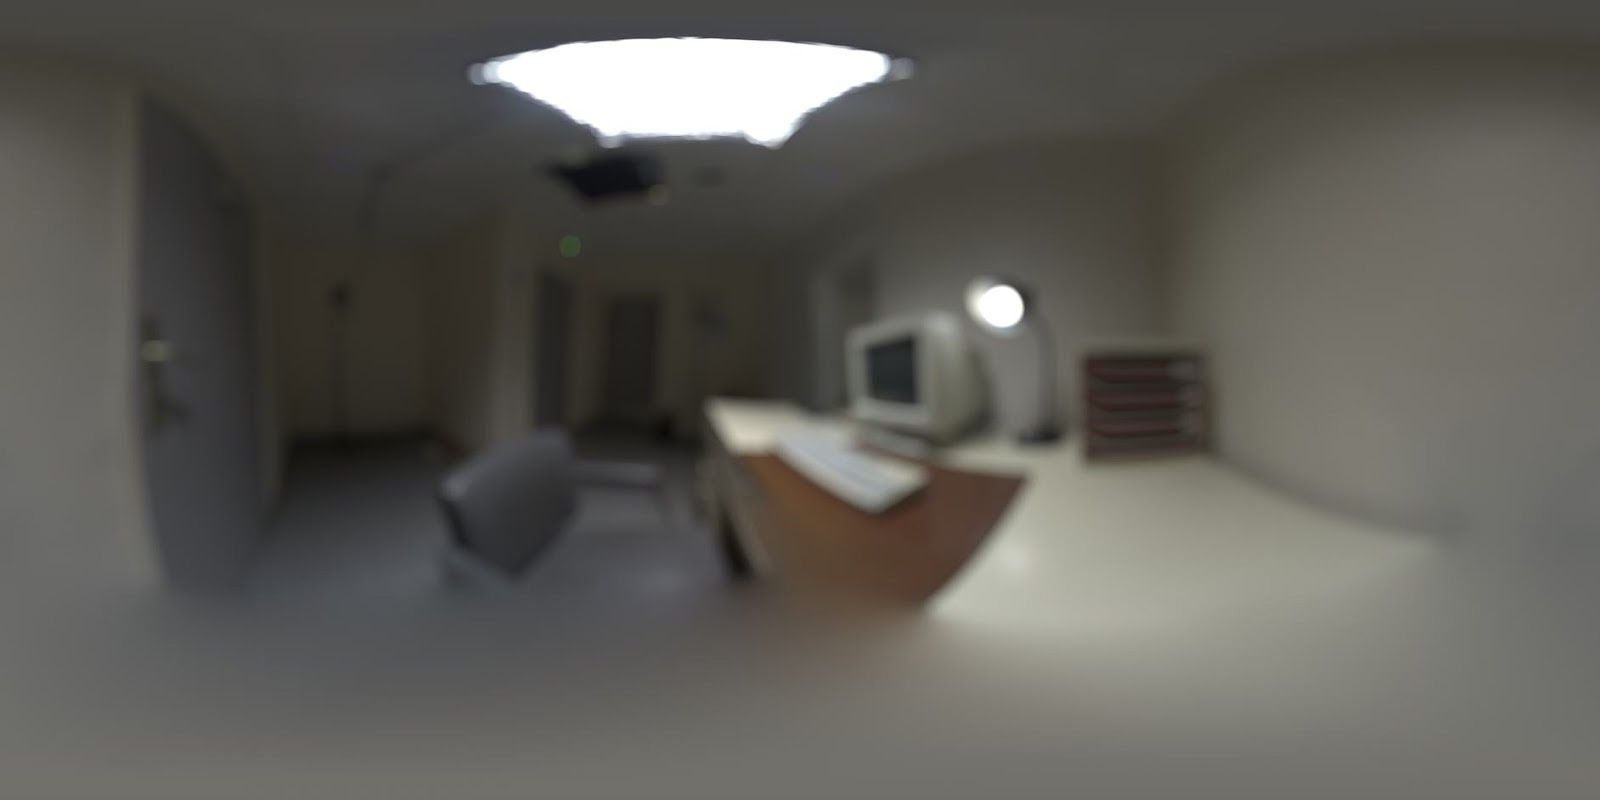
Furthermore, I encountered difficulty aligning the HDRI perfectly in PTgui. Given the nature of the project, I opted to adjust one of the images, prioritizing the lighters' appearance over absolute alignment accuracy.
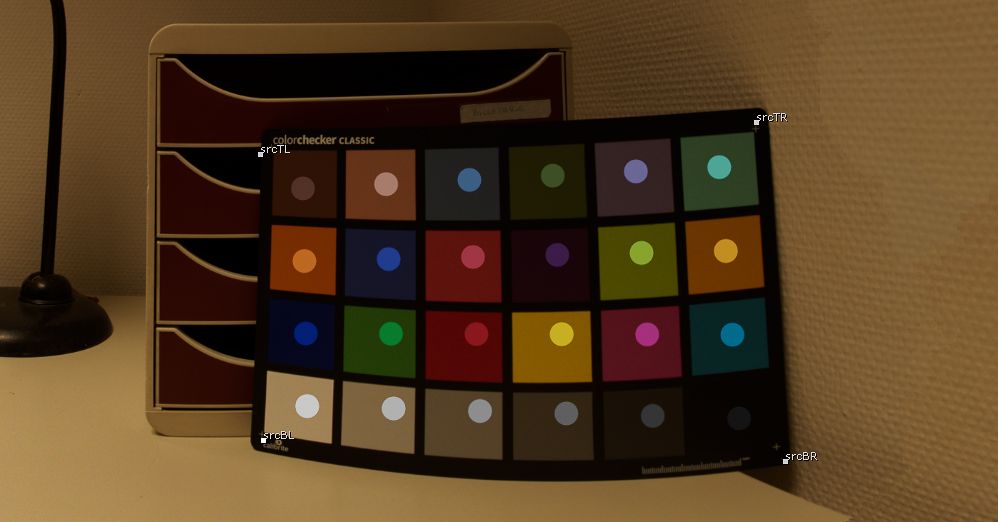
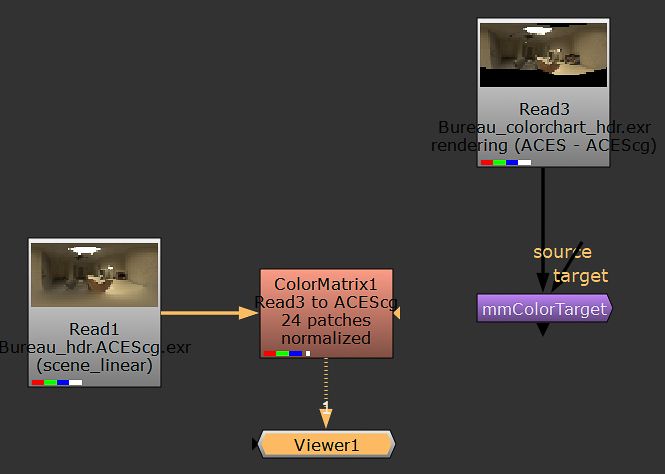
For colour calibration, I utilized a colour chart and the "mmColorTarget" gizmo developed by Marco Meyer. Subsequently, I applied a blur to the colour chart to mitigate any sharp reflections.
Shattered glass
Regarding the shattered watch glass, I employed a basic modeling technique using boolean fracturing and a glass shader with parameters set to 100% specularity, 100% transmission, and an IOR of 1.2. I intentionally maintained a large area to ensure clear visibility of the needle.
The dalled door
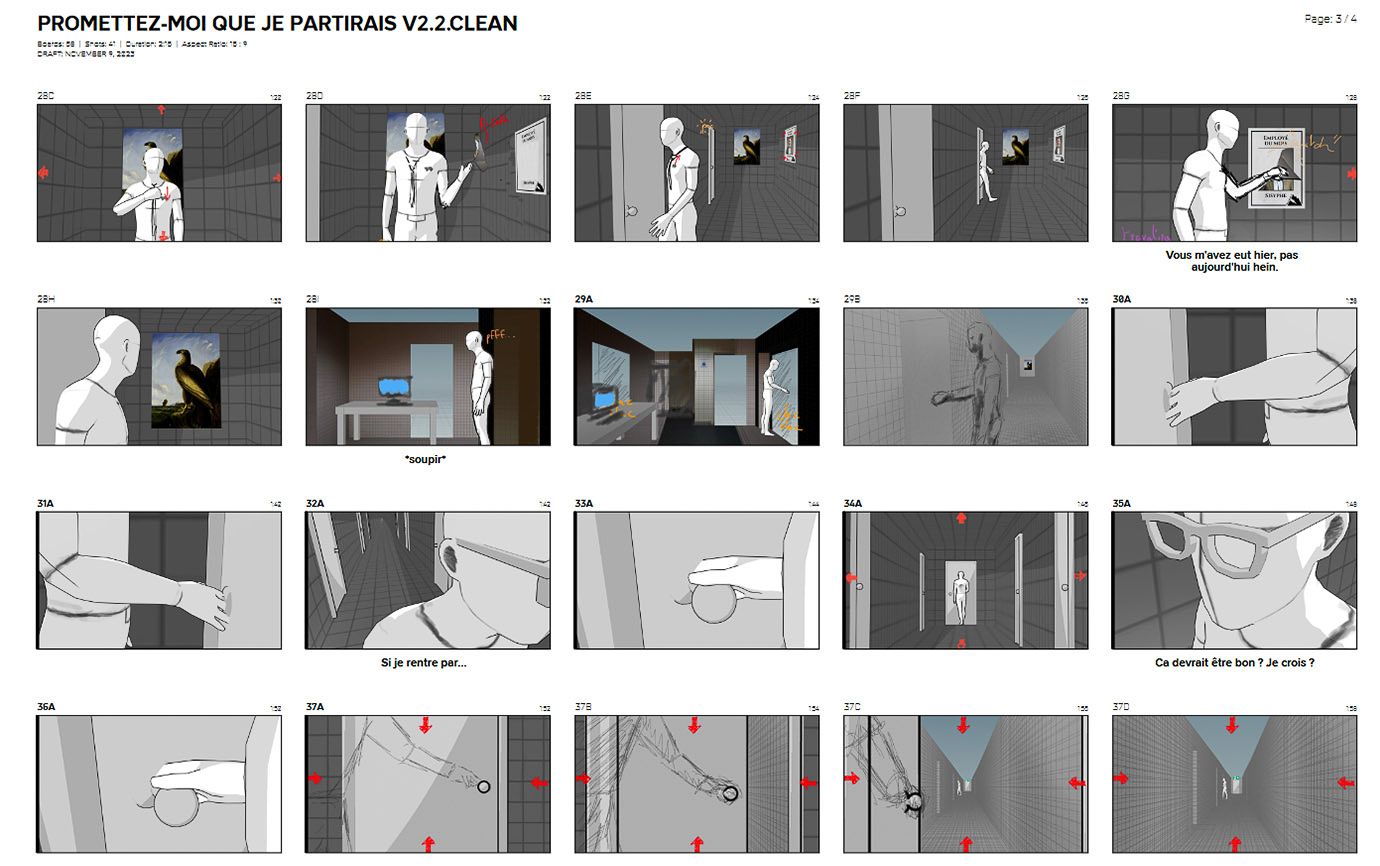
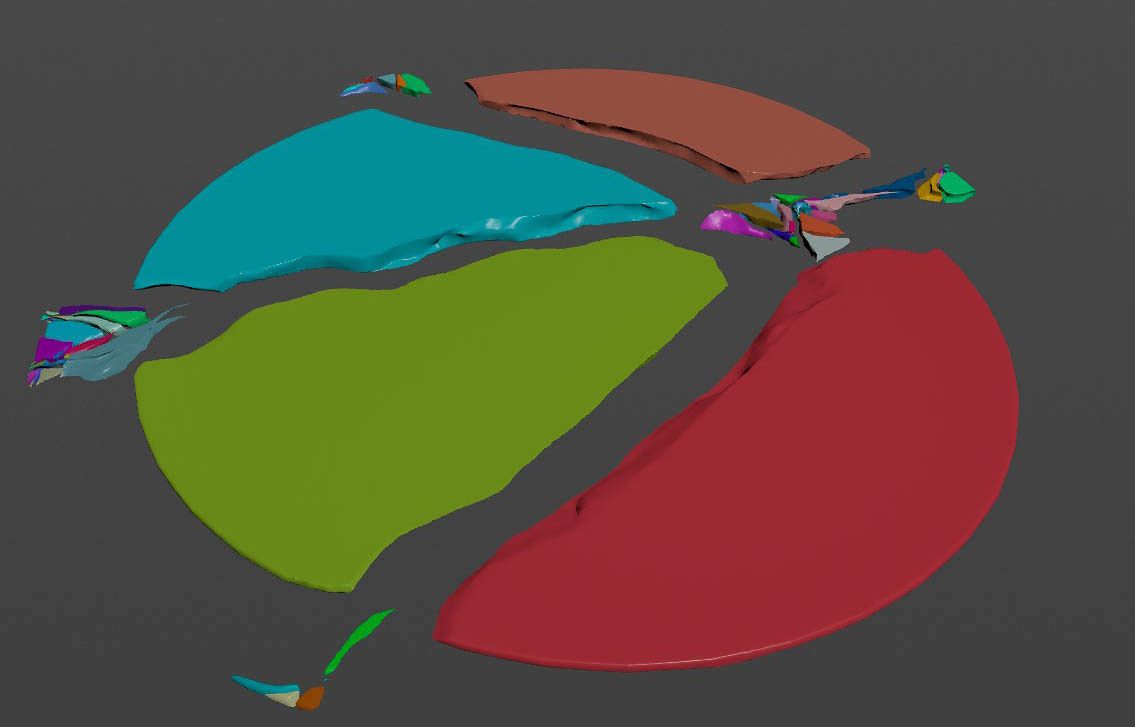
On set, we found a kind of walled door that perfectly fit our vision about the exit vanishing. I utilised photogrammetry to capture it. The reconstruction was performed in Meshroom (Alice Vision) and cleaned up in Houdini.
I have much more to learn and experiment with regarding photogrammetry, but I strive to adhere to certain guidelines to achieve accurate results when utilizing it:
Take your time during the photo shoot; avoid rushing and proceed methodically.
Maintain consistent lighting, preferably neutral and diffuse. Avoid baking lighting into the scan; flatter lighting yields better results.
Manually set up and calibrate the cameras to ensure consistency across all photos.
Use an aperture setting that keeps all subjects in focus.
Avoid scanning objects with highly reflective chrome materials. Consider using a polarized lens filter to reduce specular reflections.
Begin the shooting process by capturing photos from one side of the object and orbiting around it. Take photos at eye level, as well as from low and high angles. Then, move slightly to the left or right and repeat the process.
Ensure that your photos overlap sufficiently; otherwise, the software may struggle to track and triangulate them effectively (utilizing the same technology as camera tracking).
Repeat this process until you have captured every square centimeter of the object.
In Houdini, I simply remeshed the scan, made minor adjustments to some points, and trimmed away any unwanted parts of the mesh. Additionally, I regenerated the UV mapping since the texture provided by Meshroom wasn't satisfactory, and the lighting baked into the scan differed slightly from the desired shots. To address this, I utilized photo bashing techniques in Photoshop to recreate the textures.
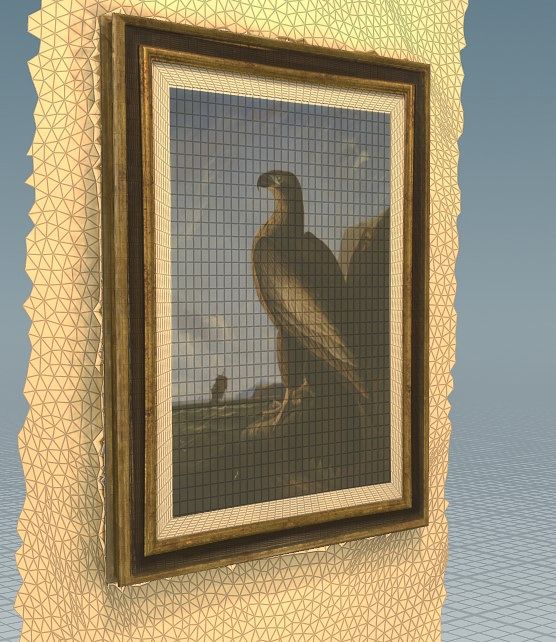
Furthermore, the eagle painting prop appeared too small and lacked detail in close-up shots, giving it a somewhat inexpensive appearance. Therefore, I opted to recreate it entirely, scaling it up to achieve a more convincing "oil painting" style.
Project workflow
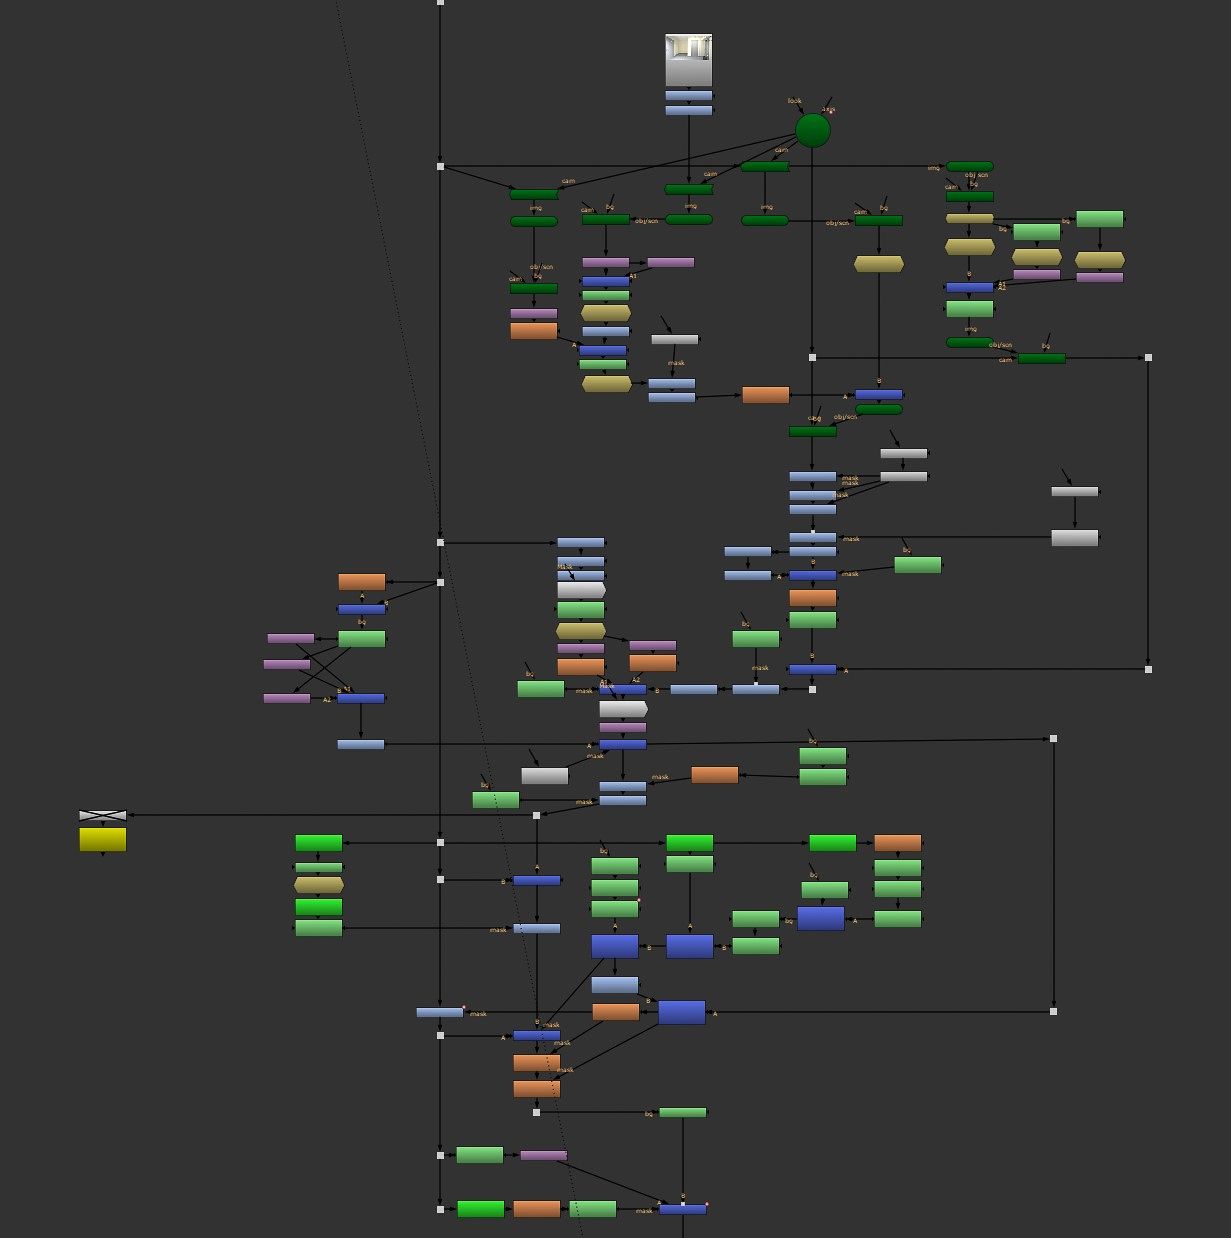
Once my assets are ready, it's time to shift into high gear and capture all those shots! Workflow becomes paramount; maintaining a smooth flow between DaVinci Resolve, SynthEyes, Houdini, Nuke, and back to DaVinci. While there's always room for improvement, the process was streamlined enough to work without frustration.
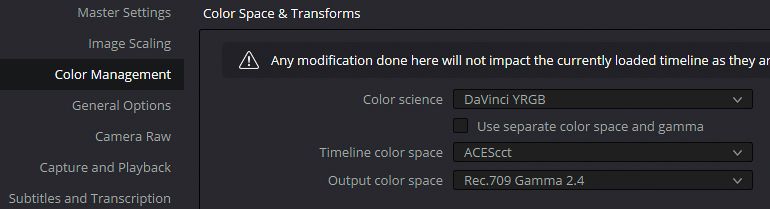
In DaVinci Resolve, I've already planned to colour grade using ACES CCT. All my media will be converted with an ACES transform from the original colour space to ACES CCT.
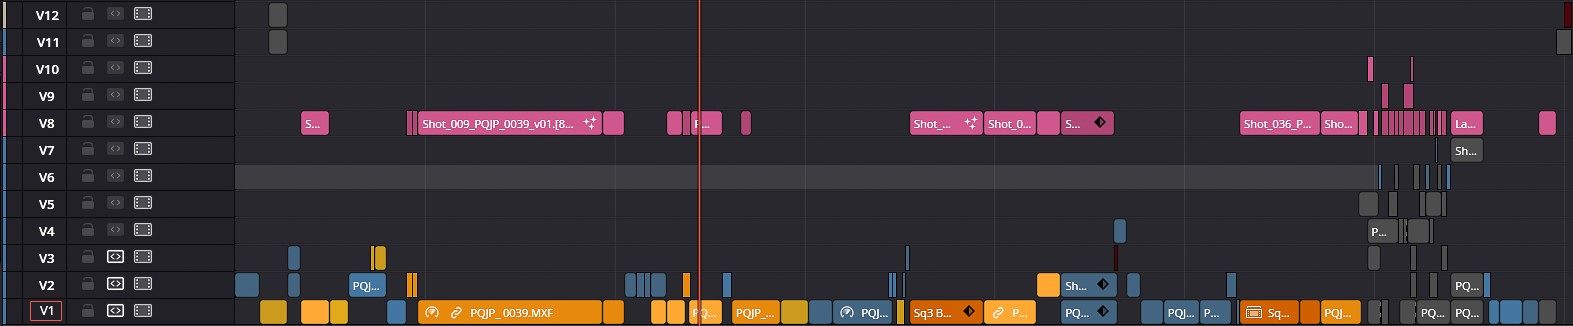
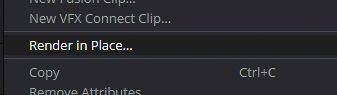
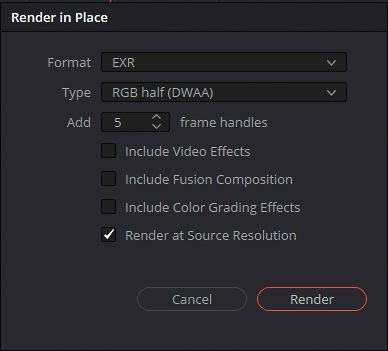
Each VFX shot was tagged with the editing timeline and exported in with the "Render in place" => EXR sequence, don't include colour correction!
Yellow : Fusion Composition, Dark Yellow : To VFX , Pink : Final VFX
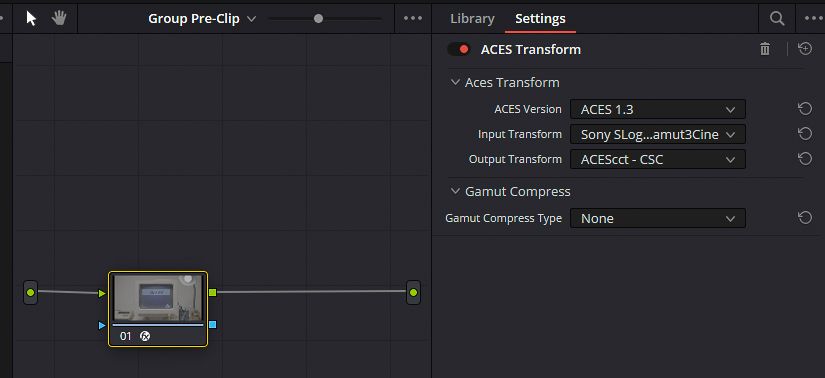
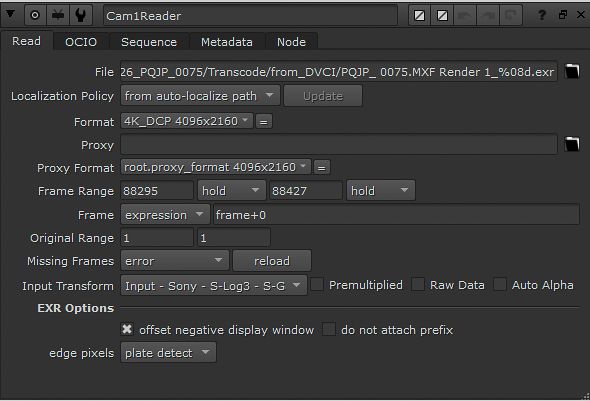
Non-color-managed media and using "render in place" (without the Color Grading effect) ensure that I will obtain a transcoded EXR sequence of my shot that matches the original color space of my media, which in my case is Slog 3 s-gammut3cine—chosen in my camera settings. Consequently, in Nuke, I tag my textures as Slog 3 s-gammut3cine. Additionally, from Nuke, I export in ACES CCT for the Houdini Background Plate.
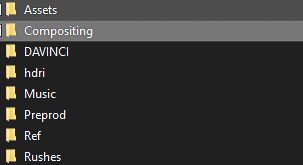
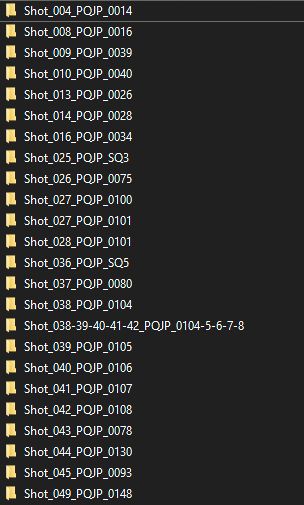
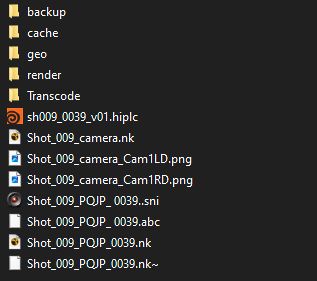
Each shot has the same folder structure and common assets folder are stored at the root of the folder project to access it with relative reference.
The tedious part involves the manual export for every shot: Right-Click > Create Labeled Folder > EXR Sequence, no color correction, Render at source resolution > Hit Render. Then, wait... Thankfully, DaVinci is fast, and I can track my progress through the wall film. However, this is definitely a process that could be automated. For example, Nuke Studio/Hiero offers a very convenient I/O management system designed for smoother workflow between editing and VFX. With features like preset folder creation, automatic Nuke script generation, auto-versioning, batch rendering, etc., I will certainly explore integrating it into my workflow for future projects.
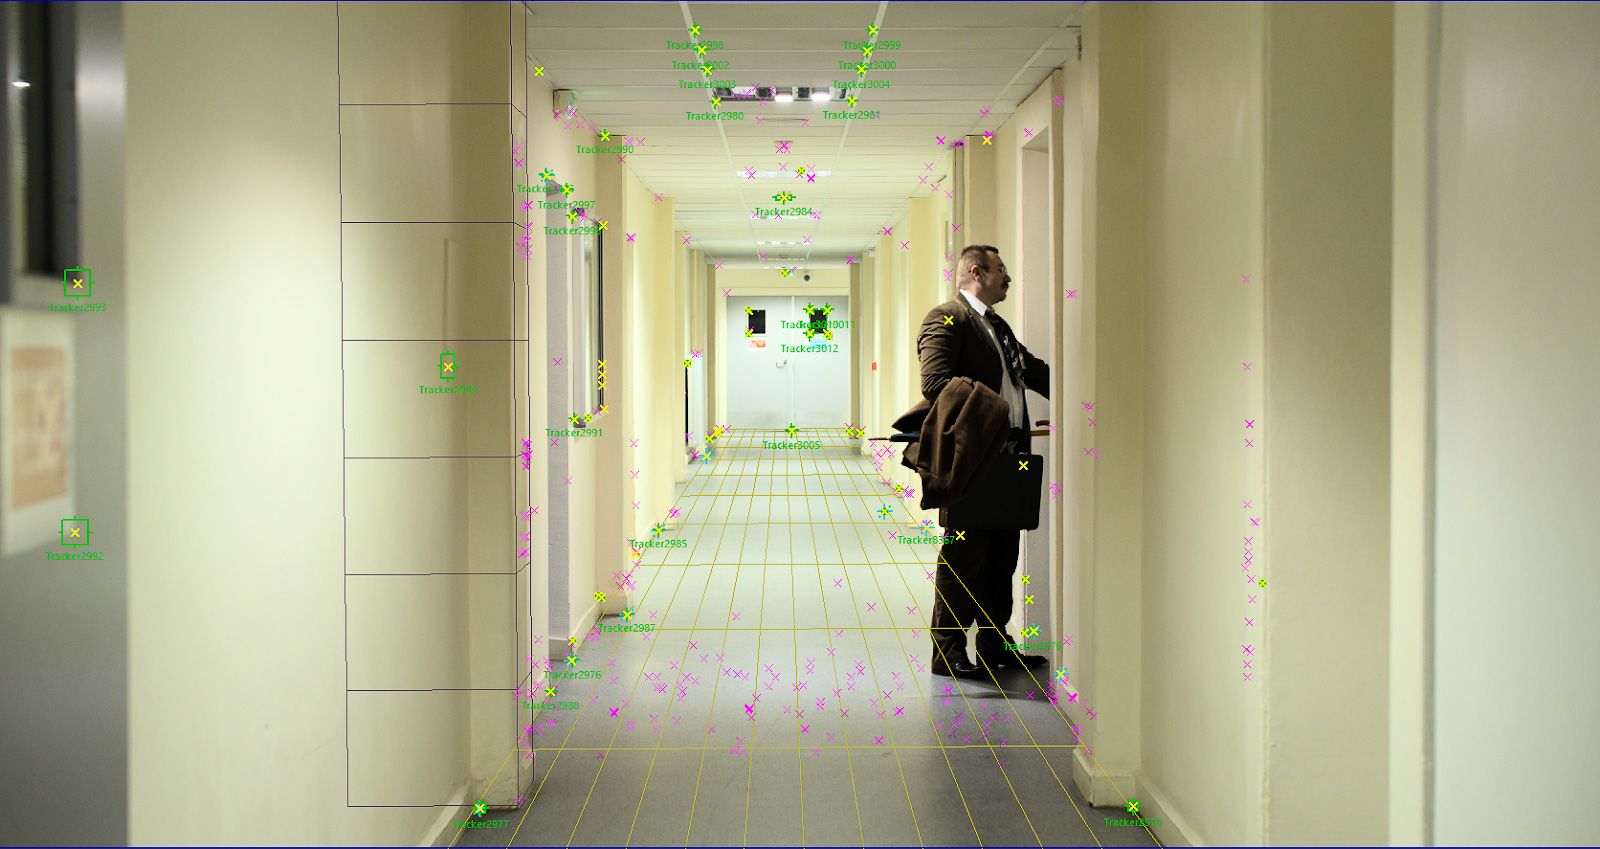
Tracking
Once exported, tracking is done in Syntheyes. This is the moment where you realize you forgot to add some tracking markers... I typically try to avoid them because most shots naturally provide enough tracking data—table corners, doors, rocks, buildings, etc. However, here I encountered two shots lacking detail: motion-blurred white walls... All you have left are your eyes to cry and guess the movement. If anyone has a better solution, I would be glad to hear about it.
Once I had a virtual camera, I exported an Alembic file that could be imported into Houdini and Nuke if necessary.
Scene setup
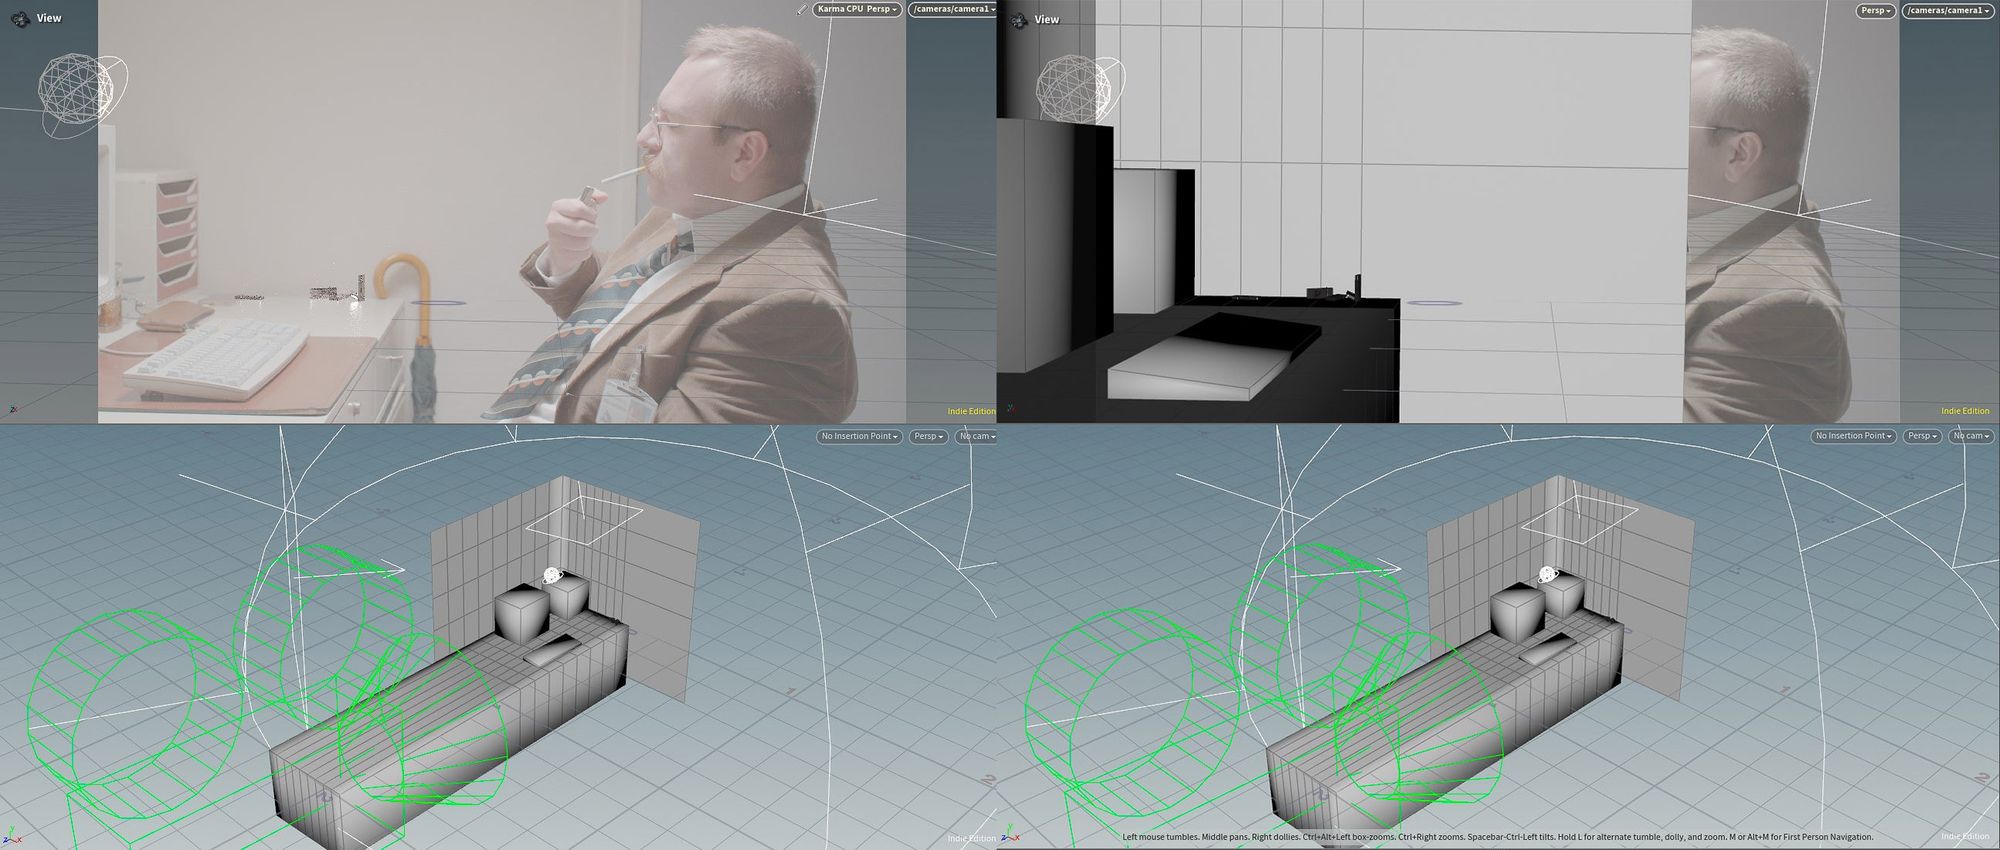
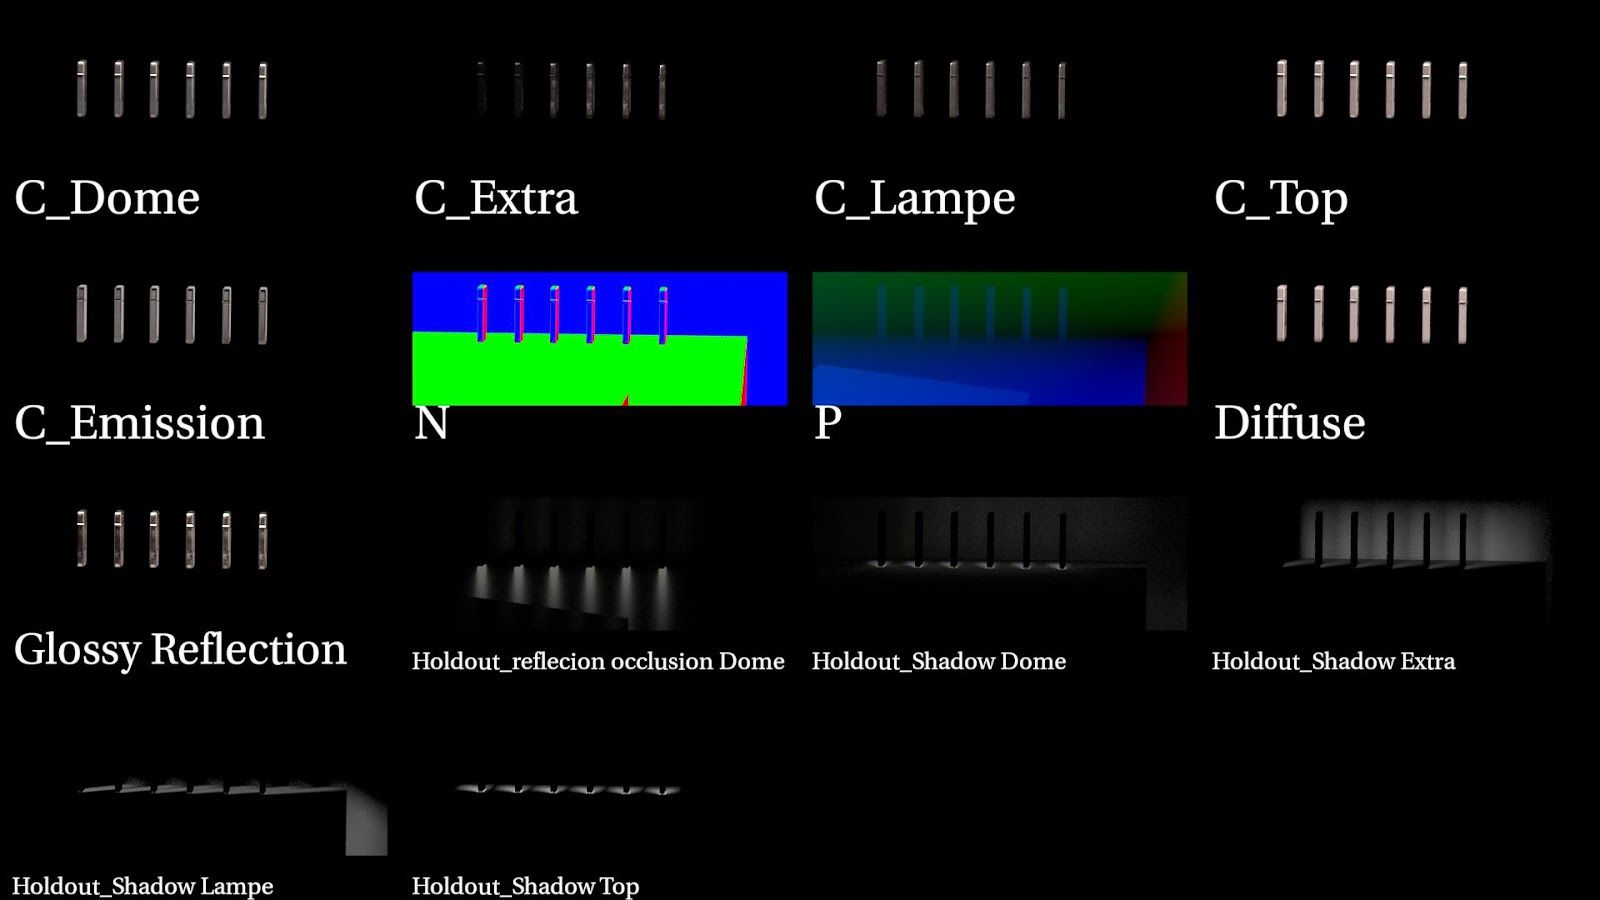
Rendering and layout will be done in Houdini, so I set up a basic lighting rig in Houdini Solaris. This included the HDRI and a few lights to replicate the real ones in my scene. Additionally, I created a background matte where I placed the plate projected onto a rough set's reproduction. Houdini offers a node called "Background Plate" that handles all the projection, holdout, and sets up the AOV for you.
This basic setup is converted into a shelf tool for easy setup on future shoots. To do so, select the desired nodes and drag and drop them onto the Shelf tab.
To maintain real-world scale, the rooms are reproduced at their actual size, which I determined using measurements taken on set. Then, I adjust the scale of my Alembic file containing the camera to match the set.
In this setup, the Background Node is my friend! It handles all the plate projections onto the elements of the environment, making life easier with its fast setup and good results!
Rendering
Once the lighting and blocking are adjusted for the shoot, the scene is rendered using Karma CPU. Thanks to HQueue and my second PC, assembled from second-hand parts, I could start tracking and setting up the next shoot while the current one is rendering—a must-have!
Speaking of rendering, it was crucial to optimize it as much as possible due to the number of shots and other parallel projects. The final master will be in UHD (3840x2160), so I avoided reducing the render resolution too much, especially because the lead actor has fine details on their face. Most shots were rendered in FHD (1920x1080) using normal upscaling techniques, benefitting from the smoothing introduced by pixel interpolation to match the plate sharpness.
The watch glass was rendered in 4K. Even though I primarily used specularity, it was important to maintain the resolution of the background plate refracting through the glass. This helped blend the CGI and reduced the need for excessive compositing tricks.
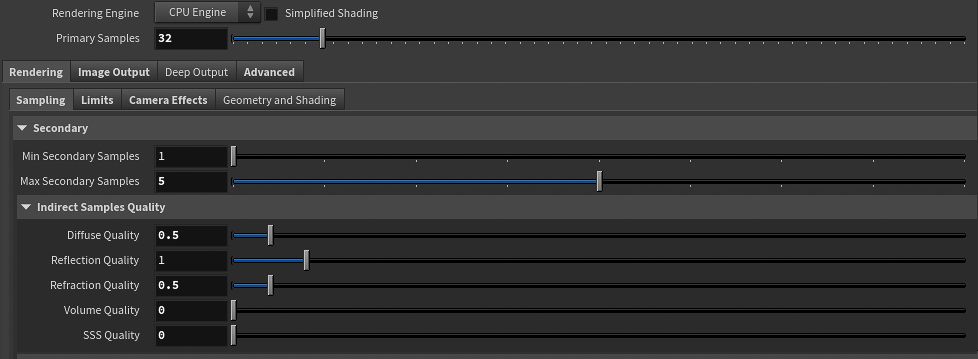
Even basic FHD renders can be time-consuming with thousands of frames. To optimize render speed, I set unnecessary samples to 0 and adjusted the quality of Diffuse, Refraction, or Reflection depending on the shot. For shots that would be blurred in post, I kept global and secondary samples as low as possible. Sometimes, I preferred to retain three bounces of GI with a low sample count for more natural lighting, which could be denoised later.
Every shot had a phase of optimisation and a final cropping on region of interest. While most renders use important sampling methods, this made me sure no time was wasted on useless samples.
In Karma it is called Data WIndows NDC, under Image Output > Aspect RatioEXR Compression settings can be found under Image Output > Metadata
Compositing
For compositing, when the shoot only required simple cleaning, I stayed in DaVinci Resolve's Fusion for a smoother workflow. It's so easy to switch to Fusion that waiting for rendering, increasing the project's footprint on your drive, and then using Nuke doesn't make sense. While it requires a bit of adjustment, it's clearly motivating me to learn more about Fusion, which is still closer to Nuke than After Effects.
Quick tips: If you're using the Magic Mask, be careful with your cache. Sometimes when the rush is moved in the timeline or the project is reloading, it can flush a part of the cache and you'll lose the Magic Mask... So if your shoot is finished, use the "Render in Place" function!
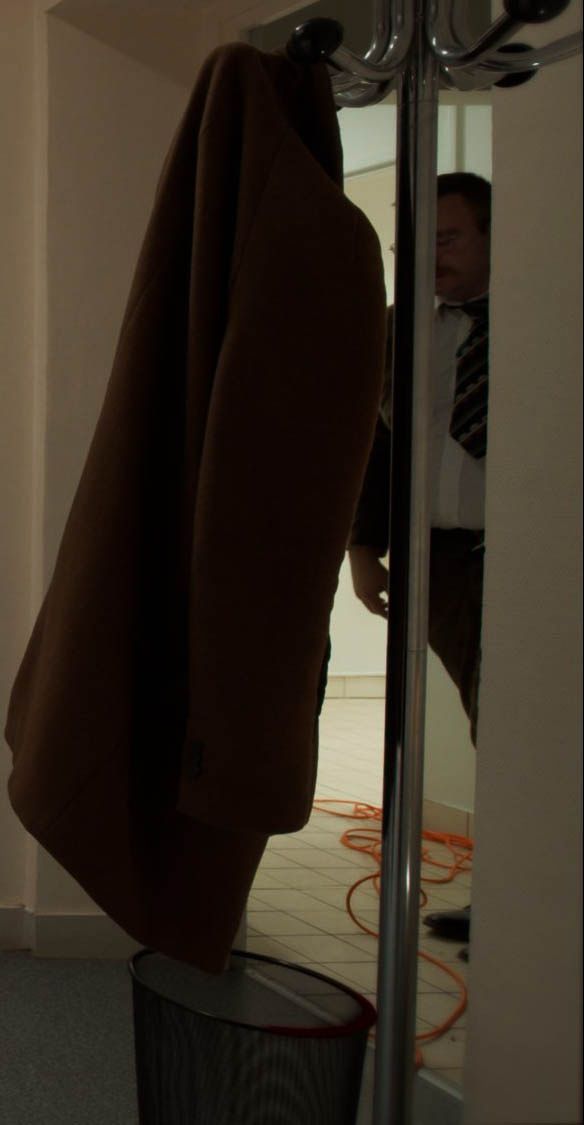
However, one cleanup task required Nuke. Projection and hand-painting techniques were utilized to remove the unwanted cables while maintaining the same floor material as the corridor. Indeed, in the story, the character returns from the corridor, which shares the same vinyl floor material as the office room.
This shot was taken at a rapid pace during a reshoot, and we inadvertently overlooked cleaning the cables. The classic 'fix it in post' approach was jokingly suggested (in reality, we simply didn't notice them in the viewfinder).
All other shoots, including those involving 3D or complex compositing, were completed within Nuke. The basic roadmap is as follows:
Neutralise the plate, apply vignette, and unwarp if necessary.
Plate Cleaning.
Rotoscopy, using Modnet (AI rotoscopy provided by The Foundry Copycat framework) when available; otherwise, hand roto was used. Most of the time, it was a combination of both.
CGI elements were often recreated with a per-light Beauty to adjust the lighting as needed. For instance, when characters move their hands between a light and an object, the corresponding Light's Beauty is masked with a rotoshape. Holdout shadow and reflection AOV provided by the Background Node aided in correct environment integration (assuming proper lighting). This involves the interaction of CGI objects with their environment, including contact shadows, projected shadows, reflections on walls and desks, etc.
Next, the 3D render is matched to the original plate regarding lens and texture specifics, such as center and corner sharpness, chromatic aberration, bloom, defocus, and grain. The Fxt_chromaticAberration gizmo developed by Tor Andreassen was utilized for the aberration, while all other adjustments were made using standard Nuke tools.
Additionally, motion blur is added in compositing to enhance render speed. This is achieved using the MotionBlur node in Nuke, which leverages OpticalFlow technologies. This approach saves considerable time and allows for rendering 3D with slightly fewer samples.
Finally, because I know that my DaVinci's timeline colourspace is in ACES cct, the compositing is rendered in ACES cct through EXR sequence and imported into DaVinci at the top of the original clip.
One word about EXR Sequence. In order to keep a fast workflow, they are all compressed in lossy format DWAA 45-80. Tiny files provide fast drive access and allow reasonable project sizes on your workstation. Most of the time, you will never notice any degradation, and even less if your final destination is YouTube.
Specific case
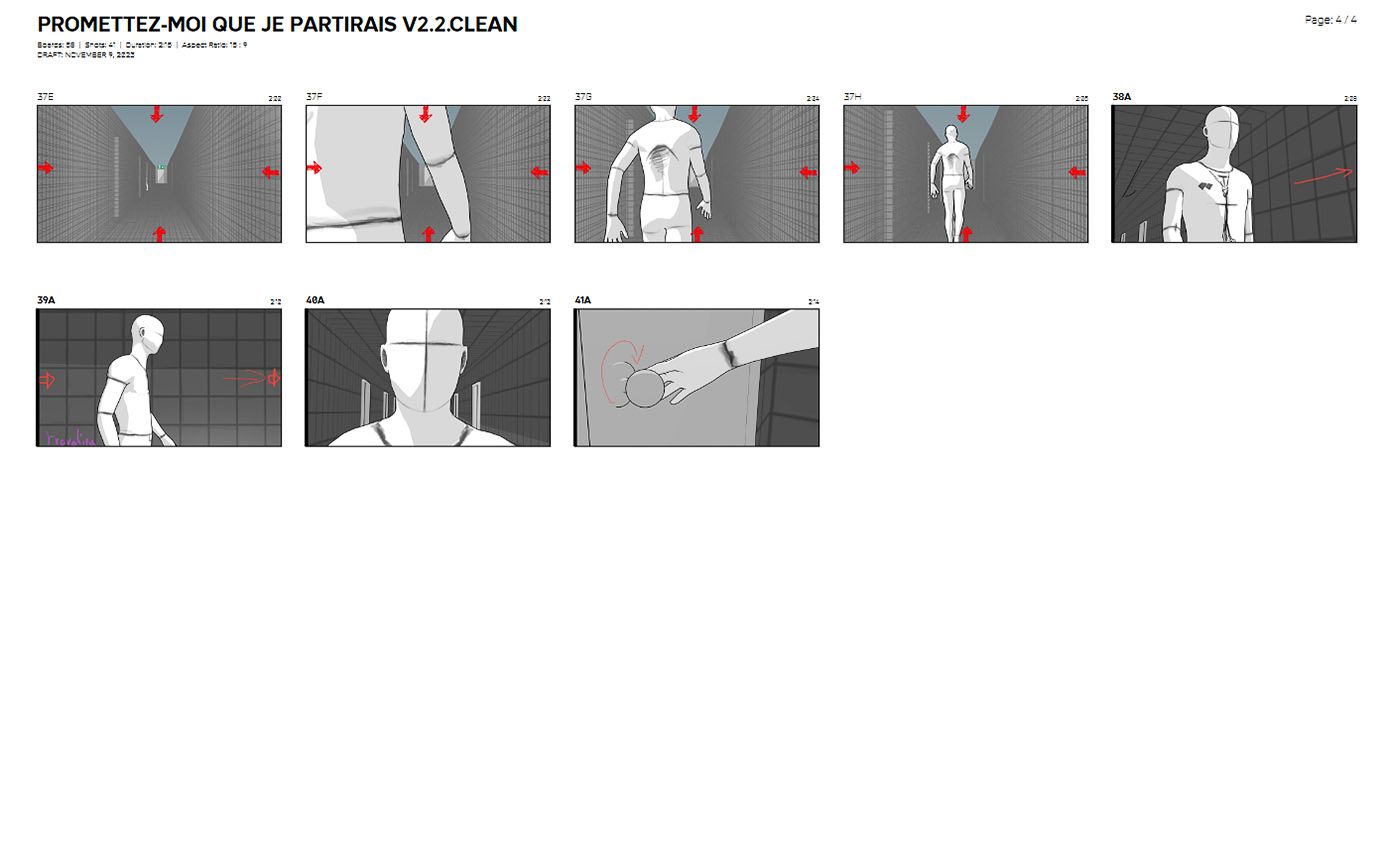
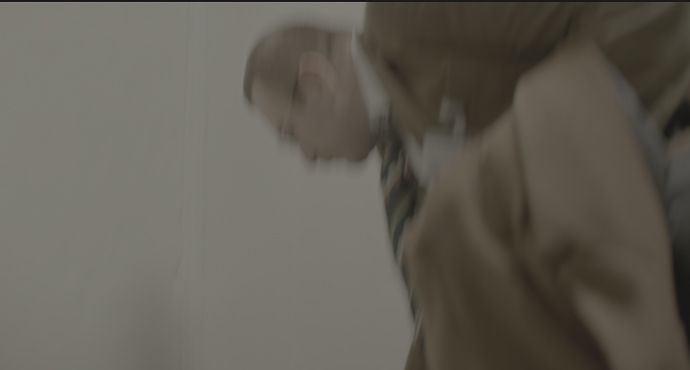
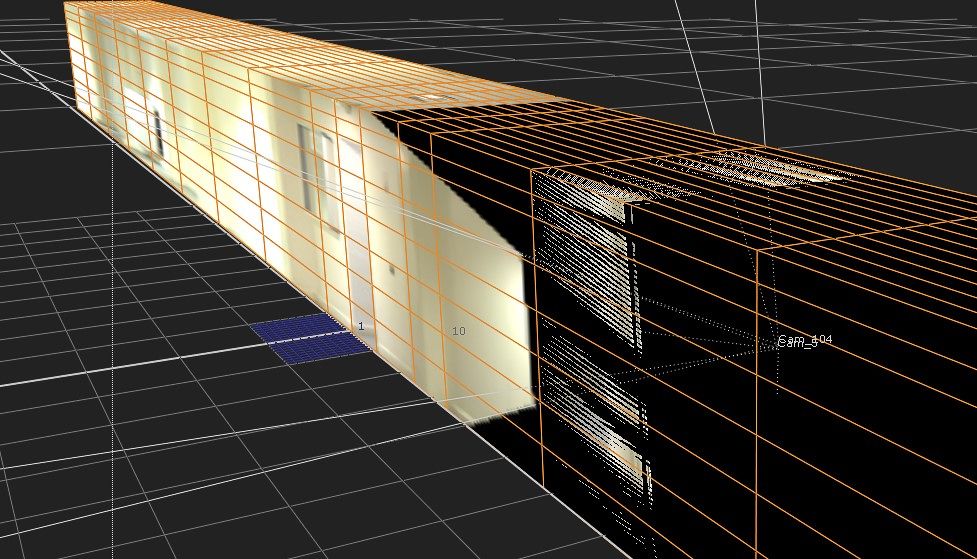
Another important shot in the film is the tracking shot where he opens the door multiple times, with the layout of the corridor changing. Multiple shots were taken with the actor positioned at different places. However, a low budget often means no motion control.
I utilized SynthEyes and Nuke to track each of the 5 selected shots and stabilise the results by projecting them inside an elongated box. Additional 2D tracking was employed to stabilise micro-movements and align the shots perfectly. Subsequently, I animated a virtual camera to re-render the projected plate for each shot. Finally, the actor's performance was rotoscoped and replaced in desired locations.
Conclusion
Curiosity has likely been the driving force behind my learning journey, compelling me to explore every facet of film craftsmanship. While the downside is that you can't do everything alone (which is actually for the better), the positive aspect lies in gaining a comprehensive understanding of the filmmaking process, enhancing adaptability, and fostering versatility—qualities that prove invaluable on small projects.
Through this project, I've come to realise how core skills like photography, music, and drawing have significantly influenced my approach to editing, 3D, VFX compositing, and filmmaking. Practicing photography and drawing has allowed me to observe how shadows add depth and dimensionality to an image, how composition fosters an eye for balance, how rhythm sets the mood, and how light behaves as it flows through a lens—bending, diffracting, spreading, and ultimately being captured by the camera. These insights are indispensable when integrating CGI into a scene.
Reach out to Clement via his Rookies profile here.