Interior Environment Creation in Unreal Engine 5
Álvaro Ferrándiz, a 3D Character Artist and Generalist, is a graduate of Lightbox Academy. Here, he shares his process of creating a Rustic Kitchen using the real-time Unreal Engine 5.
Álvaro Ferrándiz, a 3D Character Artist and Generalist, is a graduate of Lightbox Academy. Here, he shares his process of creating a Rustic Kitchen using the real-time Unreal Engine 5.

Álvaro Ferrándiz is a Spanish 3D generalist and recent graduate of Lightbox Academy. We loved his moody and rustic kitchen interior and asked him to share details of his workflow which involved using Unreal Engine 5. For Álvaro, this project was a necessary addition to his 3D Artist portfolio and one he worked on alongside his student work.
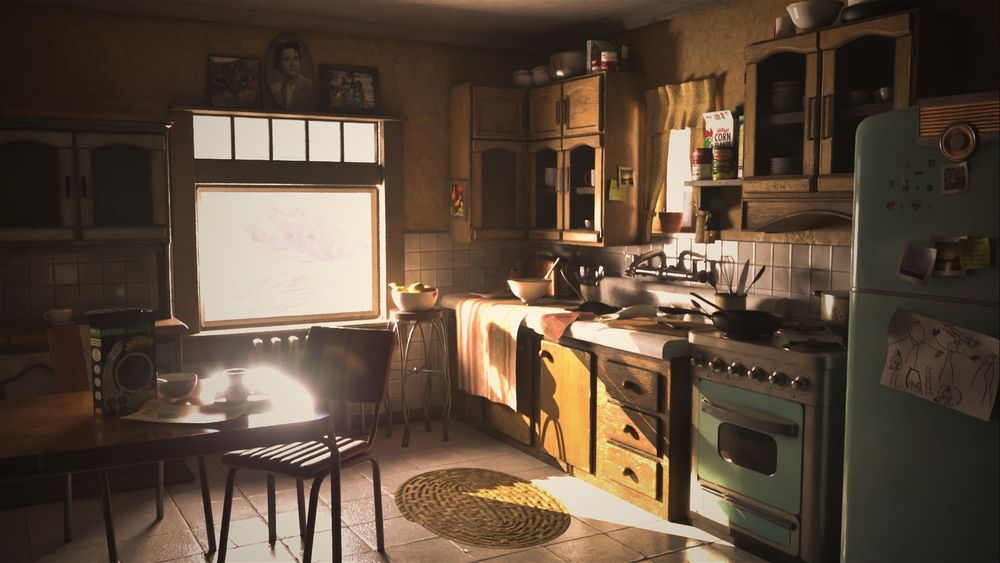
At first, I explored numerous concepts and similar projects, filling my PureRef with references to clarify my vision. Opting for a rustic theme enabled me to experiment with diverse textures and lighting, fostering a vibrant atmosphere in the kitchen. My goal was to convey the sense of a bustling family life through subtle scene elements, infusing the kitchen with vitality.

With my general references collected, I sought out specific props references to guide my modeling process in Blender. As this was a side project alongside my main workload, I didn't devote a lot of time to pre-production; it served as a refreshing break from organic modeling, allowing me to explore new techniques.
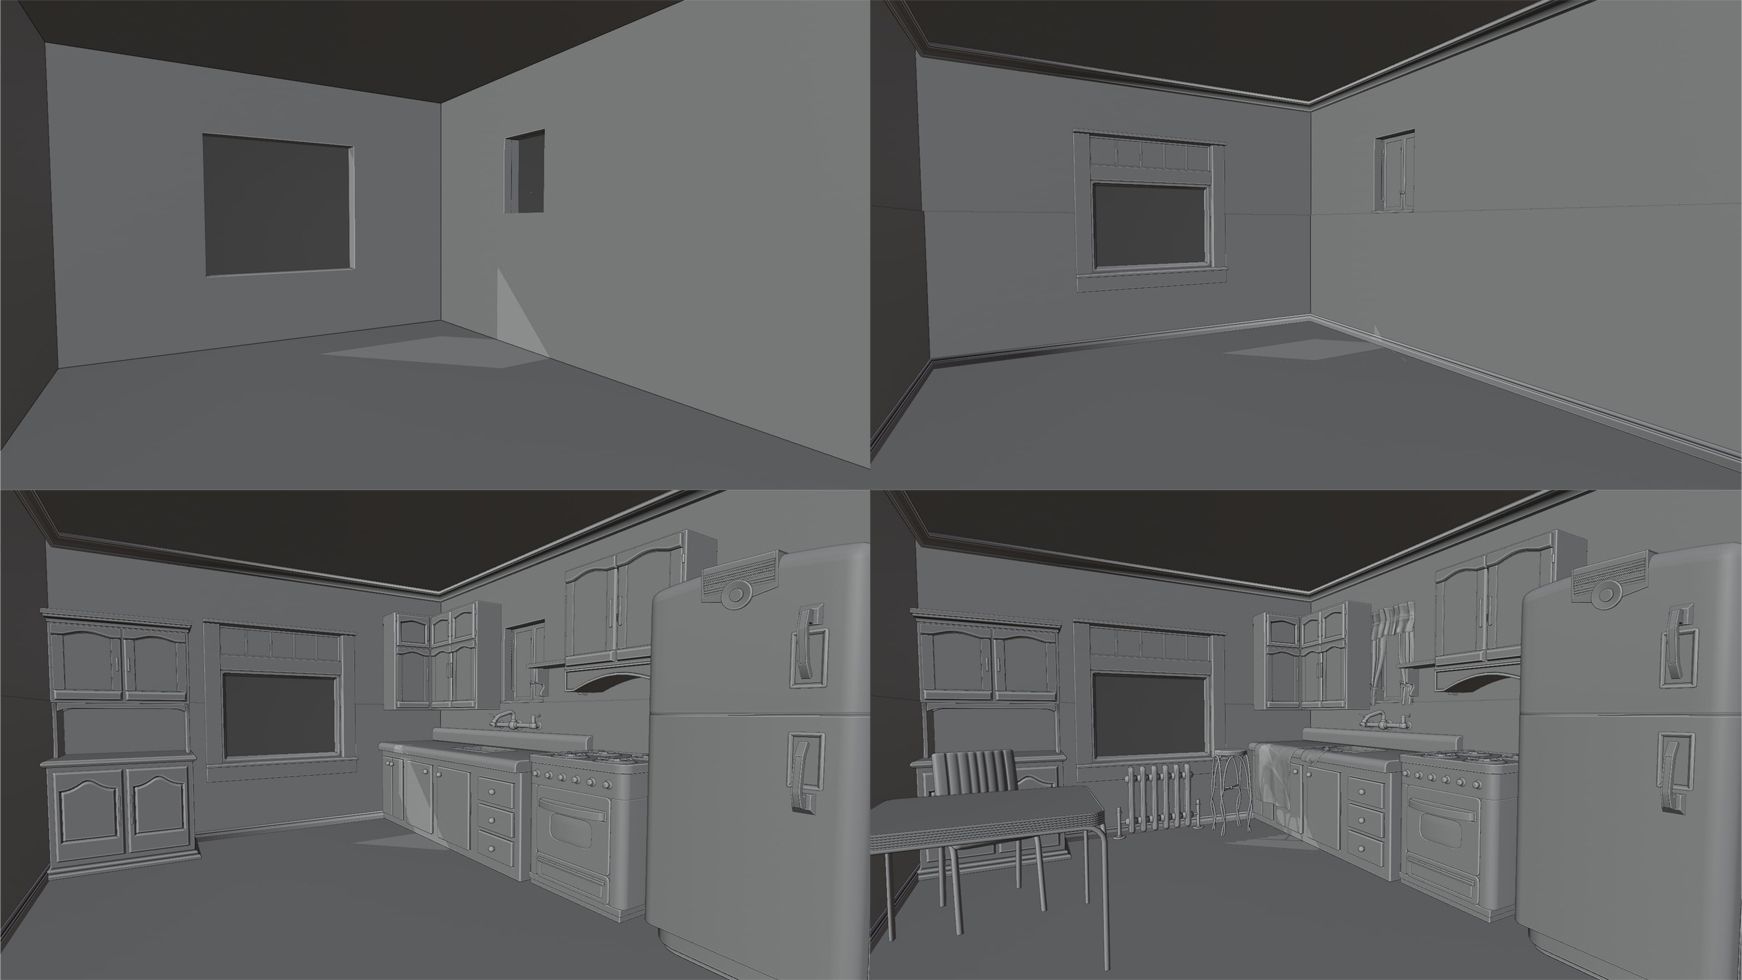
Returning to Blender after a while, I appreciated its non-destructive modeling capabilities, which streamlined my workflow. I began by modeling the room, ensuring proportions and measurements were accurate to maintain consistency across all props. Employing a blockout approach, I sculpted the basic shapes of each asset, refining them by section to optimise polycount and streamline the process. Symmetrical props benefited from the mirror modifier, while a bevel modifier enhanced edge definition. To further optimise, I deleted inner faces and organised assets into collections for efficient management. Despite initial challenges with the blockout, incremental progress brought my vision closer to realization.
I wanted to see how it would look in Unreal with all the main props. So, I worked on my UVs and textures to import them as soon as I can in the graphic engine.
I wanted to be precise with the scene's optimisation. I focused mainly on the textures to get the most resolution from each. This is key because the one of the main limit in modern video games is VRAM, sometimes even more important than polycount.
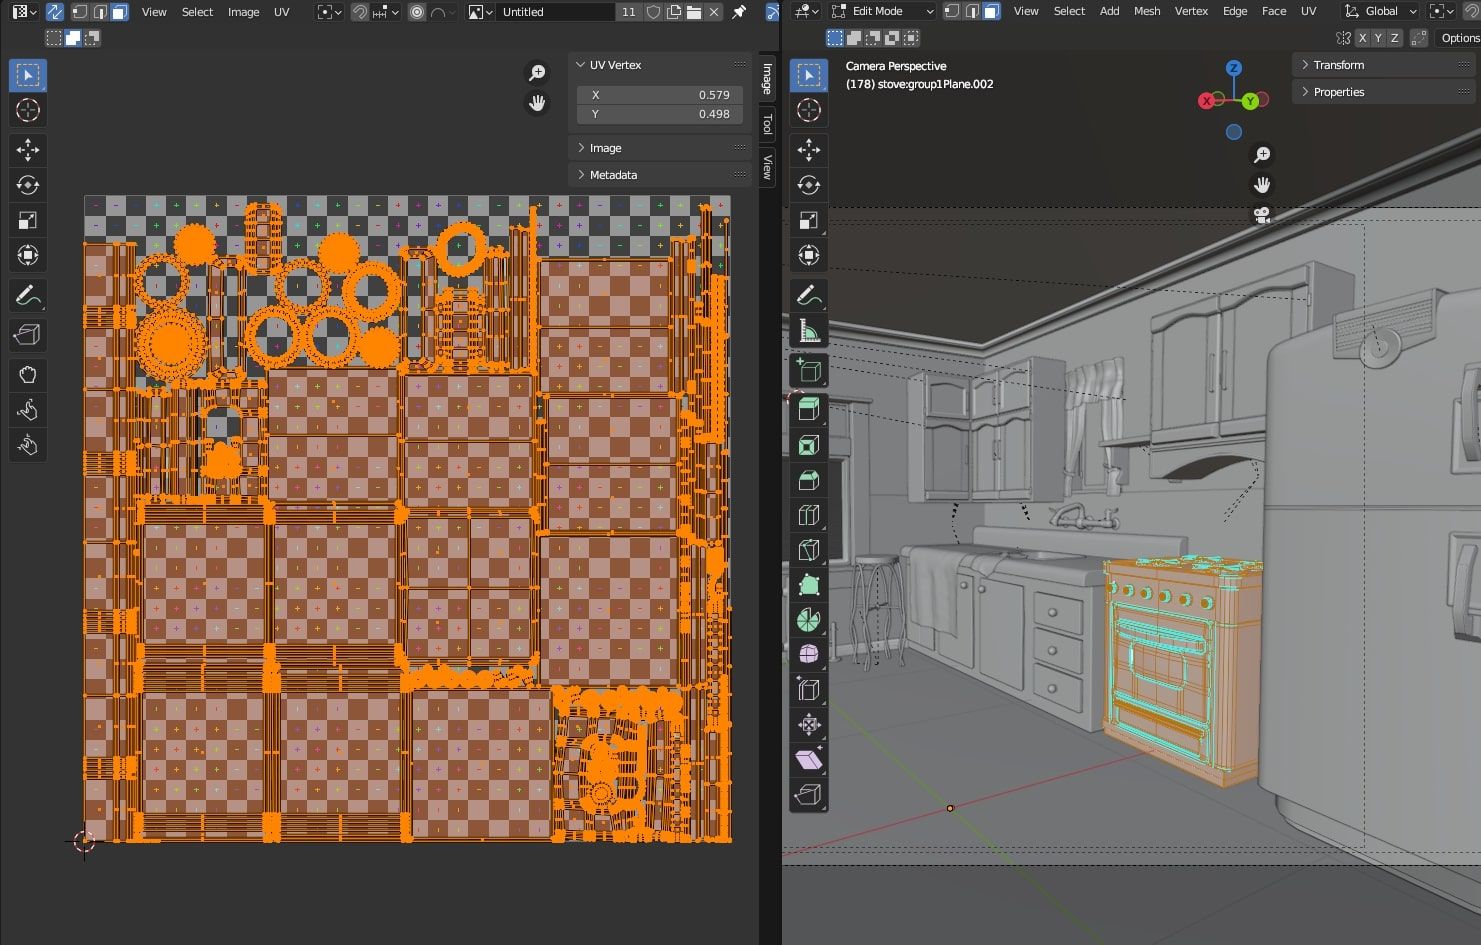
Blender is not the most friendly program to make UVs in, but I wanted to keep all the work in the same place so I tried the best I could. I kept some props in the same UV to reduce the number of textures.
I aimed to maintain uniformity among my UV islands. Upon unwrapping, some pieces exhibited undesirable shapes, which I rectified using the "follow active quads" option, occasionally requiring manual adjustments. Upon completion, I meticulously packed the UV islands, ensuring minimal empty space to optimize resolution. Additionally, I paid close attention to rotation and orientation of the UVs, crucial for ensuring consistency in texture application, particularly evident with materials like wood where irregular UVs can distort fiber appearance.
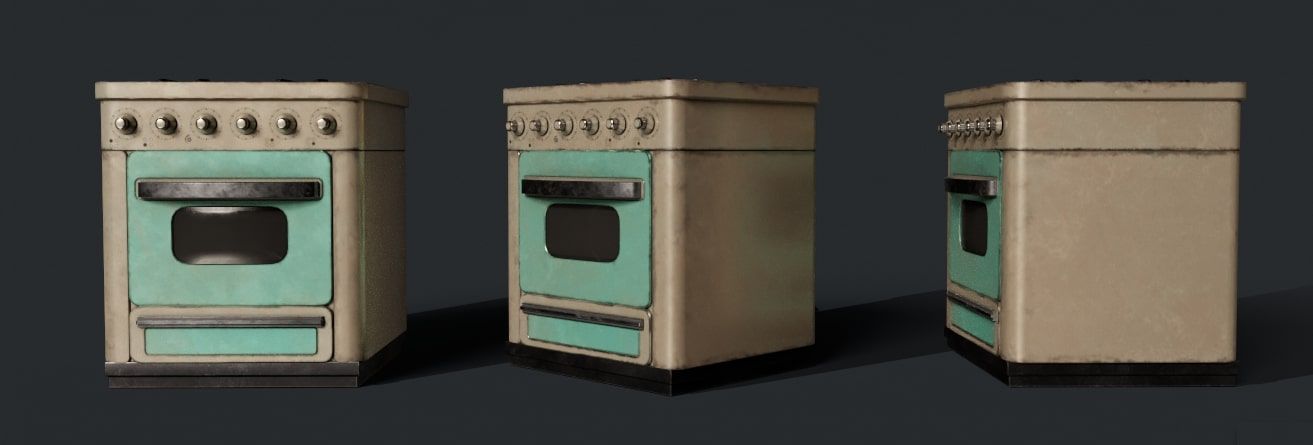
With this done I imported everything into Substance 3D Painter and I kept working on the first props. Honestly, I enjoy the texturing process a lot, so I spent time exploring new options and playing with the materials.
The workflow I followed for this is simple. I began with a base colour, then introduced variations through masked fills. Following this, I applied patterns where necessary for the material. Subsequently, I introduced imperfections such as rust or dust, employing various masks influenced by curvature, cavity, and ambient occlusion maps. Additional details were either hand-painted or incorporated using alphas and projections.
After finishing the colour, I prefer to handle roughness in separate layers for better control and organisation. I begin with a base and then incorporate fills for rust, dots, and other details. Once completed, I apply a paint layer with a passthrough blend mode. Following this, I include a Contrast Luminosity filter to adjust the final roughness level and contrast.

The textures were not ready until almost the end of the project. I kept working on them as I changed the lighting in Unreal to adjust to my colour palette and needs.
I created different kinds of smart materials that worked with all the different props. Other objects like the table were more challenging. I couldn’t find all the references I wanted to work on them but I’m very happy with the final result.
With all done, I exported my textures with the Unreal presets. What this preset does is export the AO, roughness and metallic in only one texture that uses RGB Channels. In Unreal, you set up the red channel for AO, green for roughness, and blue for metallic. This is very useful for optimisation because you load only one texture instead of 3.

Some props required more channels, like the shelves that had transparency, so I exported them manually to Unreal Engine.
At this point, I created the Unreal project and imported all the assets with their textures. With this done, I could see how things were turning out. I started to work a bit on the lighting to see how the scene's mood would evolve. These first passes were a little sad because the scene felt quite empty.
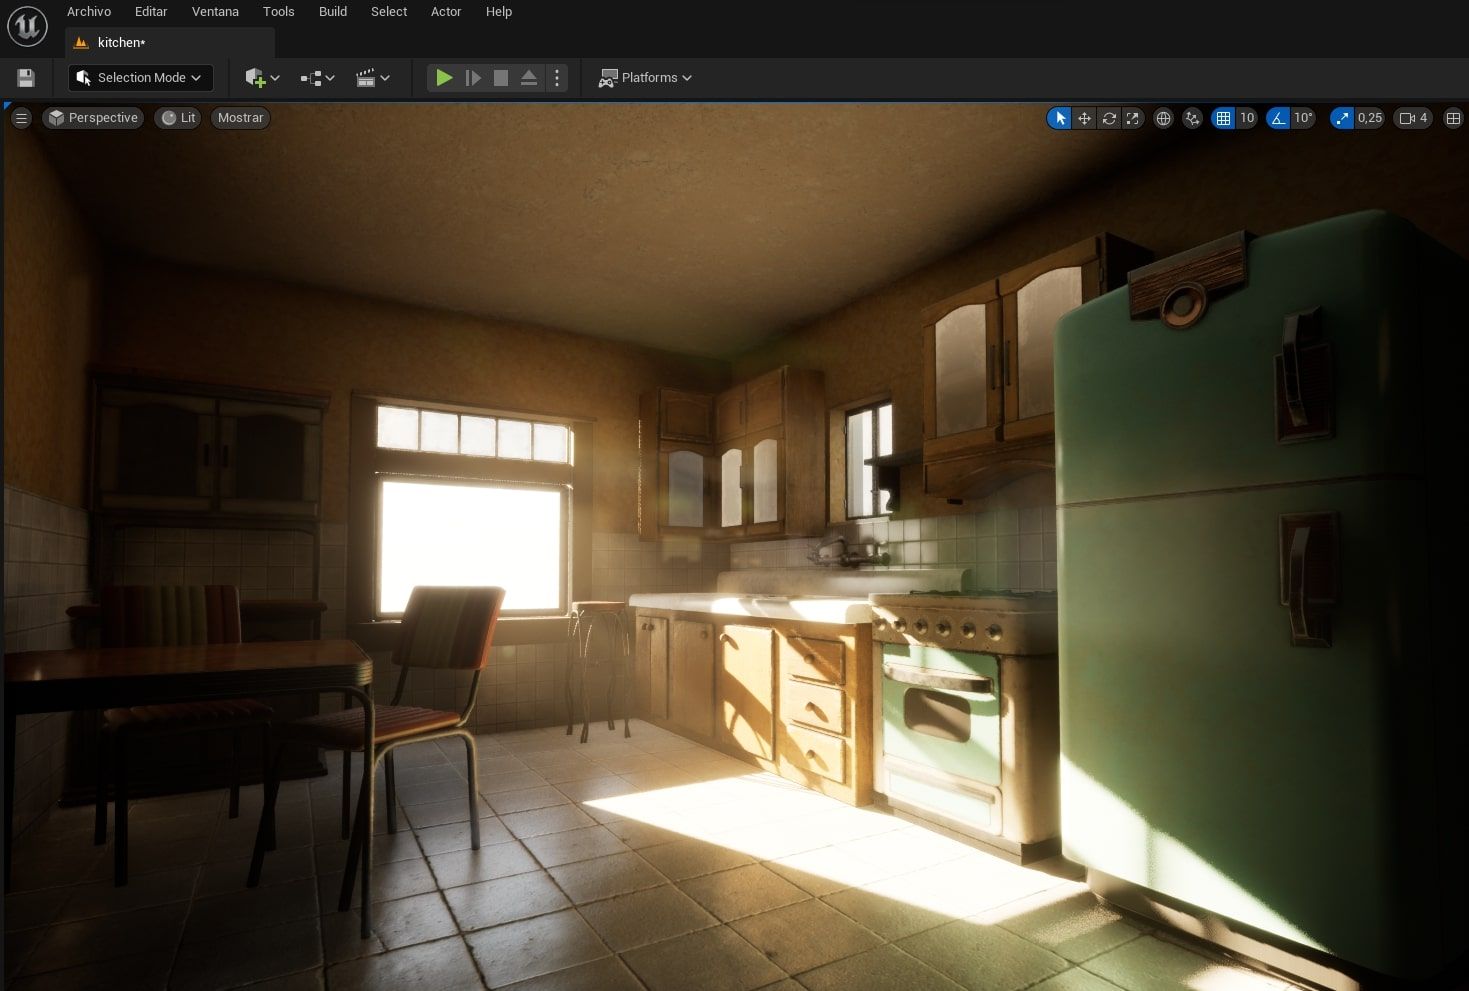
I focused on other aspects first as I knew it was far from finished. I kept configuring other values like the camera, post-process effects, fog, and added more light to enrich the scene.
I tweaked my lumen settings in the PostProcess to enhance the shadows, improve reflections, and incorporate volumetric lighting. Although I attempted to introduce a god ray across the scene, the camera angle didn't capture it as intended, requiring extensive adjustment of the fog parameters. Due to the scene appearing somewhat dark with only directional light, I supplemented it with Rect Lights in the windows to mitigate shadows and enhance reflections, significantly enhancing the overall lighting.

At this stage, I activated the raytraced shadows in my Unreal project settings, resulting in smoother shadows. However, this adjustment necessitated tweaks to the lighting to maintain the desired atmosphere in the kitchen. I discovered Lumen to be quite powerful. Real-time control over lighting is invaluable; it eliminates the need to render the scene to assess progress, thereby accelerating production, and yielding impressive results.
I started by modeling the small props that populate the scene, intending to visually convey the liveliness of the household, indicative of a family with children. This is evident in details like the superhero-themed cup, cereal boxes, drawings on the table, and the photos adorning the fridge. The rustic ambiance evokes a sense of a close-knit family living in a village, perhaps even with grandparents in the mix. Fortunately, the modeling of these objects was relatively straightforward; I didn't need to create numerous props since some could be duplicated within the scene, aiding project optimisation.

For these objects, I utilised the references collected during the pre-production phase as a base for modeling. I began with simple shapes; cylinders for plates and cups, and planes for forks and tables. Some objects, like pans, were subdivided into parts, but before UV unwrapping, I consolidated them to maintain scene organization.
Texturing was divided into two sets. Some elements reused smart materials I had previously created, while others, like drawings or photos, involved projecting images onto them. Within these, I included hidden references to my supportive friends who often inspire my work.

With everything completed, I only needed to import them into the project and position them within the scene. To achieve a sense of organized chaos, I scattered them randomly, filling shelves with crockery and the table with knives, plates, and forks. Additionally, I strategically placed pictures in areas that felt a bit empty.

With this done, I solved the main problem of the last phase. The scene didn't feel empty anymore and gave the vibes of a place full of life but also peaceful at the sunset.
In this final phase of the project, I completed adjustments to certain texture parameters. This involved elements of the scene with transparency, such as the glass of the shelves, and subsurface properties, like blinds and tablecloths.
I fine-tuned all lighting parameters available in Unreal for Lumen, including global illumination, shadows, and reflections. At this juncture, I captured some renders using Lumen alongside the Path Tracing option.

I noticed that path tracing yielded better results in terms of shadows and metallic surfaces, offering a more realistic contrast of light. The glass shelves appeared more transparent with better reflections, though it darkened the cabinets. Table reflections were sharper and more detailed, and overall light interaction with the room improved, enhancing the floor and roof. However, I experienced a loss of control over illumination.

Lumen, on the other hand, preserved the scene's essence and provided volumetric lighting, eliminating the need for manually creating god rays. However, metallic surfaces appeared darker and less realistic, and table reflections were pixelated. Some prop shadows were either overly blurred or missing. Despite its drawbacks, I still preferred the Path Tracing method due to its superior surface realism, although it required more rendering time and lacked real-time capabilities.
In the end, I decided to render using both methods to compare their differences.
This project taught me valuable lessons in working with graphics engines, managing polycounts and UVs, and utilising Unreal Engine 5, Lumen illumination, and Path Tracing. It also served as a space for me to disconnect from my other character project and experiment with different techniques and programs.
Before this, I used to focus on only one project, and sometimes that gave me mental breakdowns. So, to people like me, try new things, give the projects some time, and practice other skills. You will see how you come back with new eyes, perspective, and maybe knowledge that you will find useful.
I hope that you enjoyed this breakdown of my Rustic Kitchen. I enjoyed working on this project. Thanks to The Rookies for giving me the opportunity to share it with you.
If you like my work you can check my The Rookies profile here.