A Quick Guide on Creating 3D Character for Games
Ivan Ho, a 3dsense Media School graduate and former Rookie Awards entrant, shares tips on crafting 3D characters from references. Get inspired for your next project!
Ivan Ho, a 3dsense Media School graduate and former Rookie Awards entrant, shares tips on crafting 3D characters from references. Get inspired for your next project!
Ivan Ho is a graduate of 3dsense Media School and a previous Rookie Awards entrant. We came across his student portfolio again recently and asked him to share a few tips for creating a 3D Character from a reference. Check this article out for a bit of inspiration as you approach your next character piece.
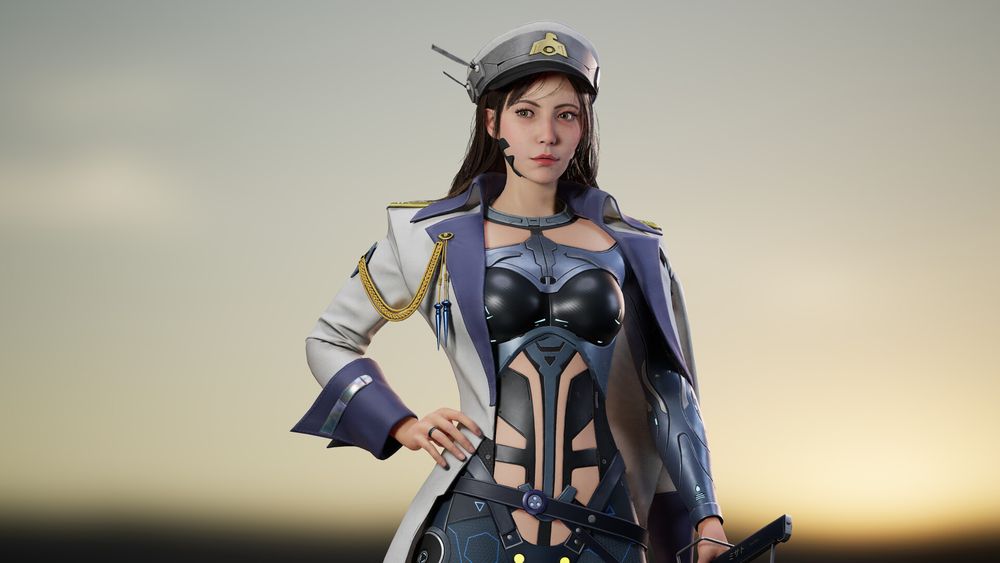
Hey everyone, I’m Ivan Ho, a 3D Artist based in Singapore. I am honored to have received an invitation from The Rookies to share my process of creating my character with all of you. This project is my entry for the Artstation Neo Tokyo challenge. I picked the concept art from the amazing Robin Hu.
Here are some of the useful pointers and tips that I've learnt throughout my journey as a 3D artist which greatly helped improve my creations to the next level. I hope that by sharing these, I can help inspire fellow artists around.

Searching for references is a crucial step at the start of each project. Having references helps to give me a better understanding of what I am creating and makes the asset more believable. I used PureRef to gather the relevant images.

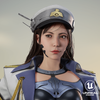
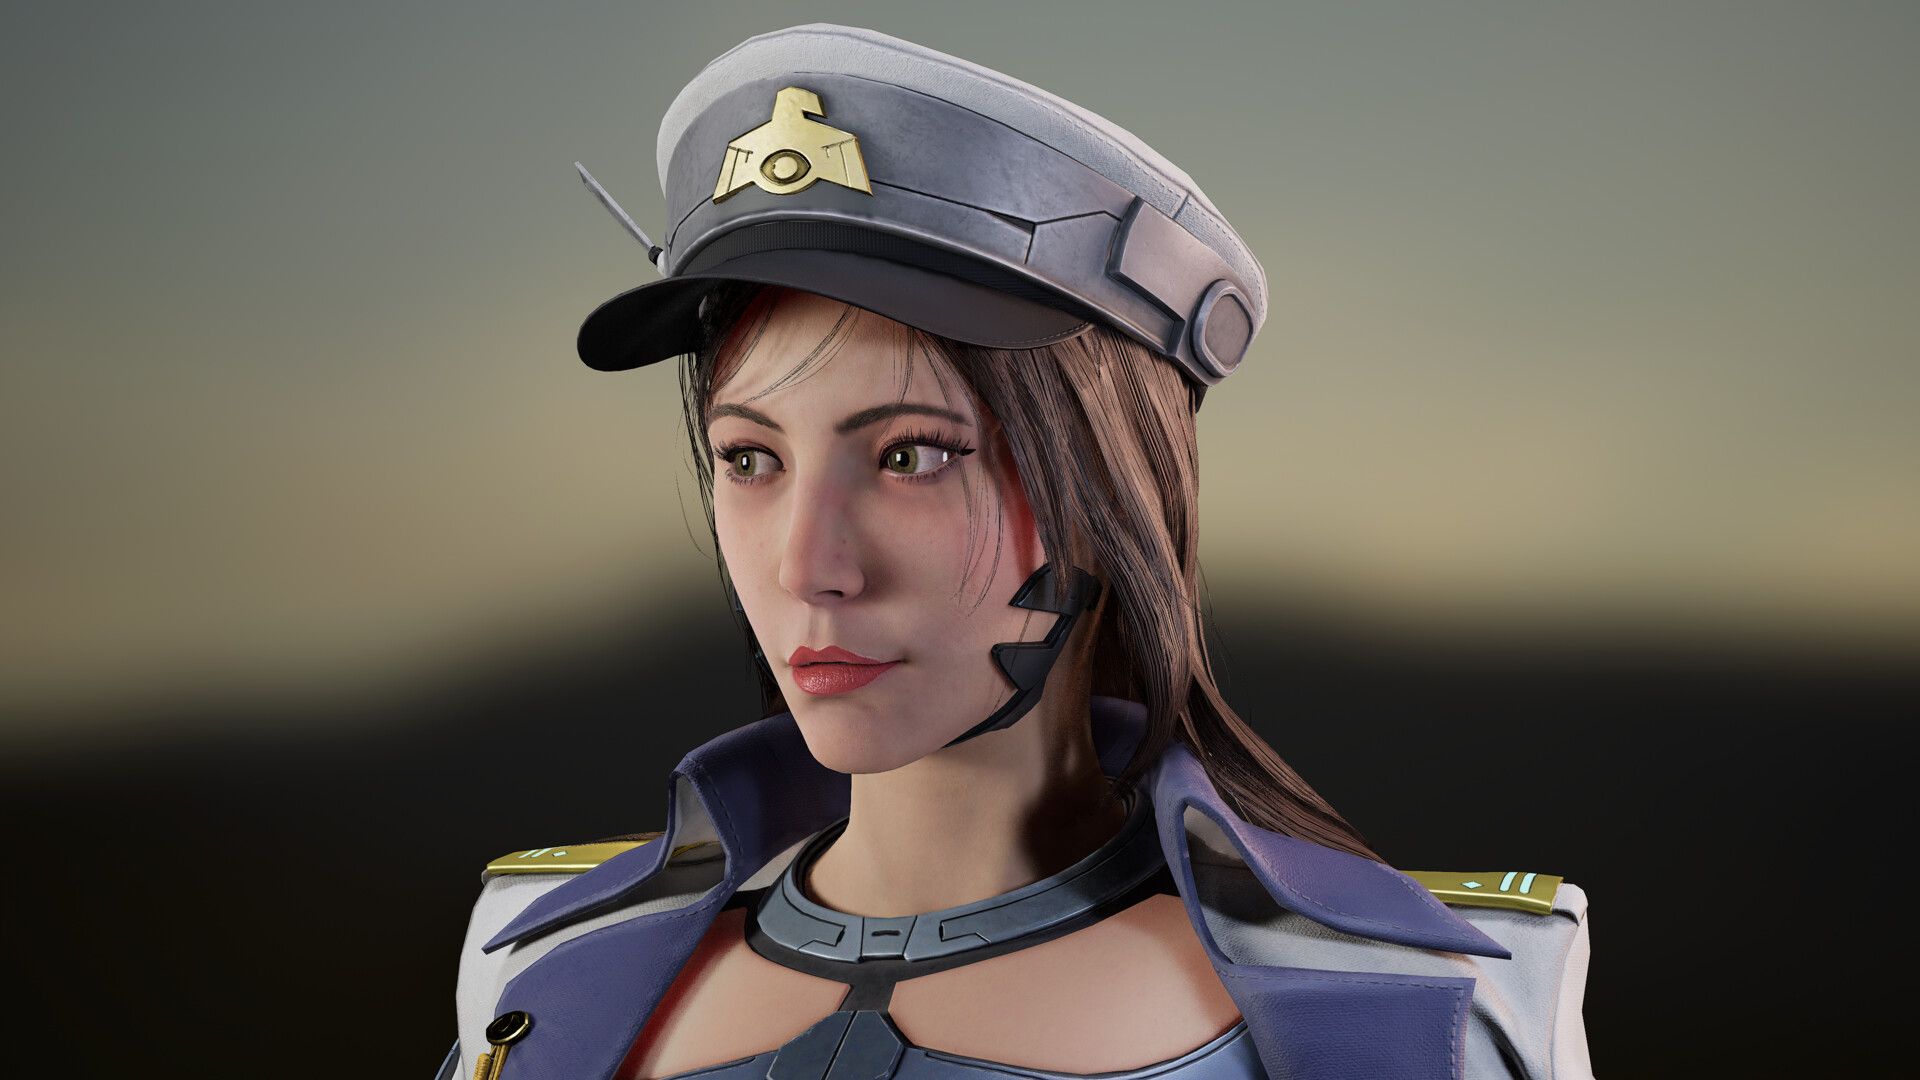
I explored a different workflows, by using metahumans from Unreal Engine as the base mesh for the character. By using the metahuman mesh, the majority of forms and proportion is established and the rest is tweaked to match the concept. From there, I started sculpting the face, referencing general Japanese female faces that I felt looked similar to the concept.

I masked areas and extracted them for the base of the clothing. I did a blockout of the clothing and did a quick uv unwrap. I used the unwrapped UVs as a reference for creating shirt patterns in Marvelous Designer. I like this workflow as it eliminates wondering how a shirt pattern will look like from scratch. mar

I did some adjustments to achieve the results that I liked, and exported it back to ZBrush for more detail sculpting.

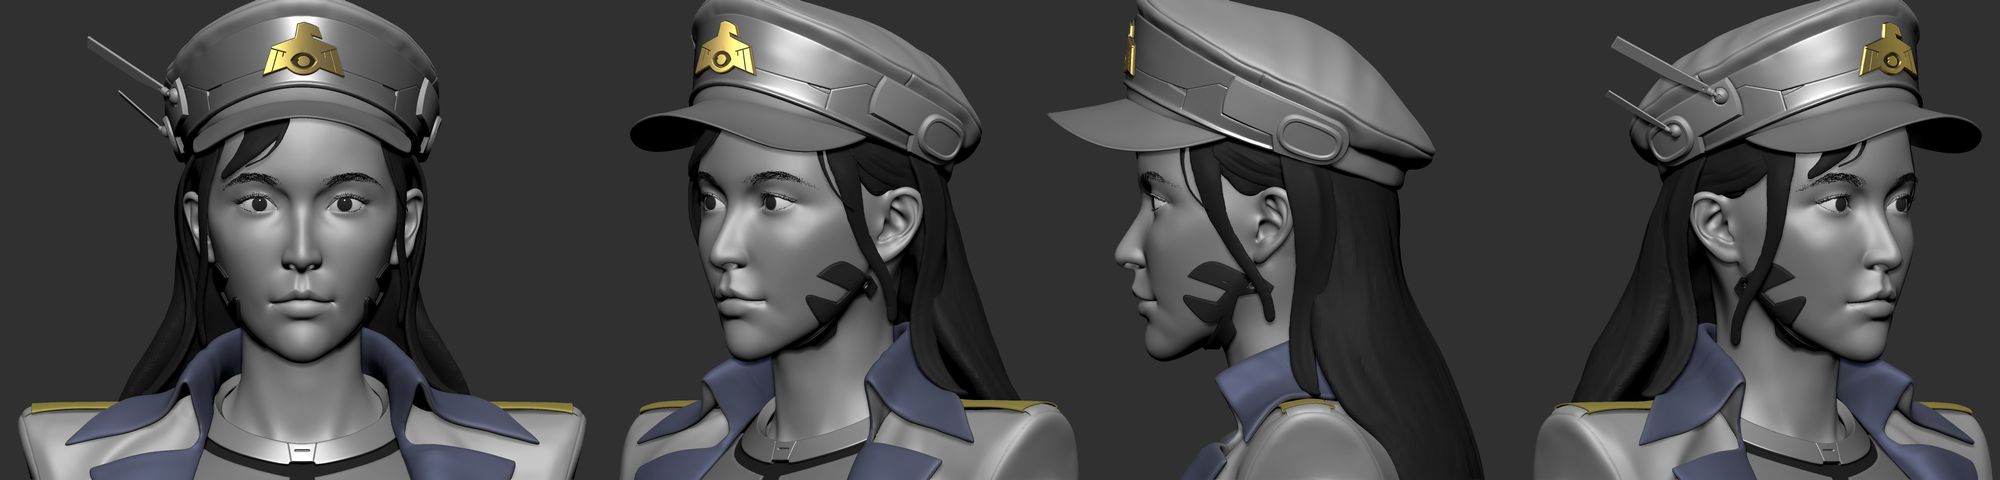
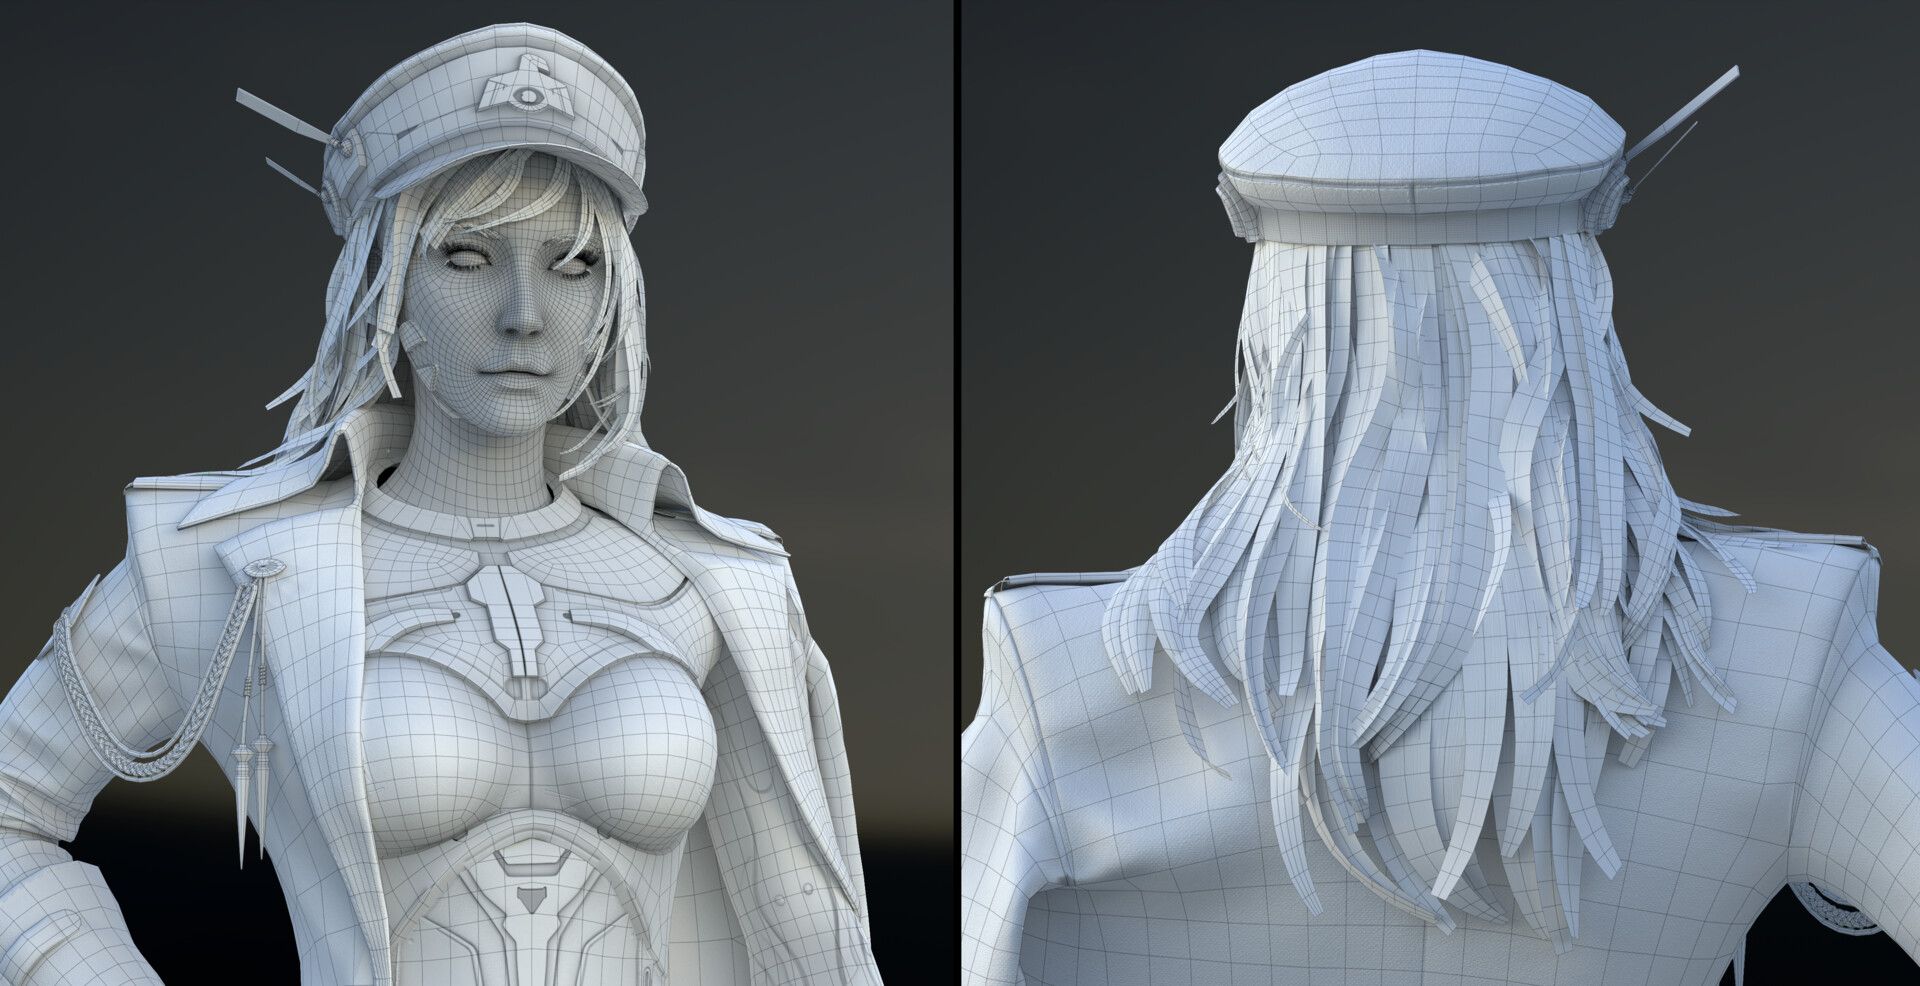
Retopology was mostly done using the Quad Draw tool in Maya, while some simpler meshes could be easily retopologise in ZBrush using the ZRemesher tool. There are restrictions for the challenge, which was a limit of 100k tris, and 2 x 4k texture maps. I made sure to make full use of vertices and that important silhouette or shapes must be shown in the model.
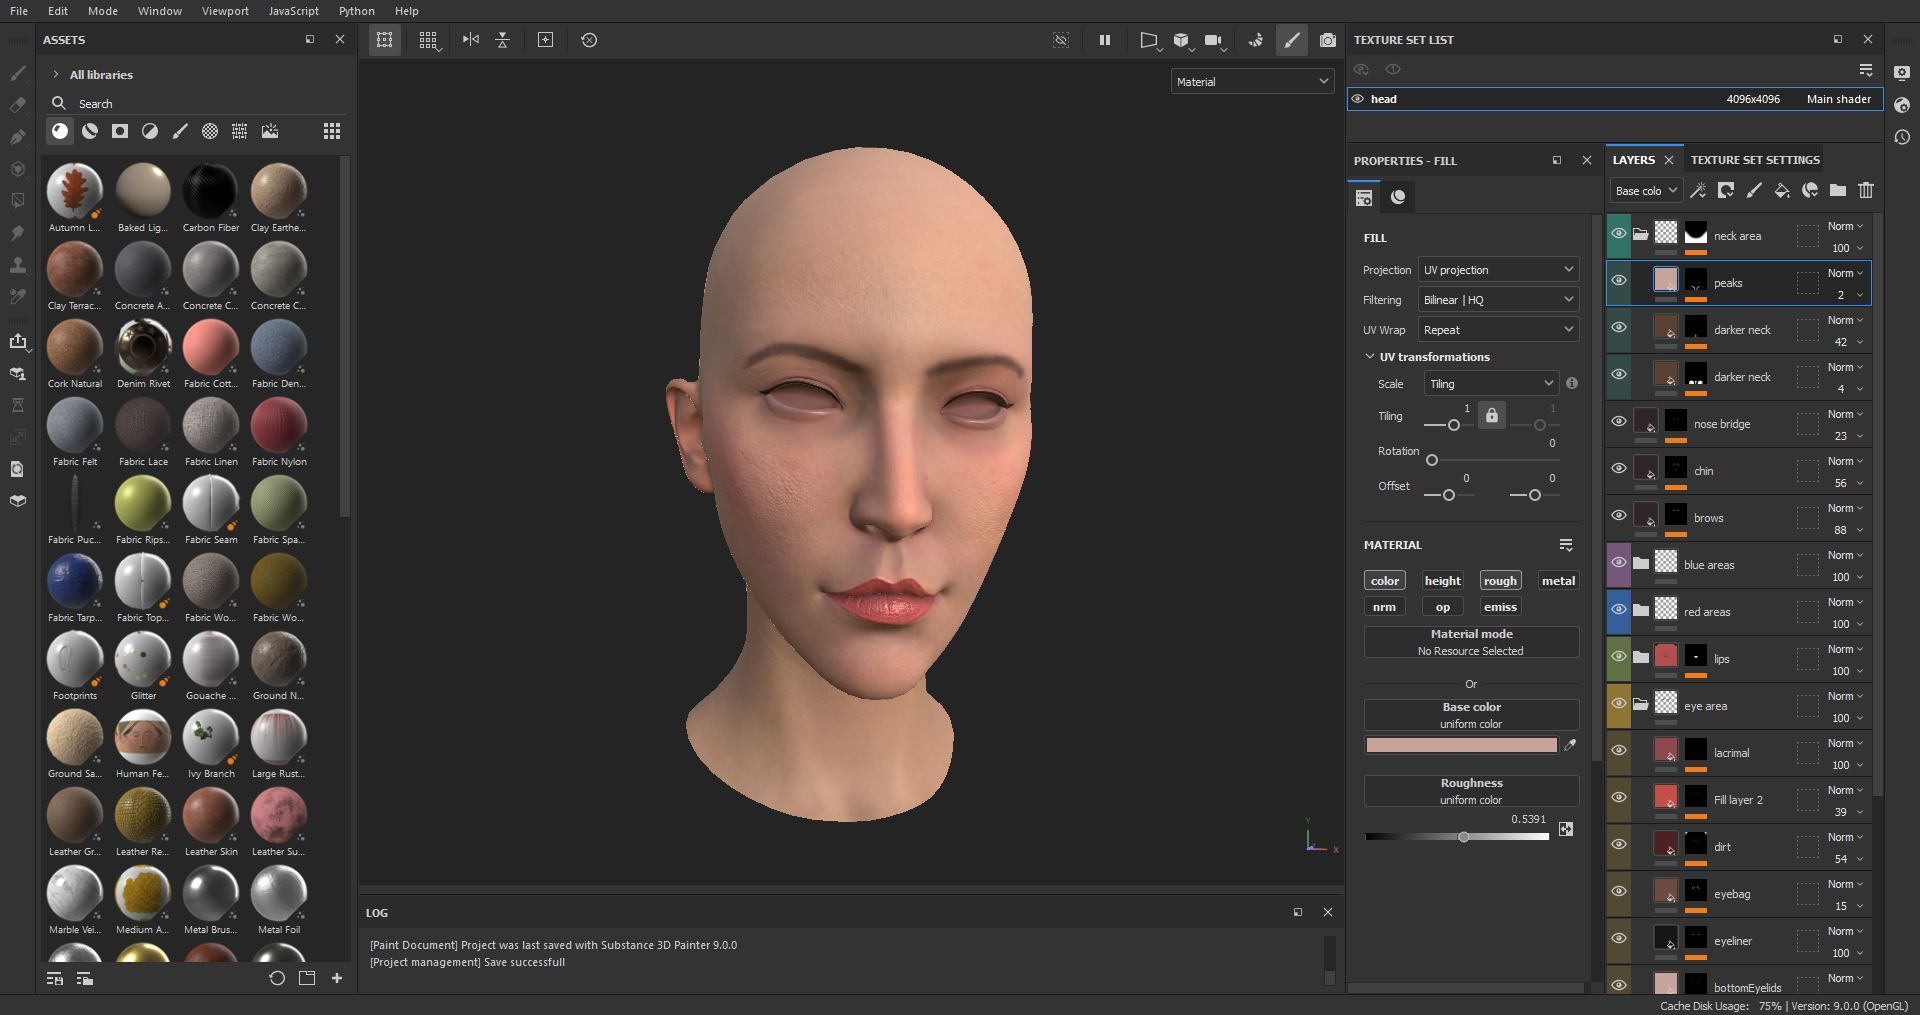
Since there was a limit of 2 x 4k texture maps, I decided to dedicate one map fully on her head. And the rest of the character utilised 2k and 1k maps.


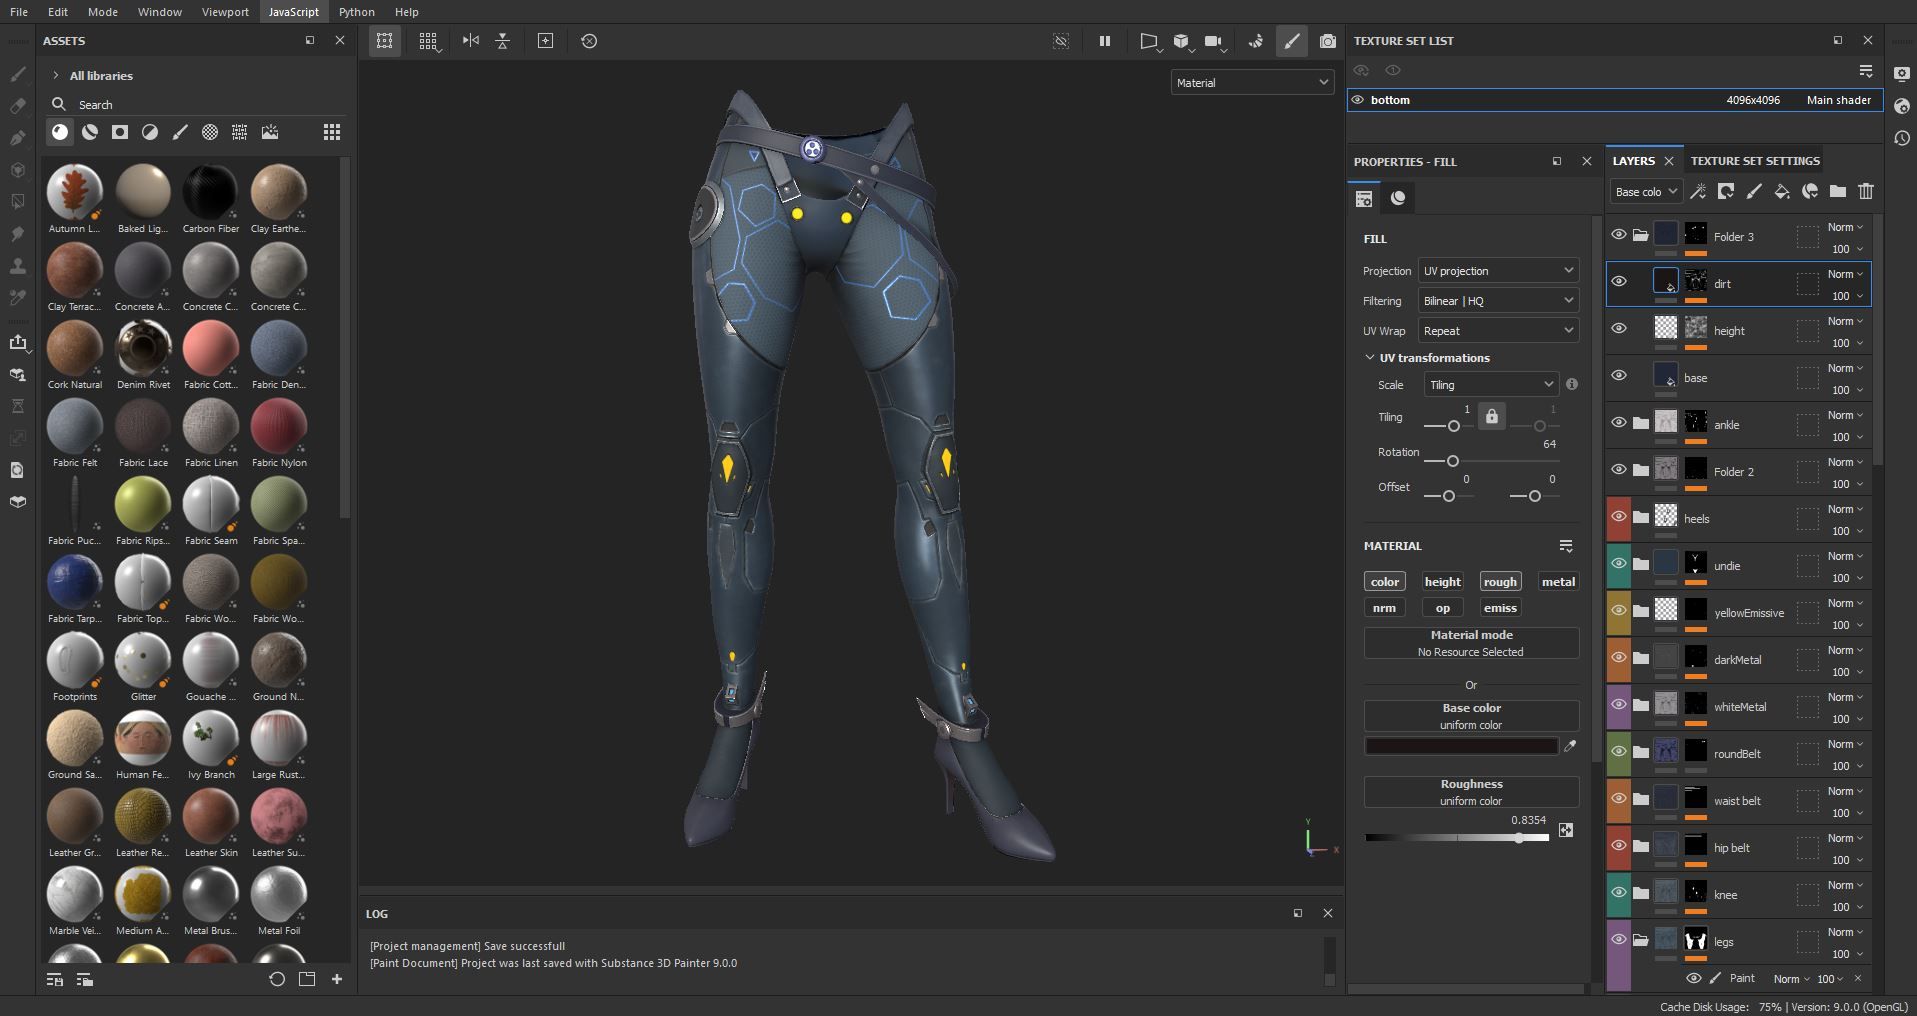
For the creation of textures, I used Substance 3D Painter.
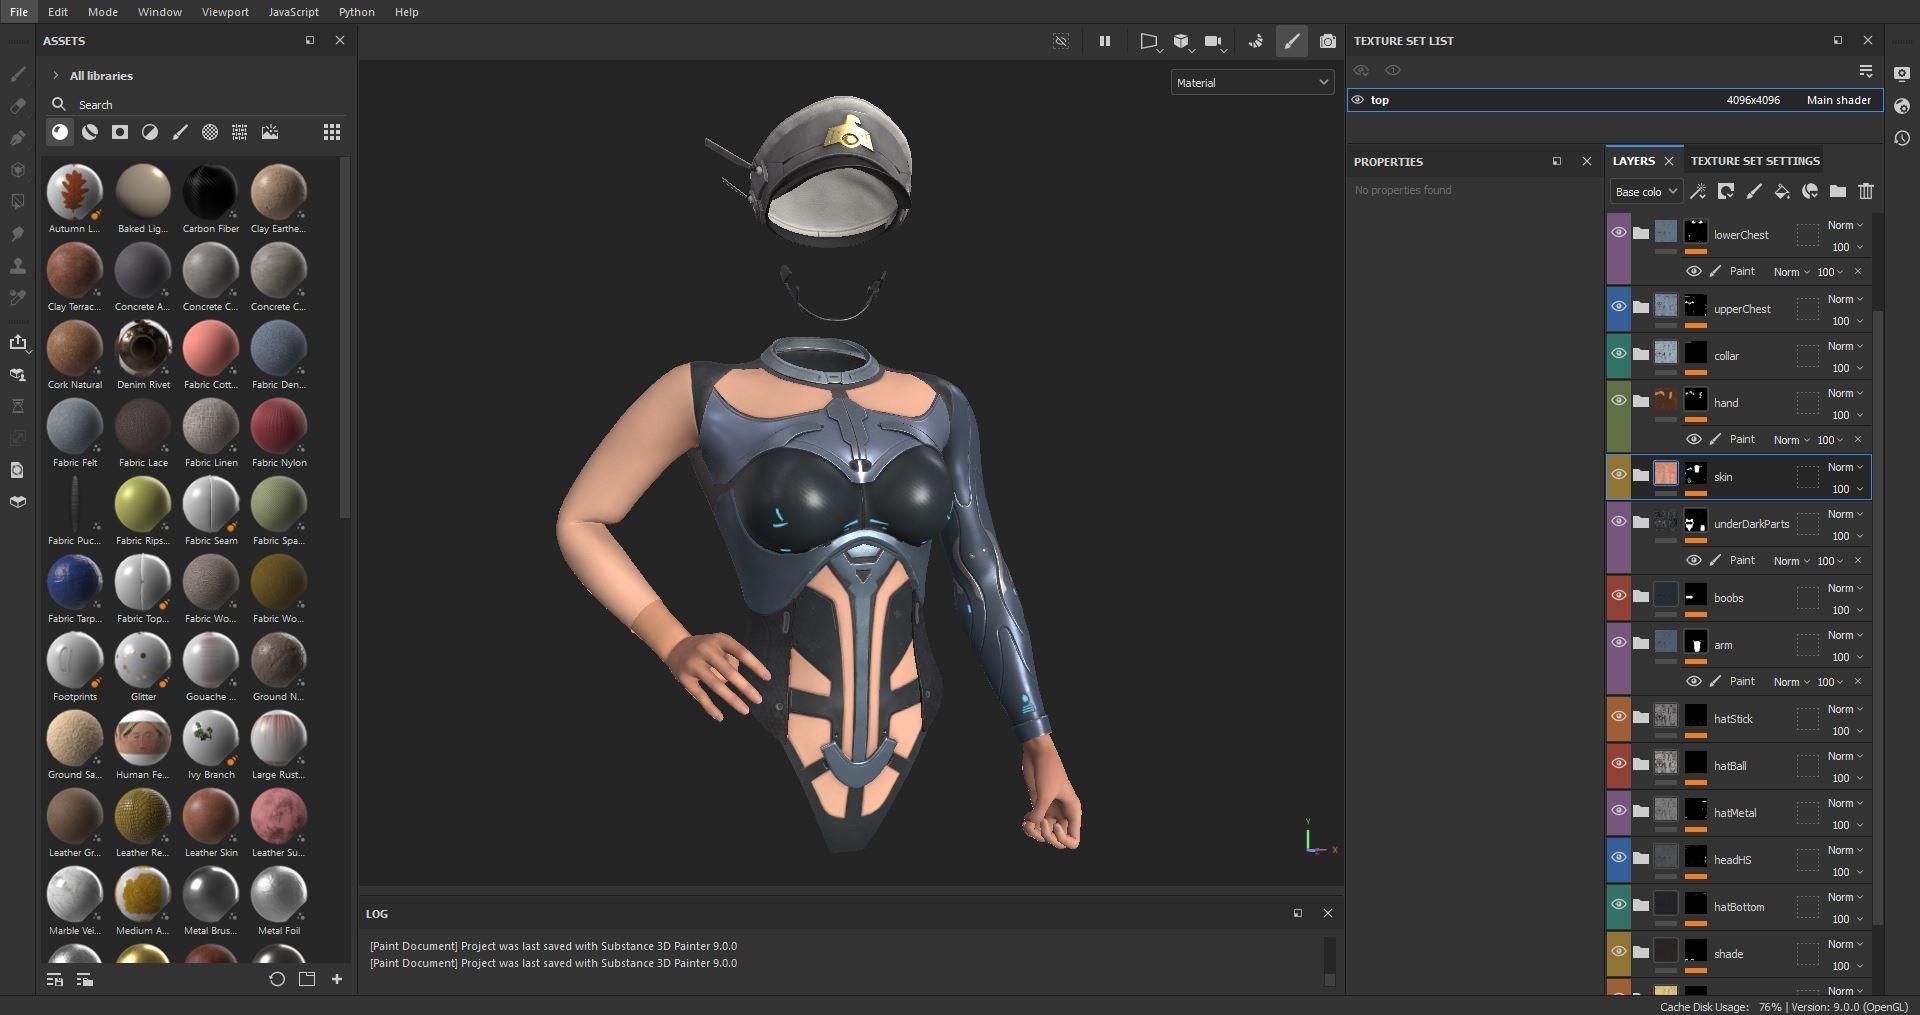
During this project, I learnt one useful technique for creating more realistic materials. The base colours for each material is not as simple as a lighter or darker shade of a certain colour, but more of a warmer and cooler tone mixed together.
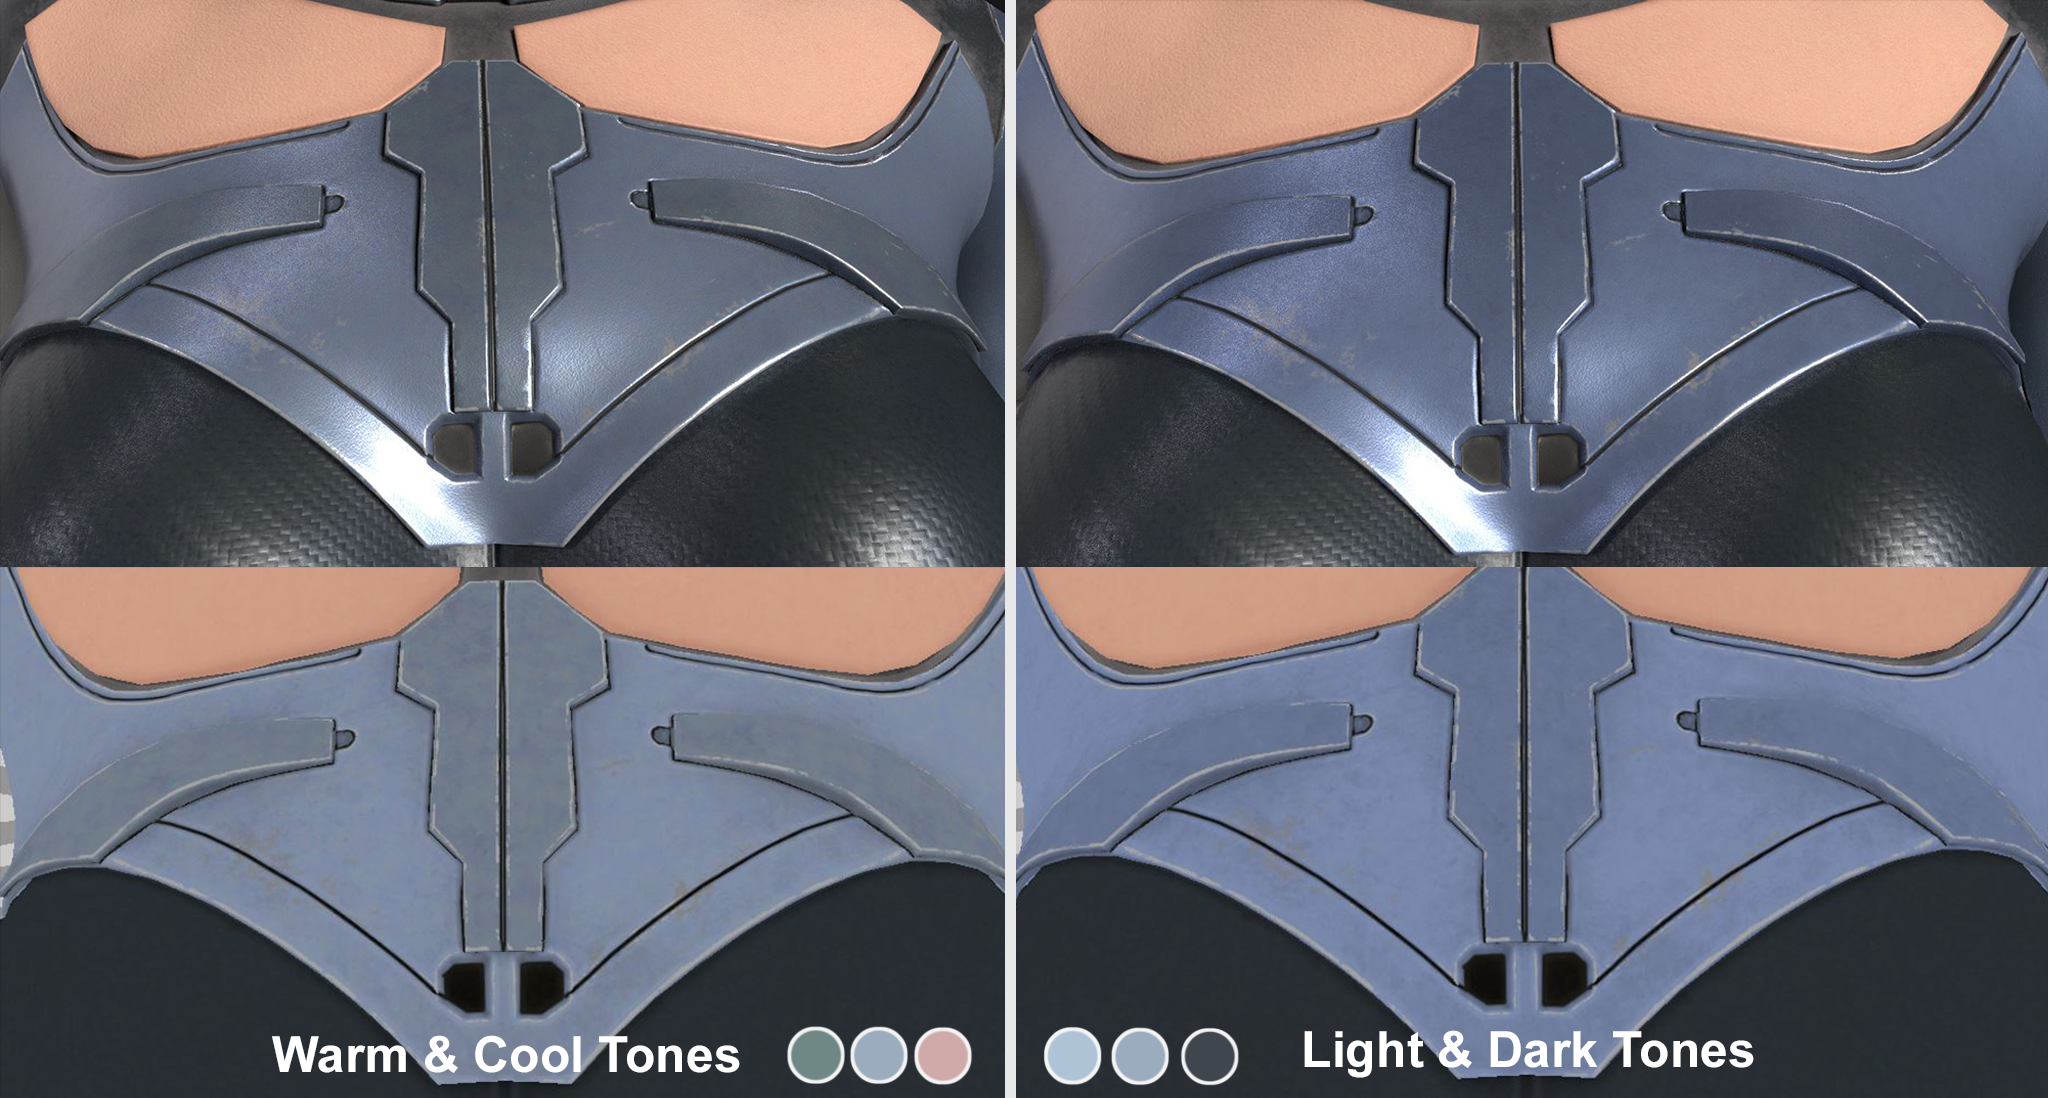
For example, the metal material here shows that there is a main base colour, followed by one variation of warmer tone, and one variation of cooler tone. This mixture helps to create a more realistic texture in my opinion.

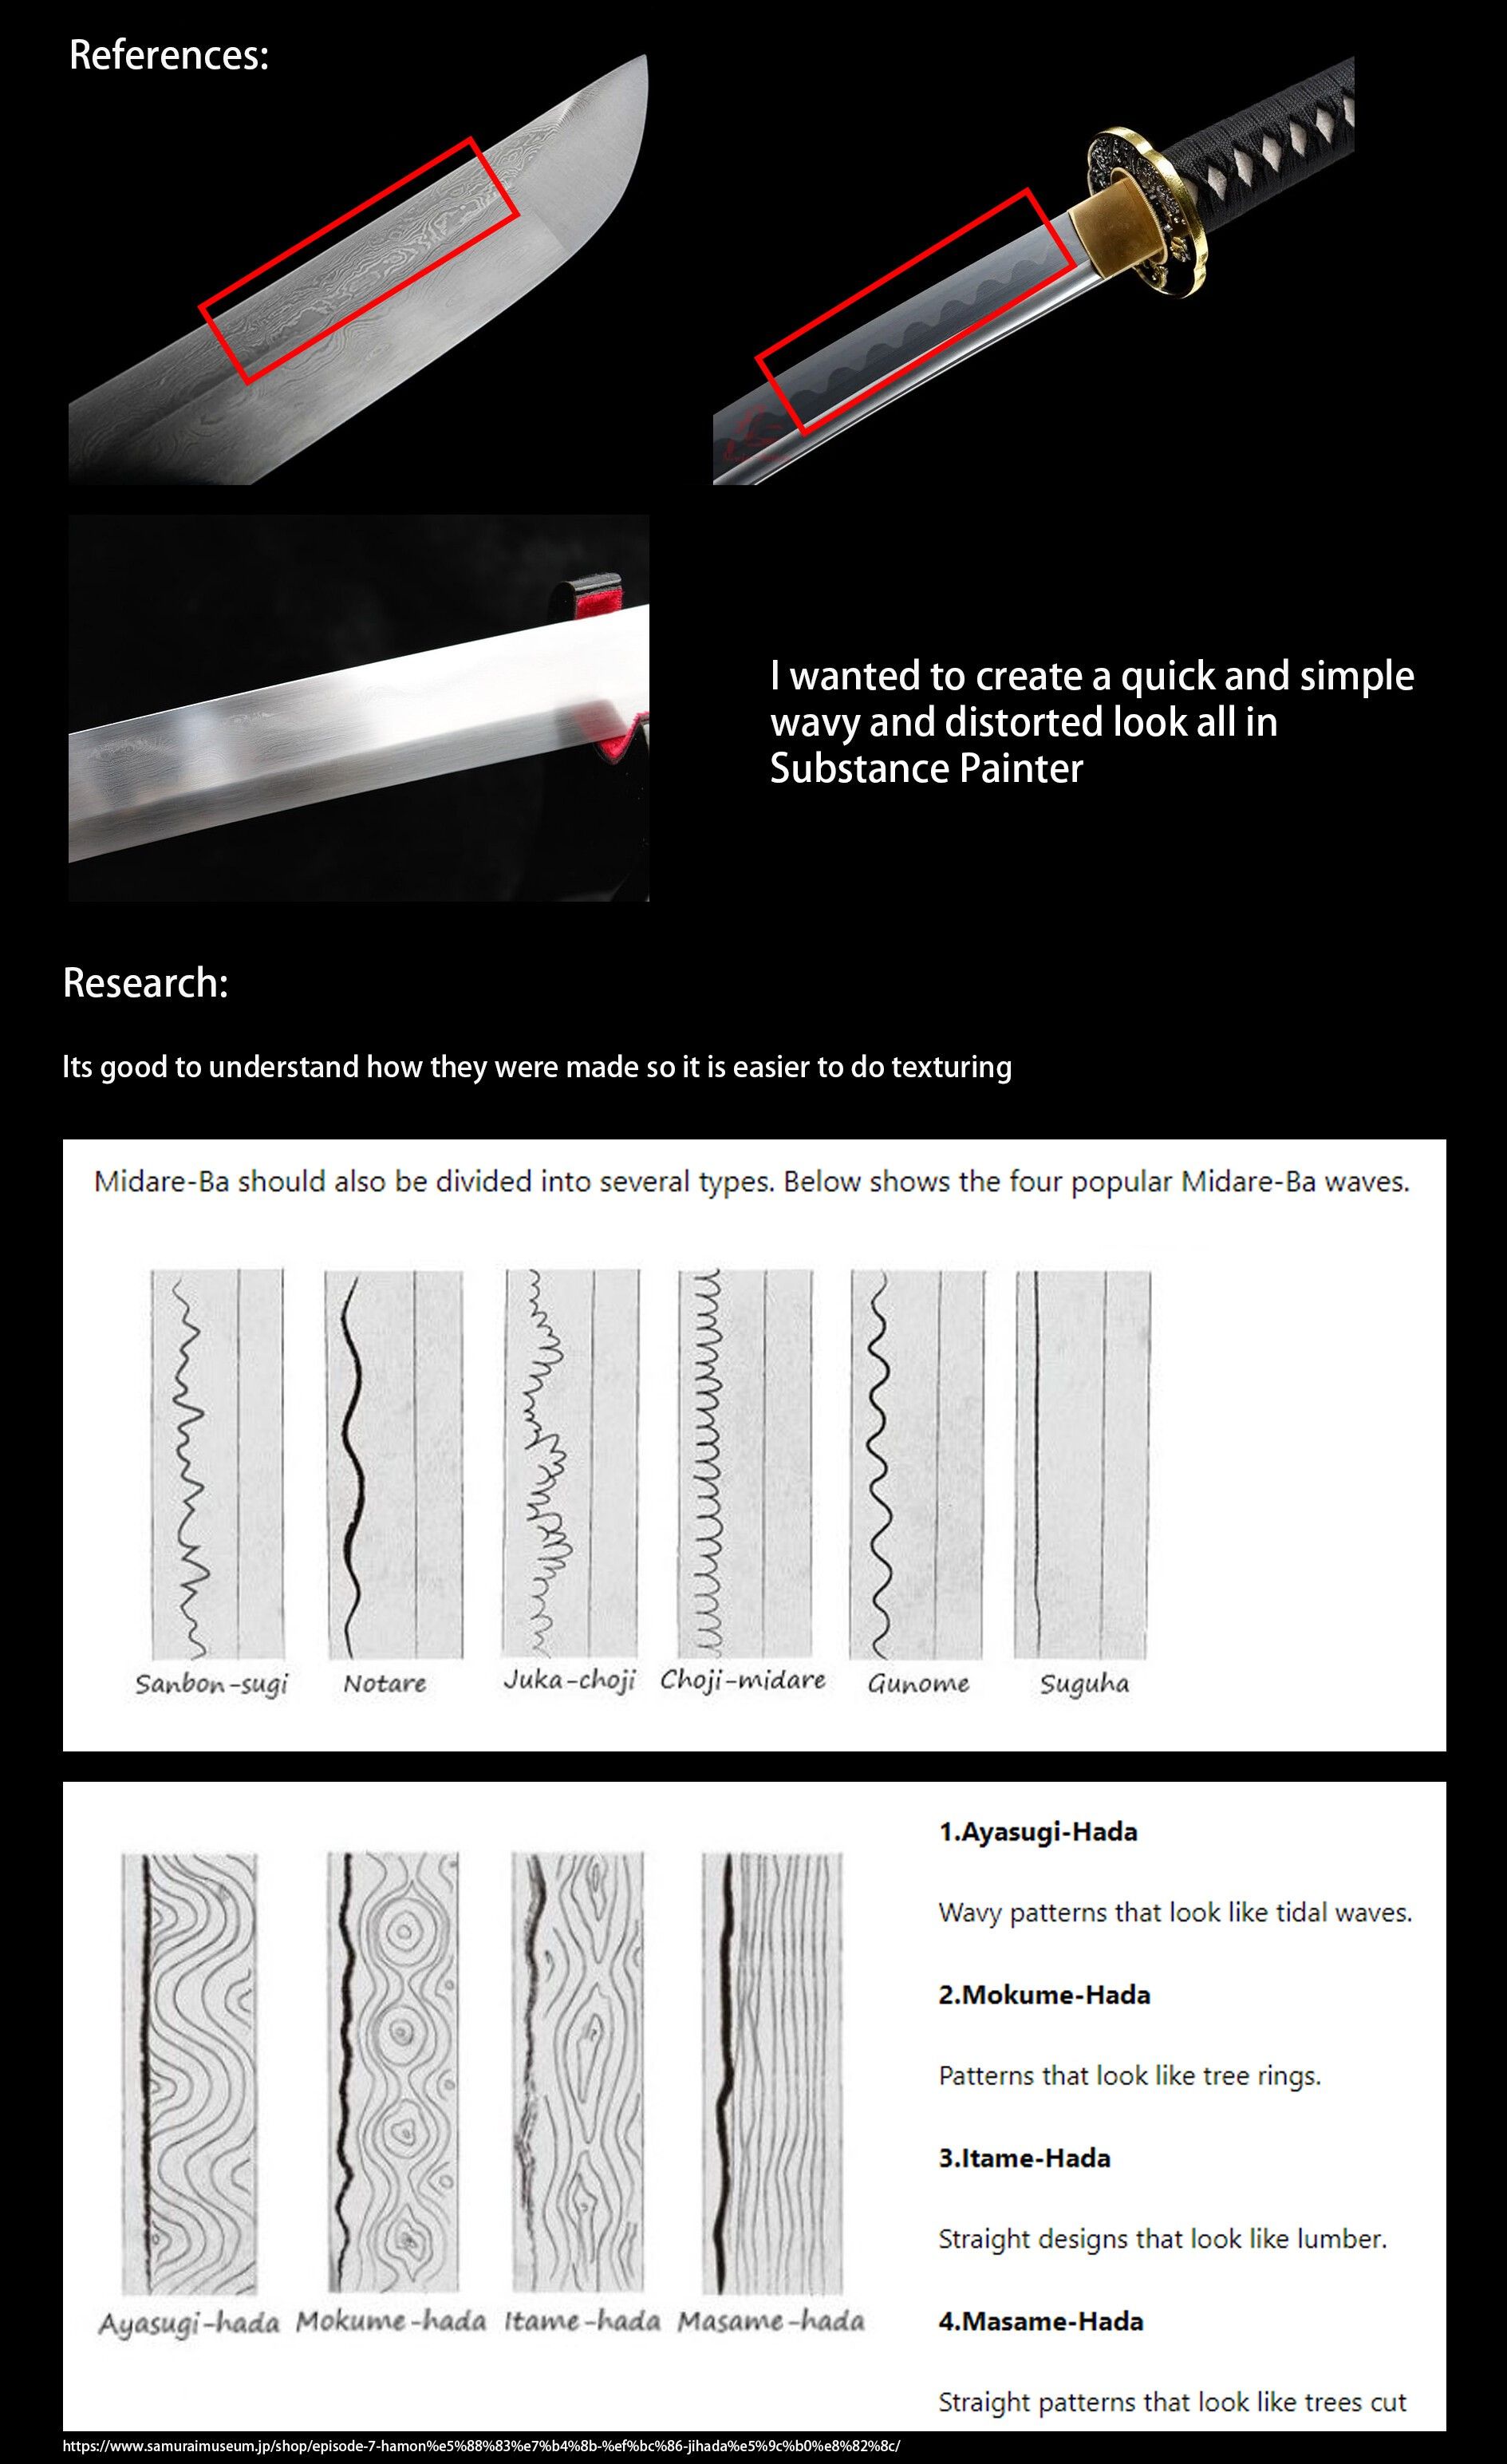
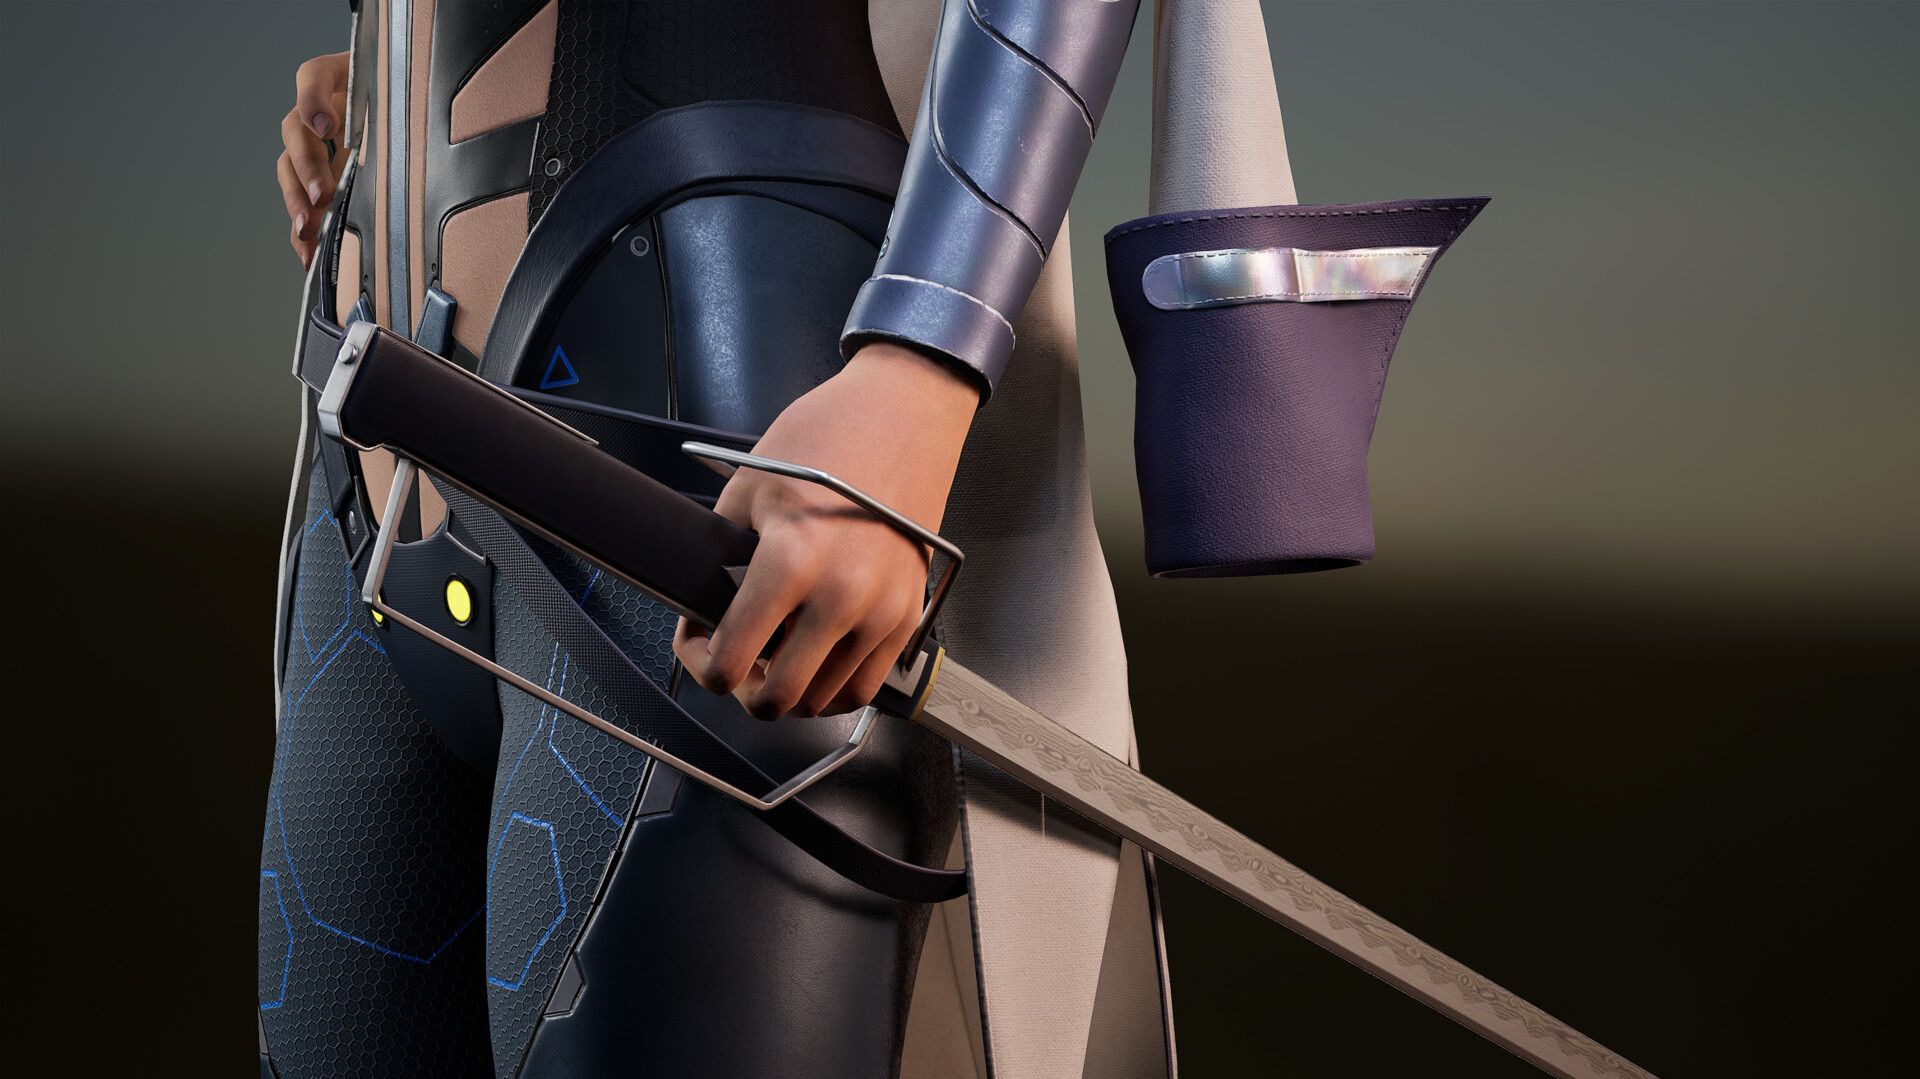
Another thing I learnt from a senior is to research deeper how the item is created in real life. Doing more research helps with the believability of the model. One example I have below is the texture of the katana. Instead of just a standard sharp metal blade, we can see that it is divided into 2 parts, the Midare-ba and the Hada.
The Hada is the 'grain' pattern on the surface of a Japanese blade. It is formed during the initial construction process, the resulting Hada indicates the techniques which the smith used to make the blade. "乱刃/乱れ刃"" (midareba), which means irregular or chaotic blade pattern.
I used Hair Strand Designer to create the hair atlas for this character.
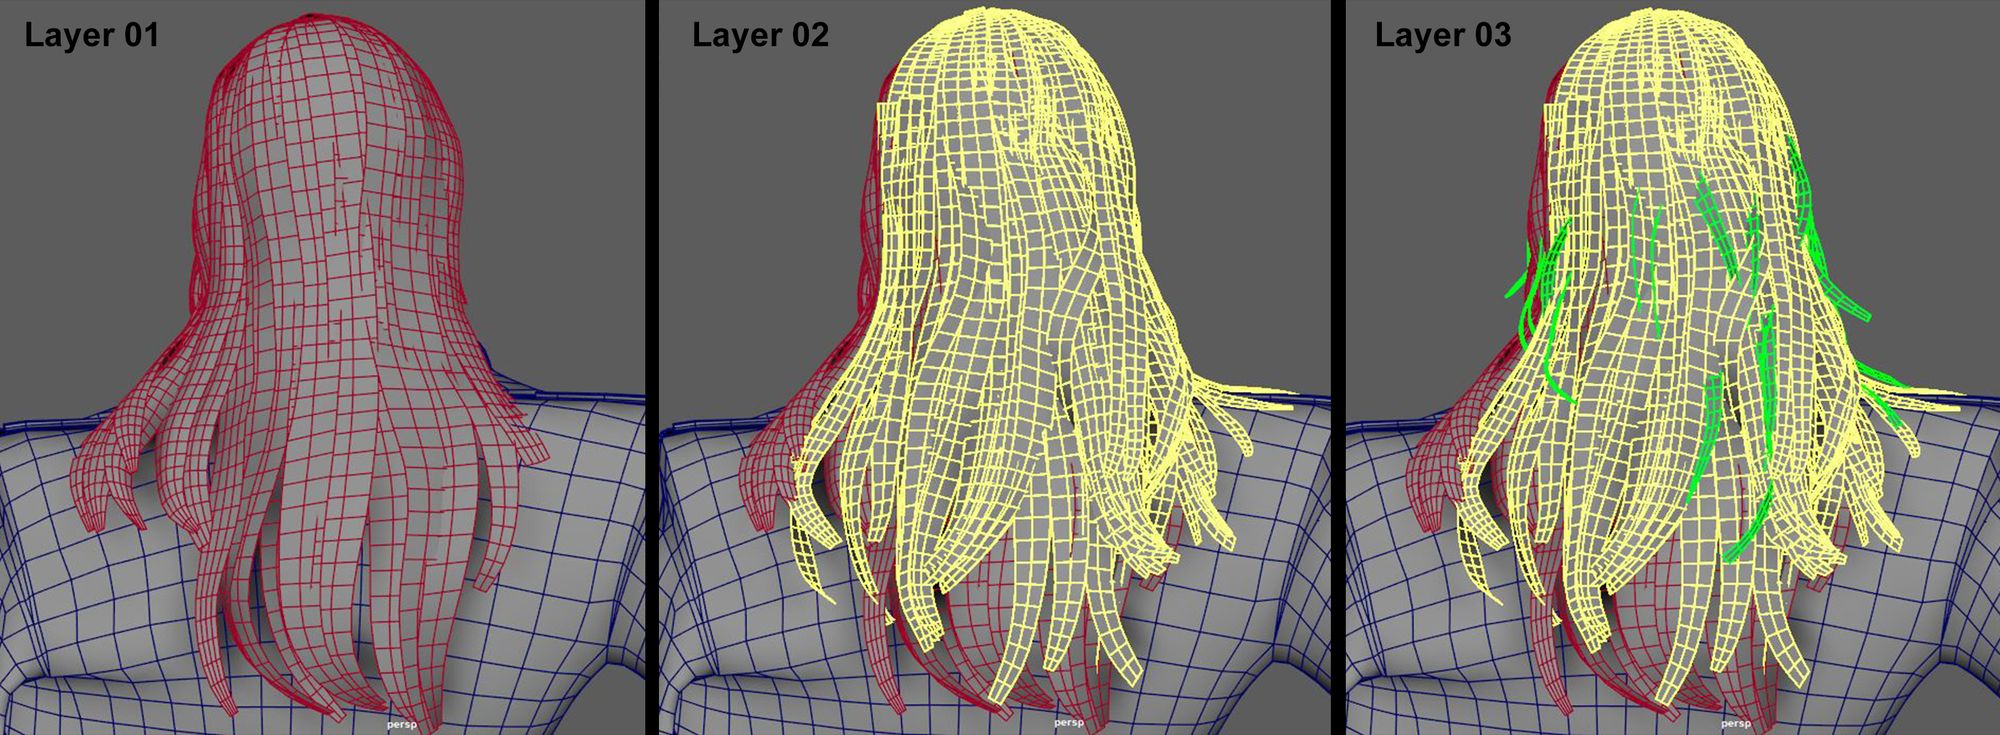
I break the hair down in simpler shapes, understanding the flow of hair from references I have gathered. I watched a webinar from CGMA, featuring Johan Lithvall and learnt more about his approach and workflow of tackling hair cards.
For the placement of cards, I used 3 different layers, the primary layer (to cover up the skull), the secondary layer (for hair chunks), and a tertiary layer (flyaway hair)
Unreal Engine is something that I have always wanted to learn and be proficient at, and this project is the perfect opportunity. I imported all the assets needed to the scene and played around with different HDRI that I downloaded from PolyHaven to achieve the mood that fits nicely with the character.
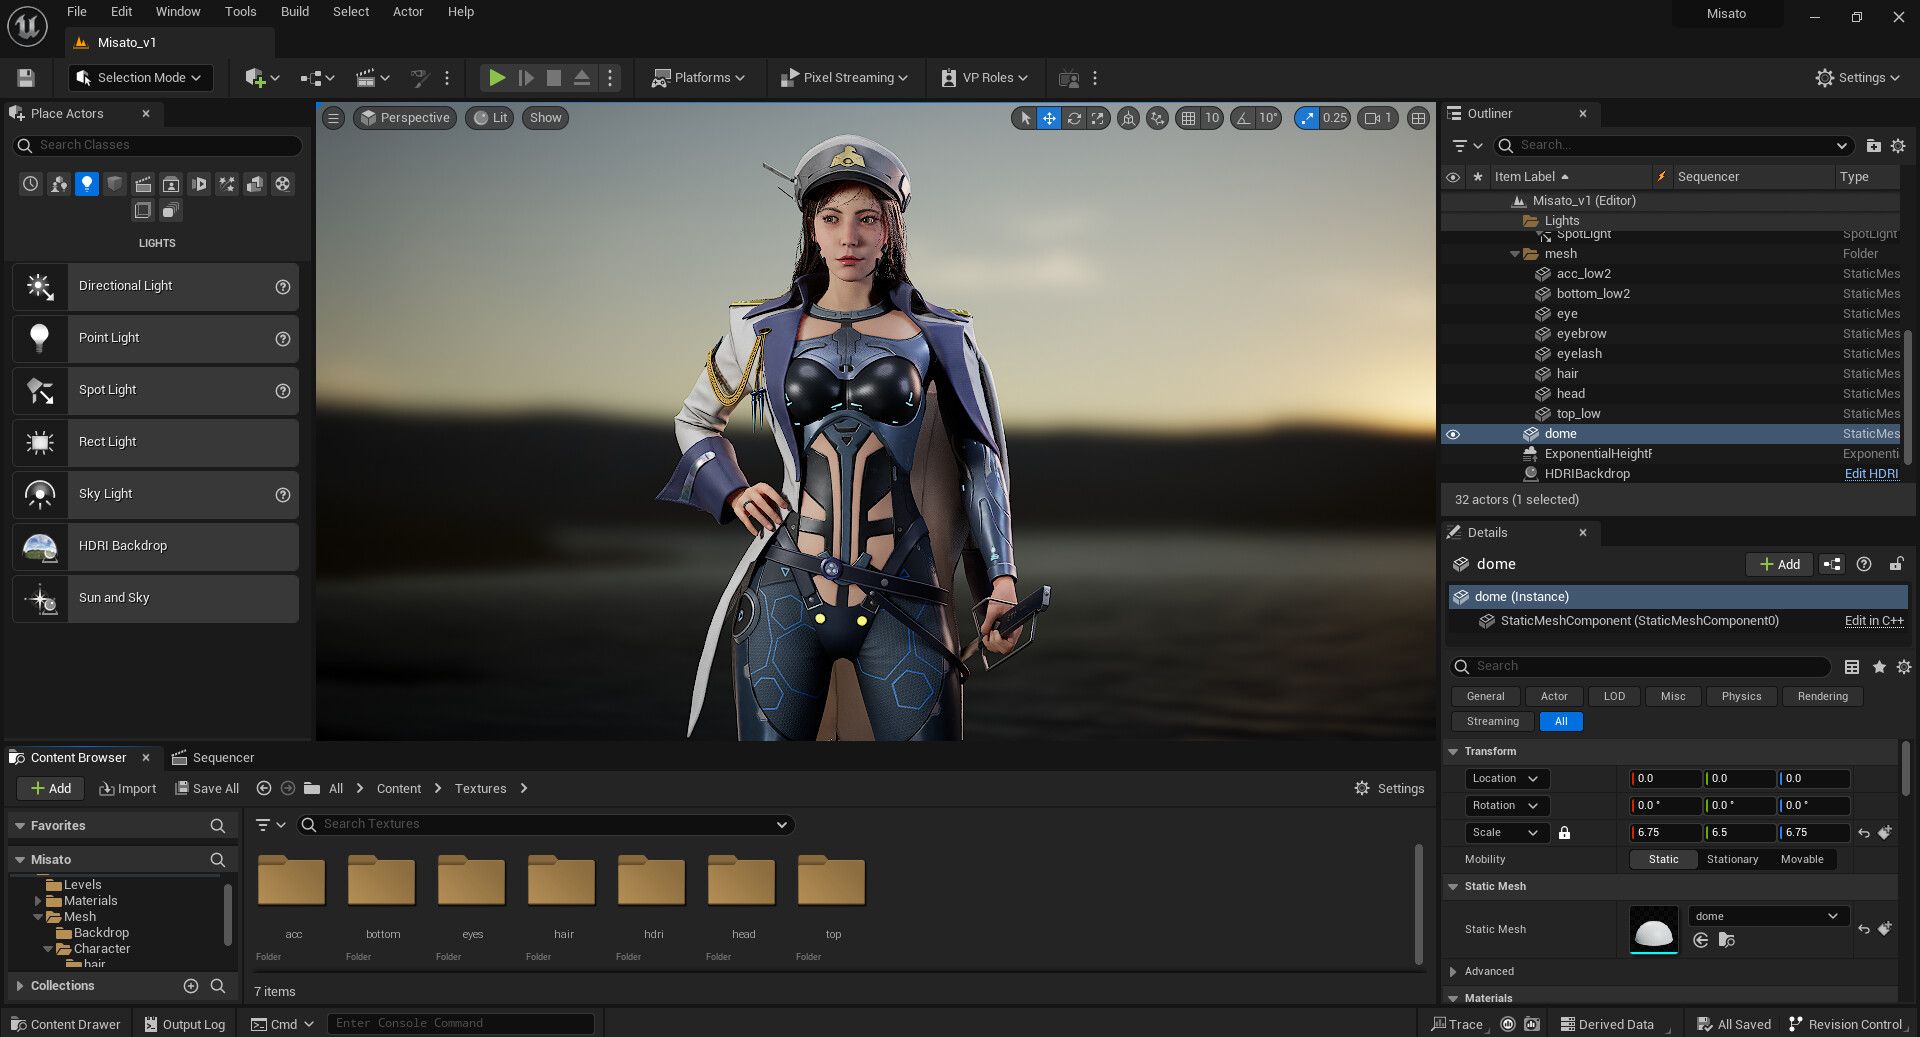

I feel that it is also important to decide which rendering engine I want to use at the start of the project to showcase the final output. Based on my own experience, each software, such as Maya, ZBrush, Marmoset, Unreal Engine, seems to have a different camera FOV, even if the numbers are the same. So after a good amount of sculpting, it is good to decimate and import into the engine to check if the shape and silhouette is readable.
I use a camera FOV of 80 when rendering a close-up view of the face, and a FOV of 50 when rendering at least half the body.
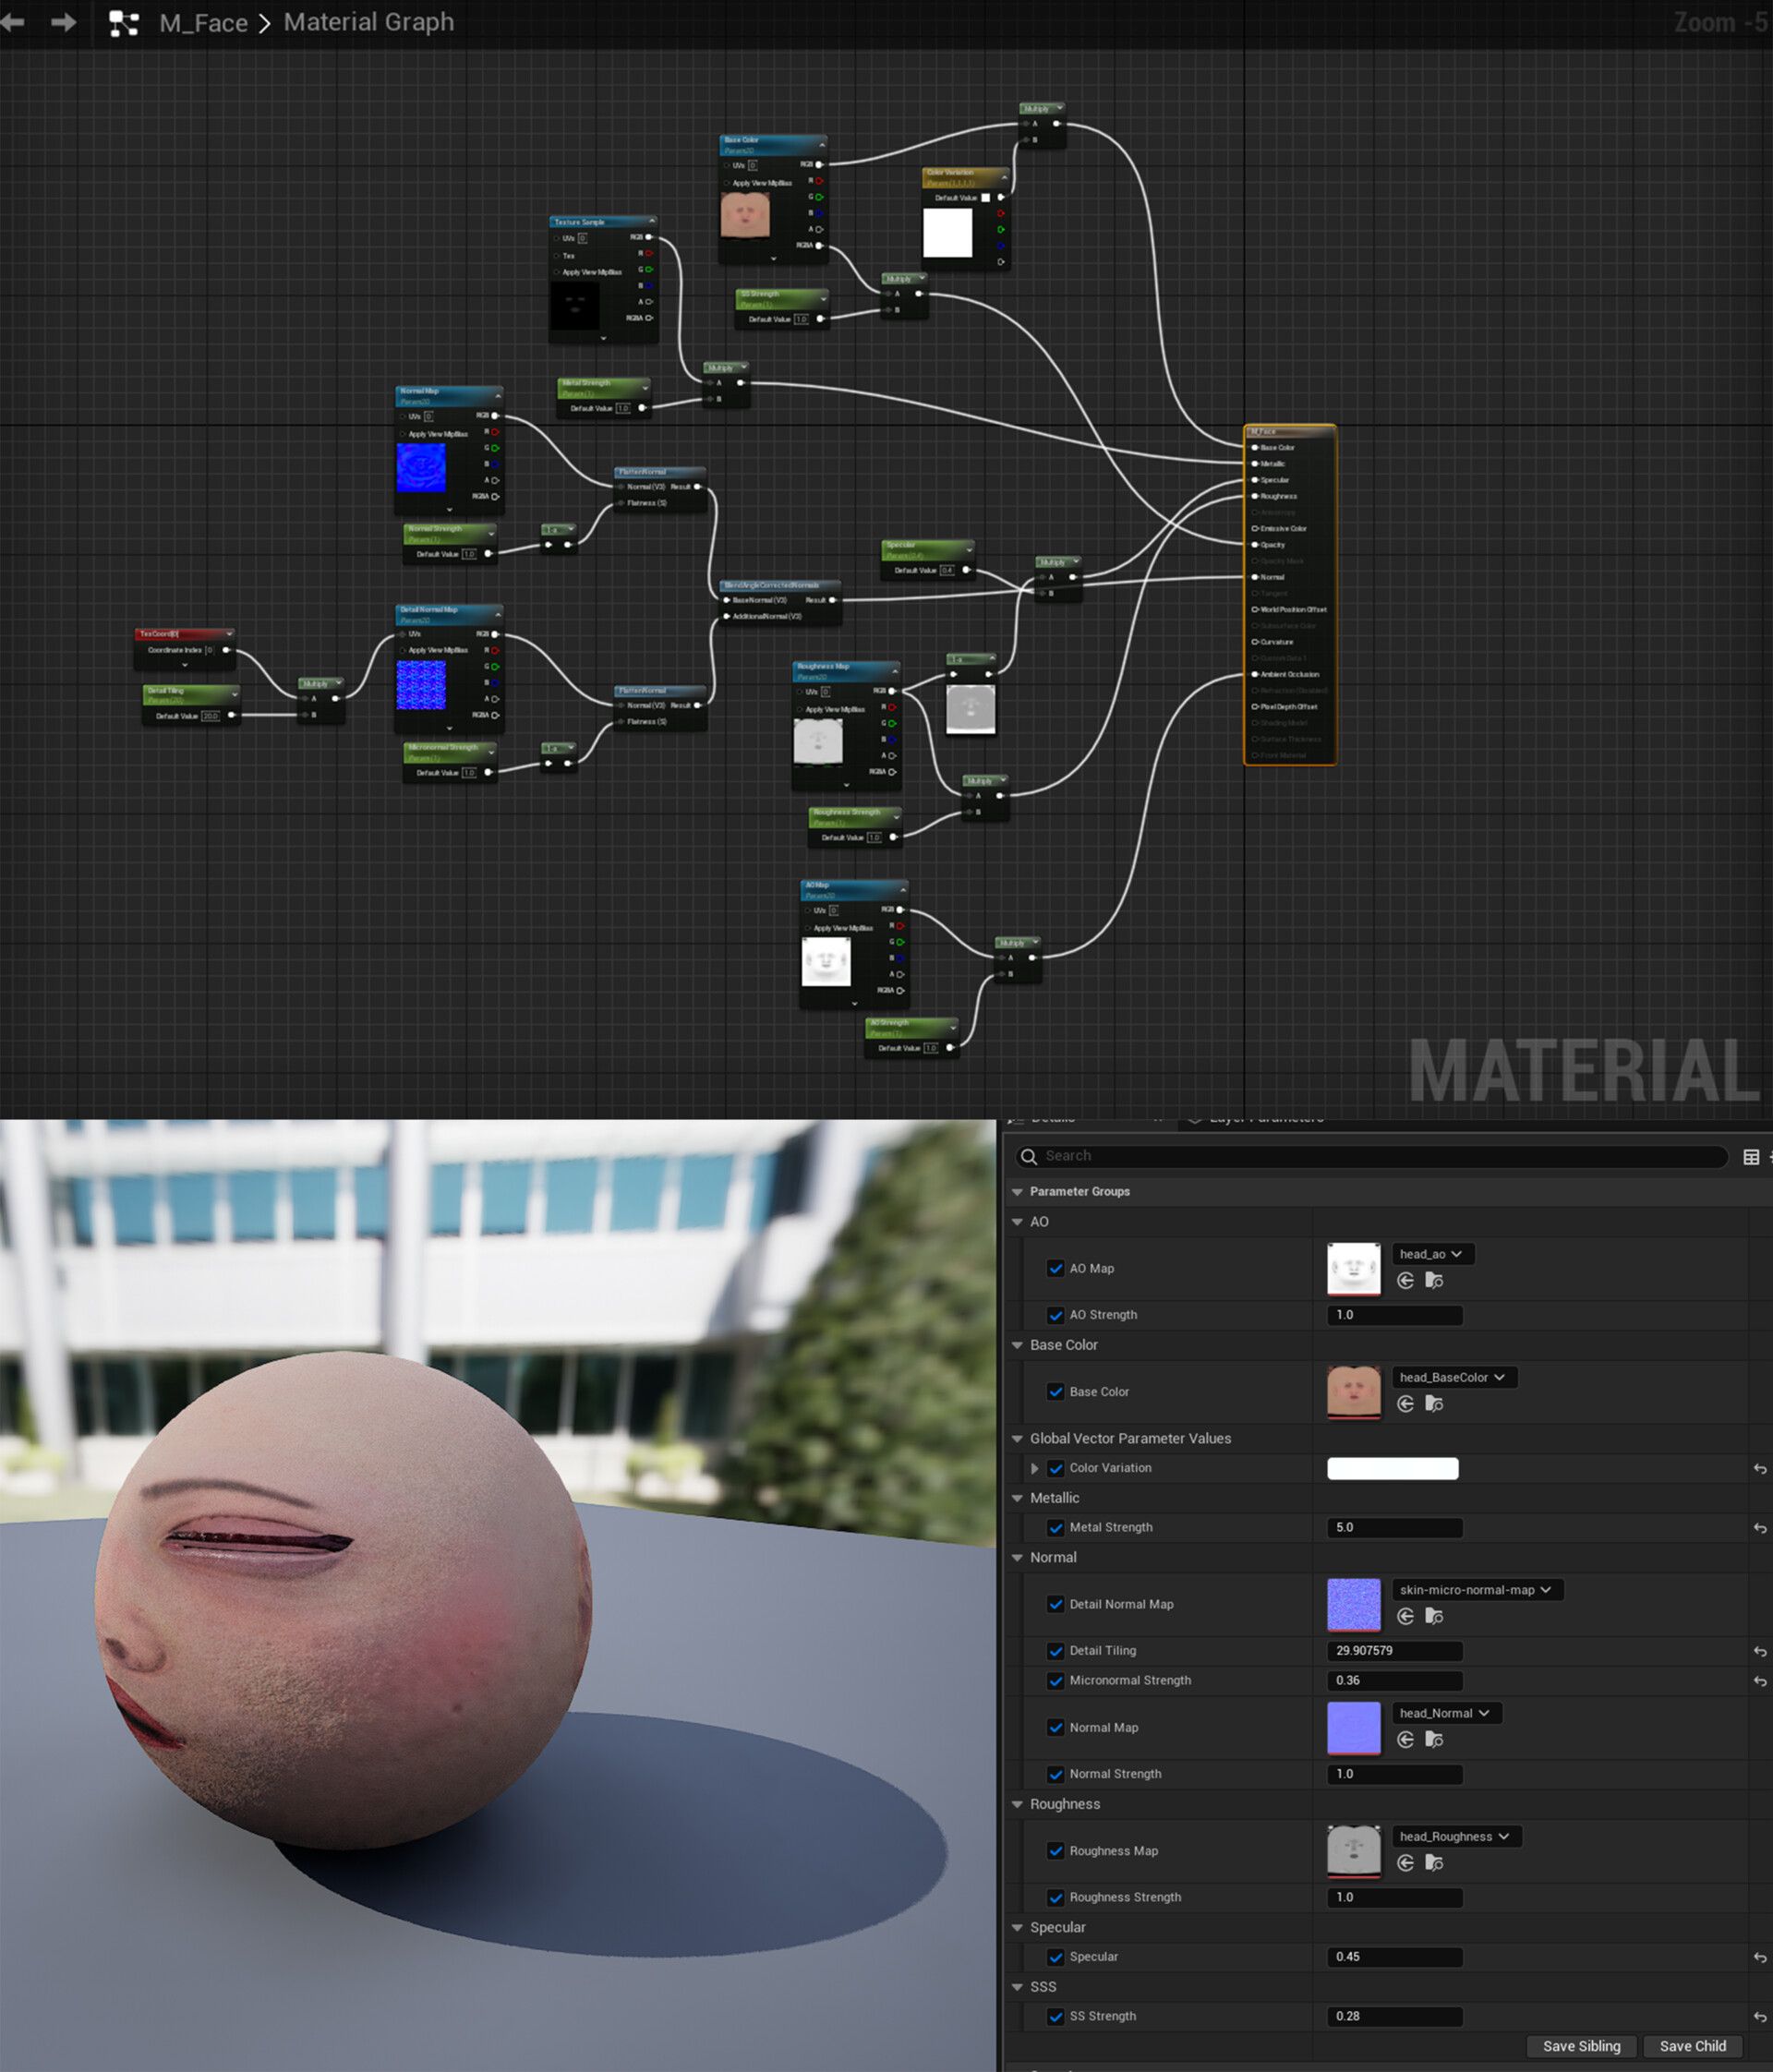
For skin and hair shader, I watched J Hill’s tutorial on Youtube.

Overall, this project has been very fun to do and I hope you enjoyed my reading through my process in this blog and gained something new.

If you have any further questions about any part of the pipeline, please feel free to reach out to me here via my ArtStation profile here, or my Rookies profile here.