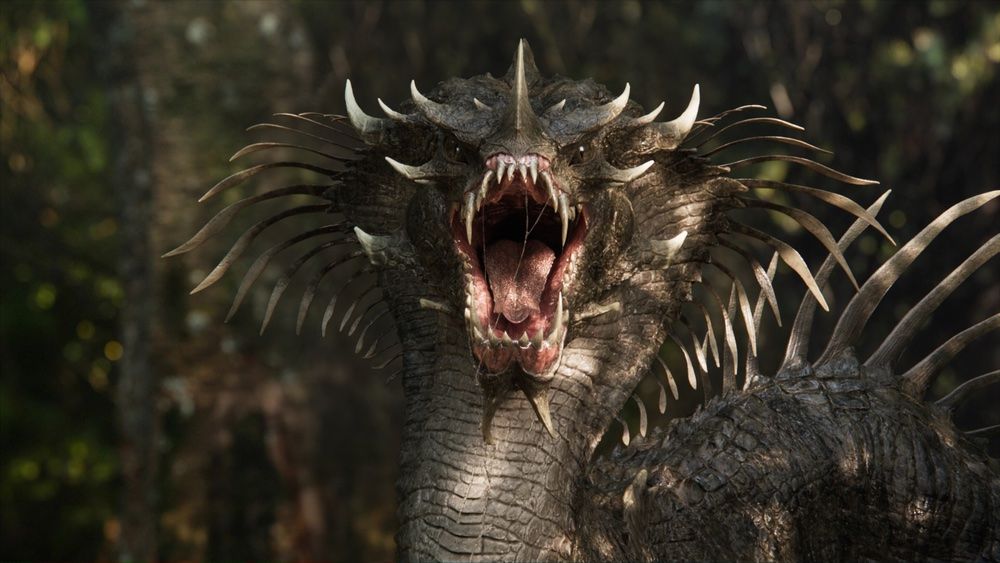
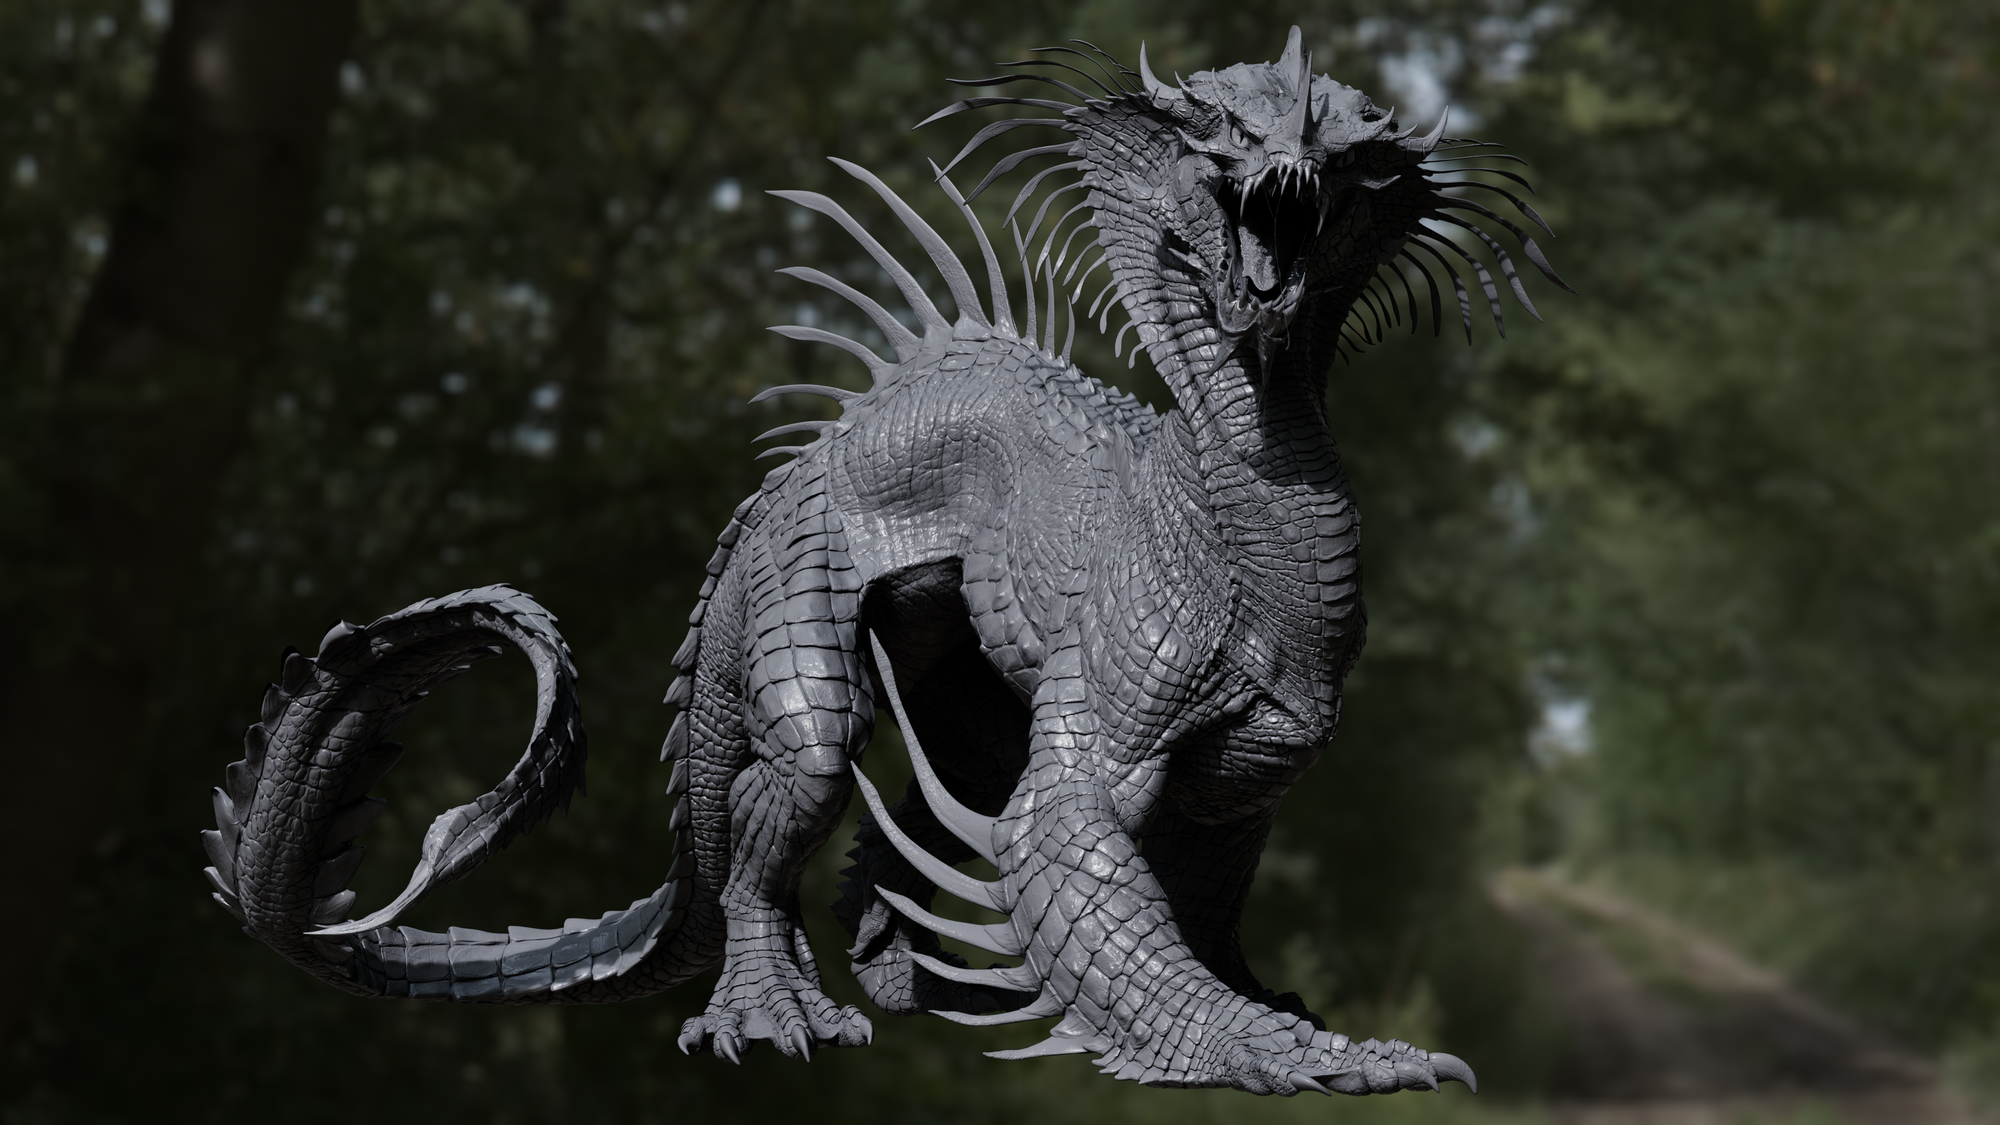
A 3D Creature Modeling and Design Process
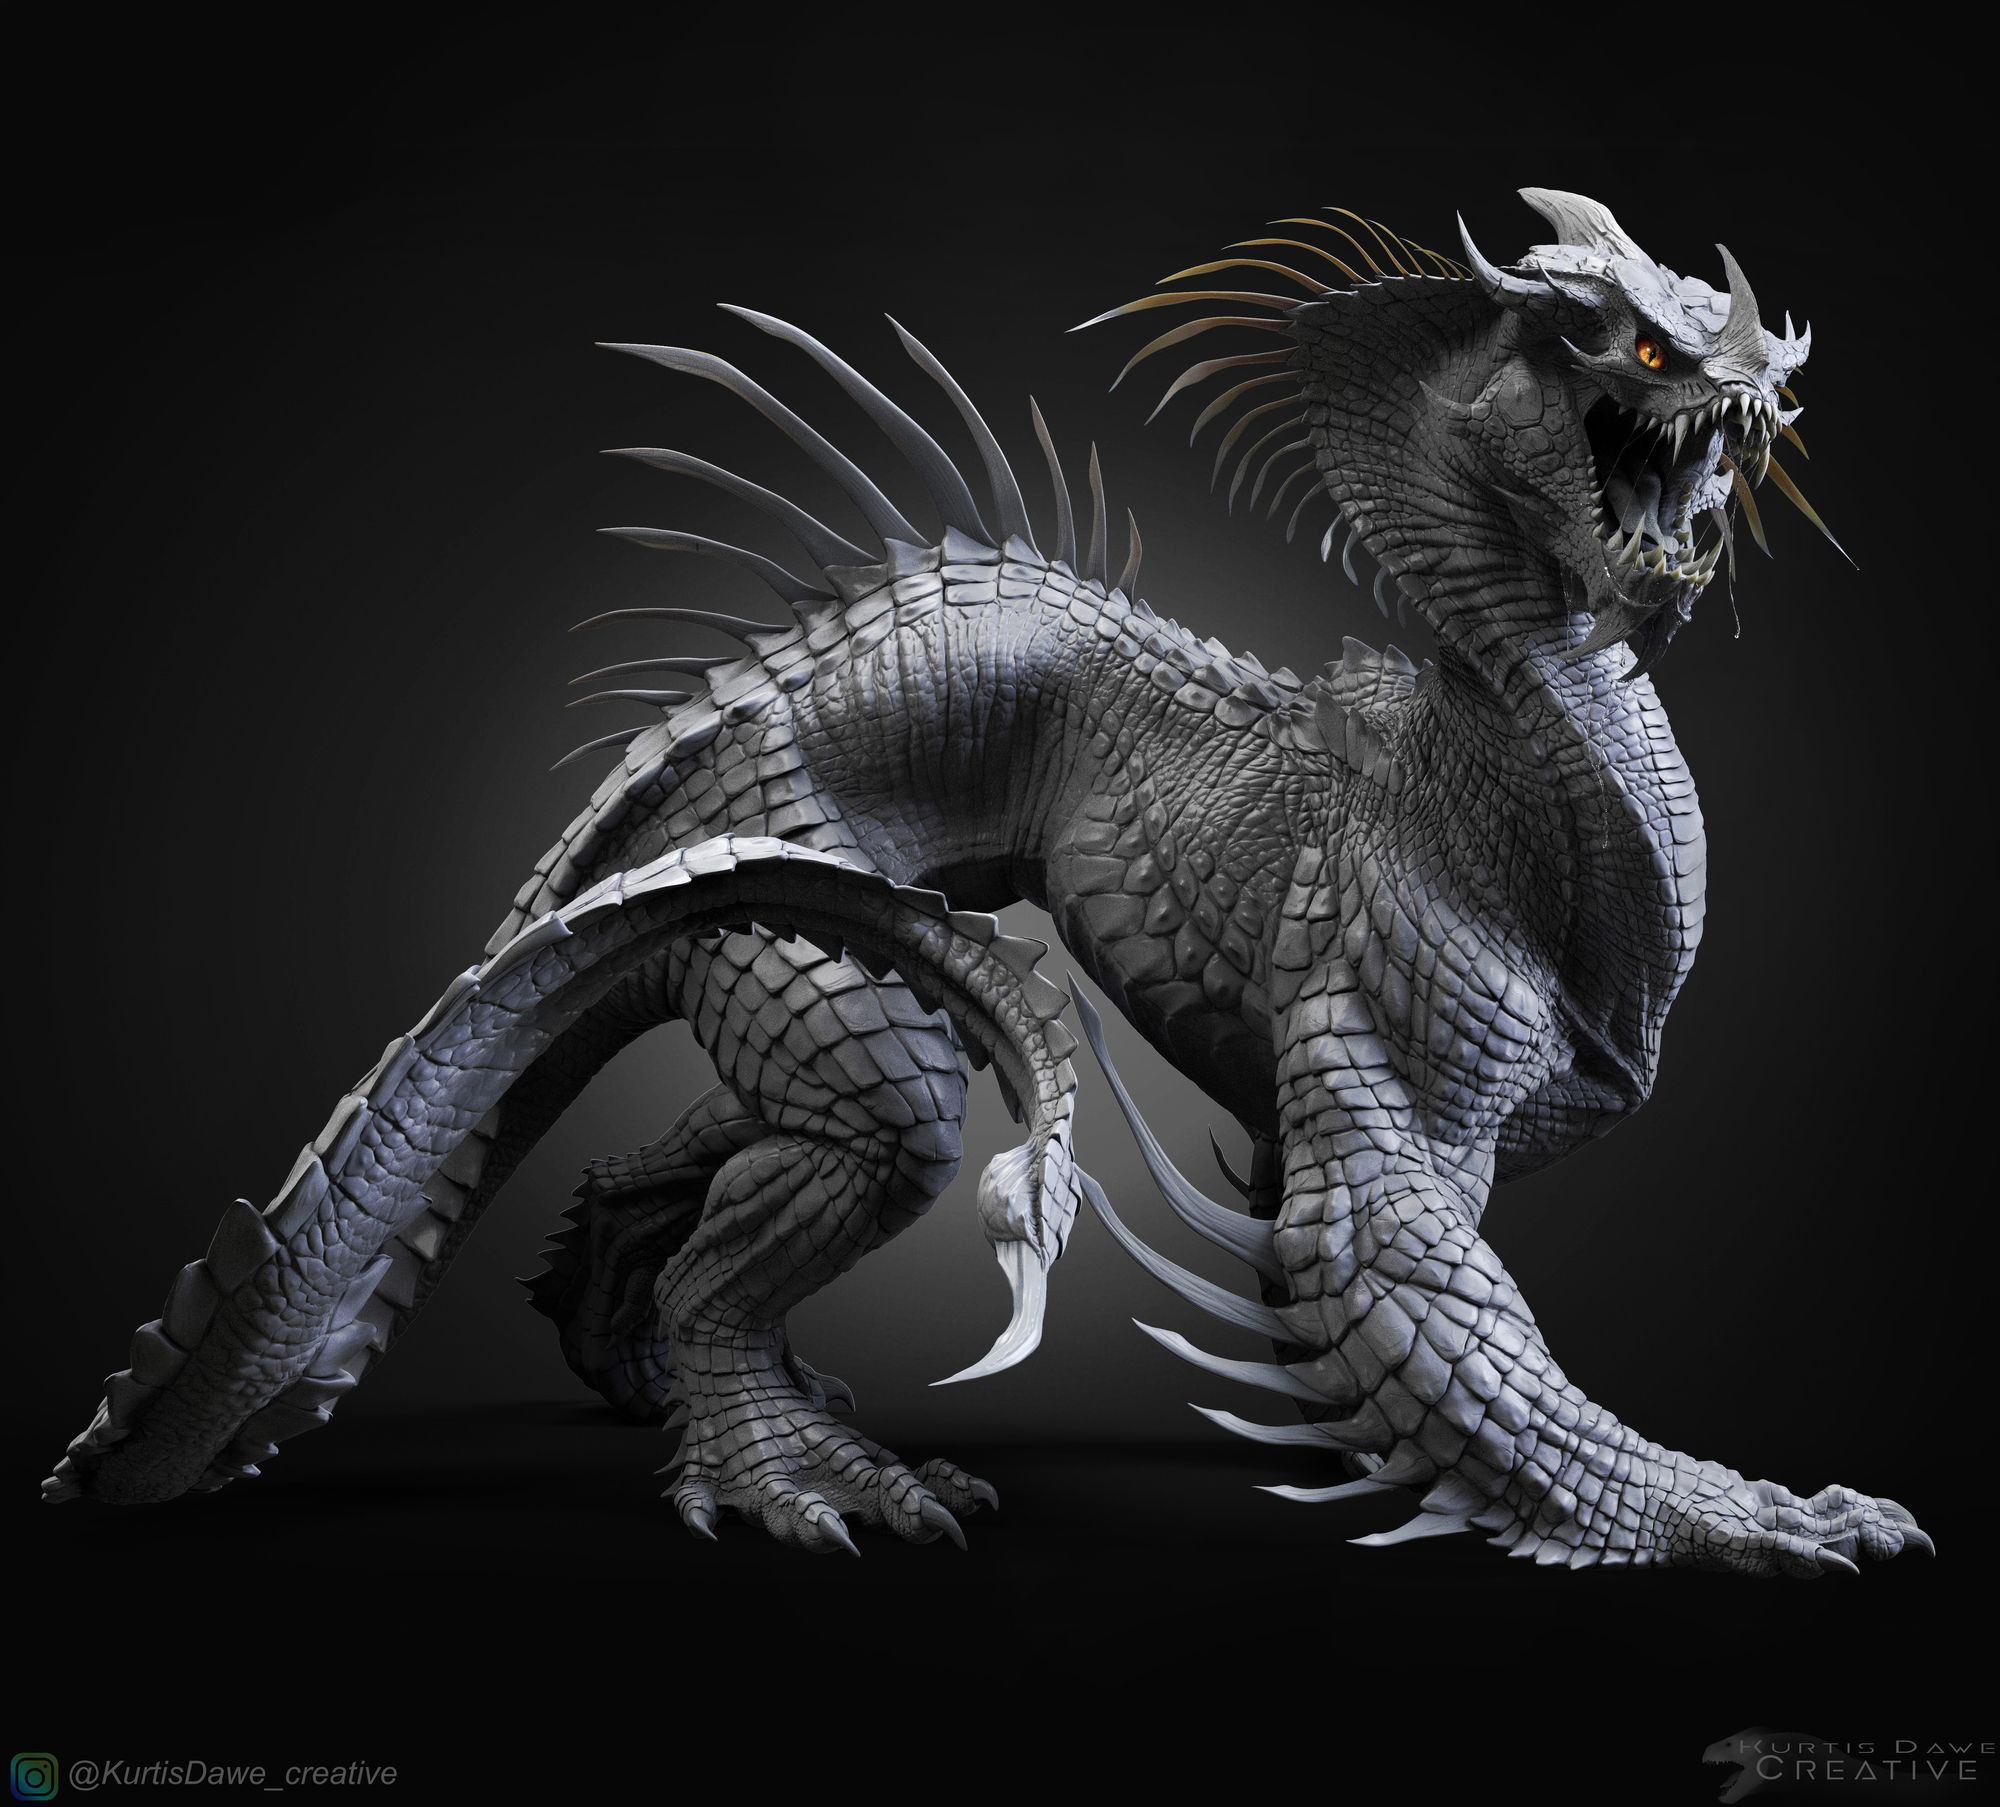
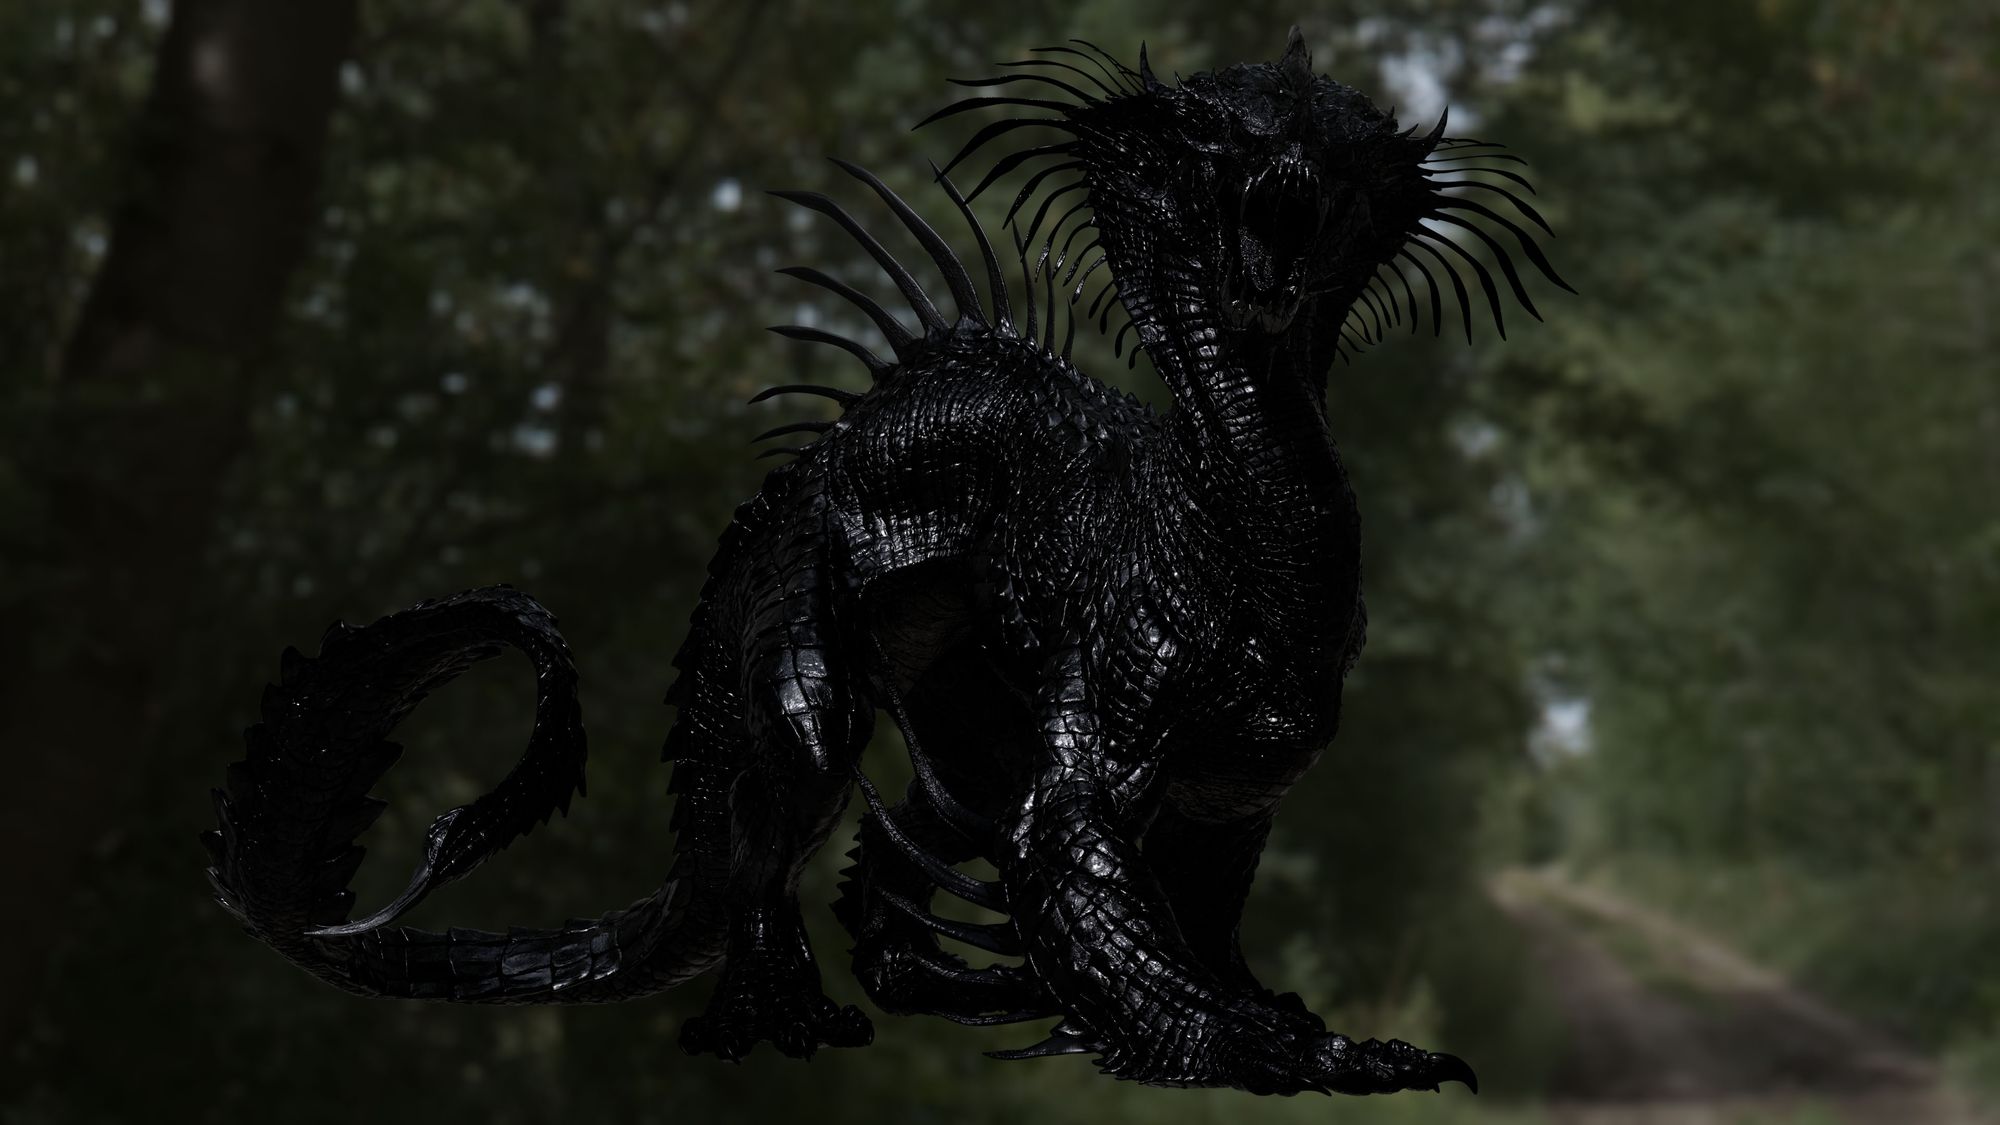
In his latest project, "Razorback Whiptail," Matteo Llorens, a recent graduate from ESMA, shares insights into his creature modeling and design process.
In his latest project, "Razorback Whiptail," Matteo Llorens, a recent graduate from ESMA, shares insights into his creature modeling and design process.
Matteo Llorens, a recent graduate of ESMA, is deeply passionate about cinema and specializes in creature creation. During his final year at ESMA, he worked on personal creature character projects alongside his short graduated movie, allowing him to focus on the specialties he aims to pursue and further enhance his skills. Currently, he is actively seeking a position as a creative artist in the visual effects industry, eager to turn his passion into a professional career.
In this article, Matteo shares his creature modeling and design process for his latest project, "Razorback Whiptail".
For some time now, I've been eager to master Mari software. When Kurtis Dawe offered several artists the opportunity to work on one of his assets, I jumped at the chance. My passion for creatures and monsters has been a driving force since I started in 3D work, so I was thrilled to dive into this exciting project. Having access to such a high-quality asset allowed me to concentrate on honing my skills in creature texturing and look development.
An essential practice for every artist is to gather a wide array of references. I strongly suggest using PureRef software, as it is incredibly helpful for organising references that will be invaluable throughout your project.
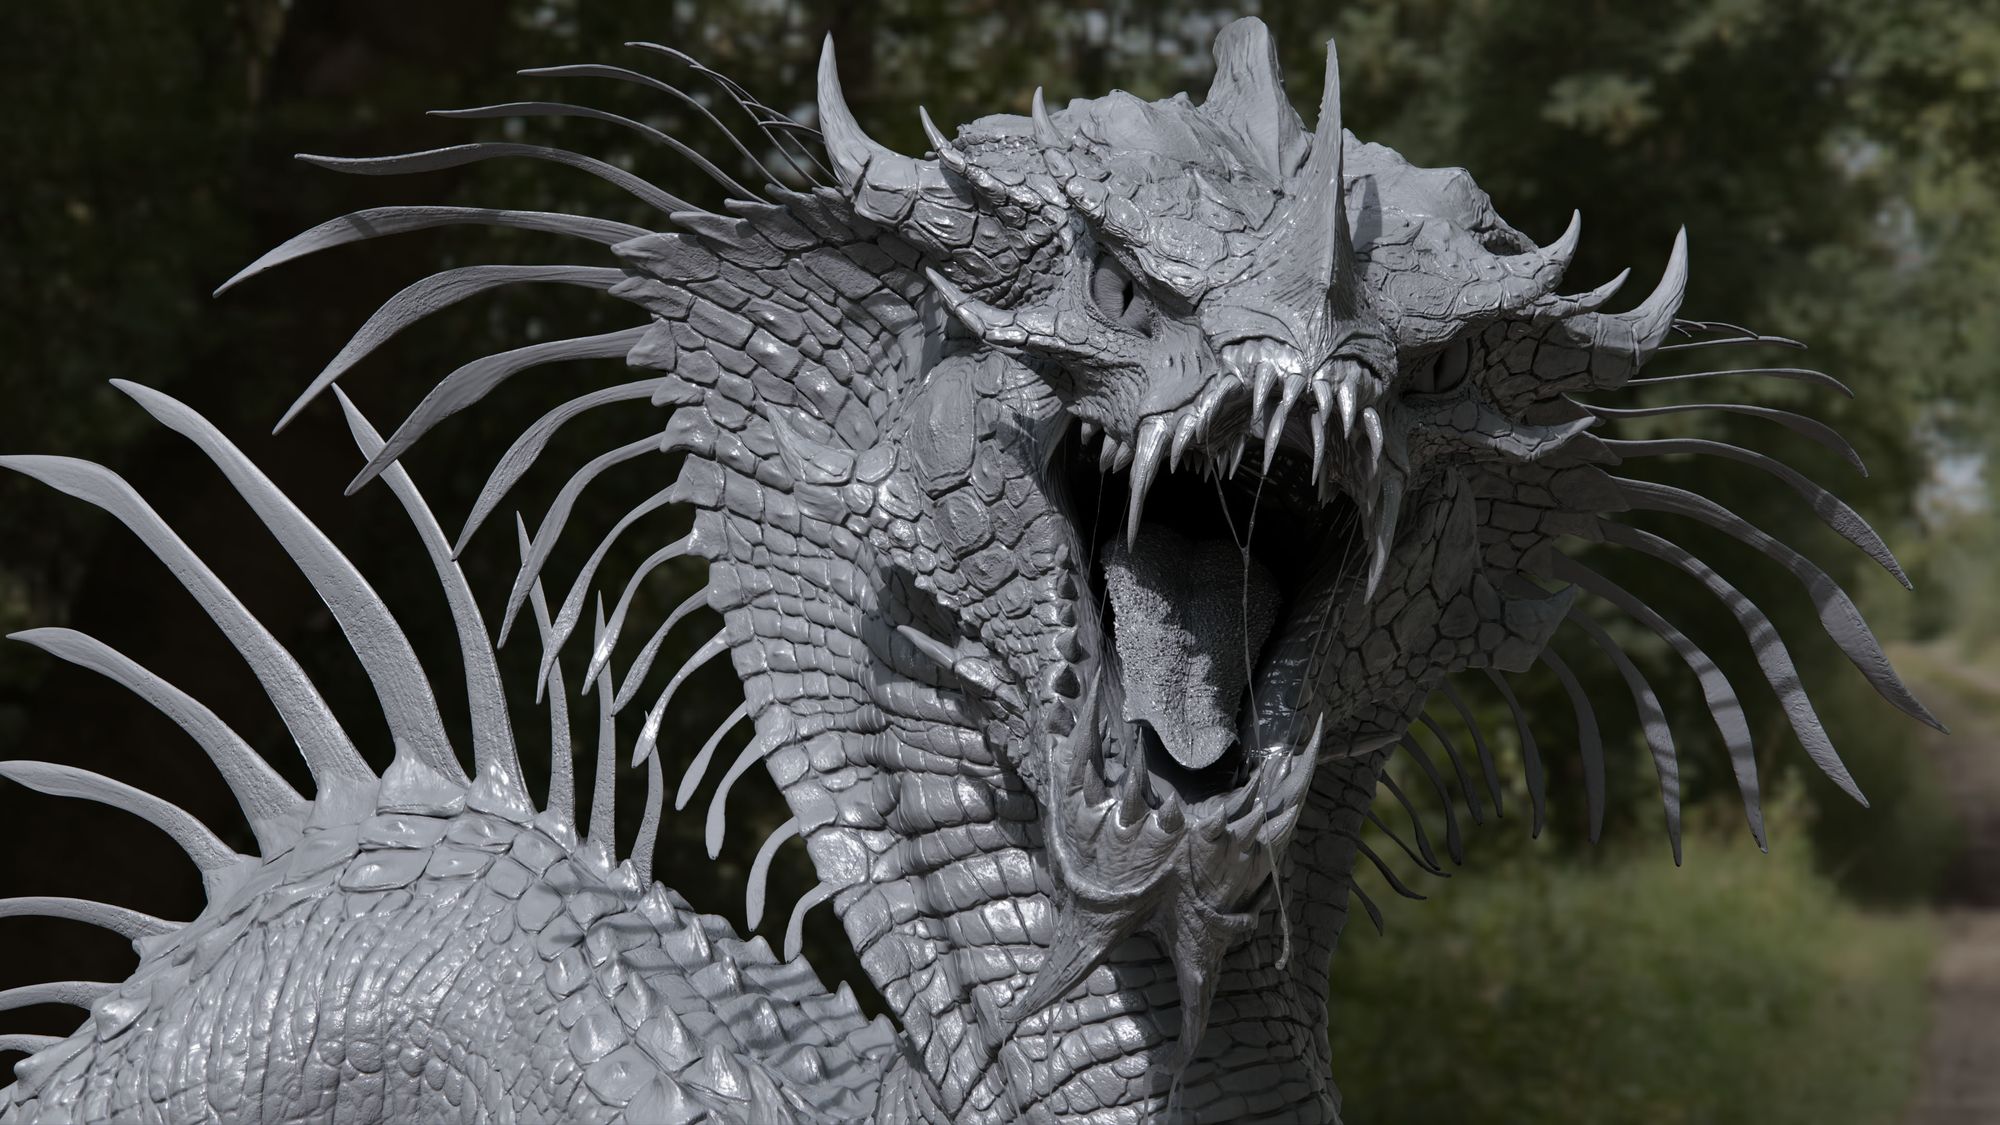
Start by grounding your work in reality, but don't shy away from examining projects by other artists. This strategy enables you to base your work in the real world while allowing room for innovation and adaptation to your unique model. When making precise modeling choices, remember that these decisions also impact texturing. Every choice should be more than just about appearance; they need to be justified and take into account the creature's environment. Is it situated on a specific planet? Does it resemble an animal, reptile, or amphibian? These considerations are key to creating a realistic and believable creature.

The latest PureRef update will also provide you with excellent organisational tools, including the addition of colour annotations and links you can now create between your references. You can also add project milestones and perform paint-overs between each stage of your work, ensuring a stable and smooth project progression.
For modeling guidance, I suggest delving into the YouTube tutorials shared by Kurtis Dawe. These videos offer valuable insights into his creative process, illustrating how he crafts creatures from scratch. He shares techniques for managing limb connections, detailing scales, and infusing vitality into his creations.

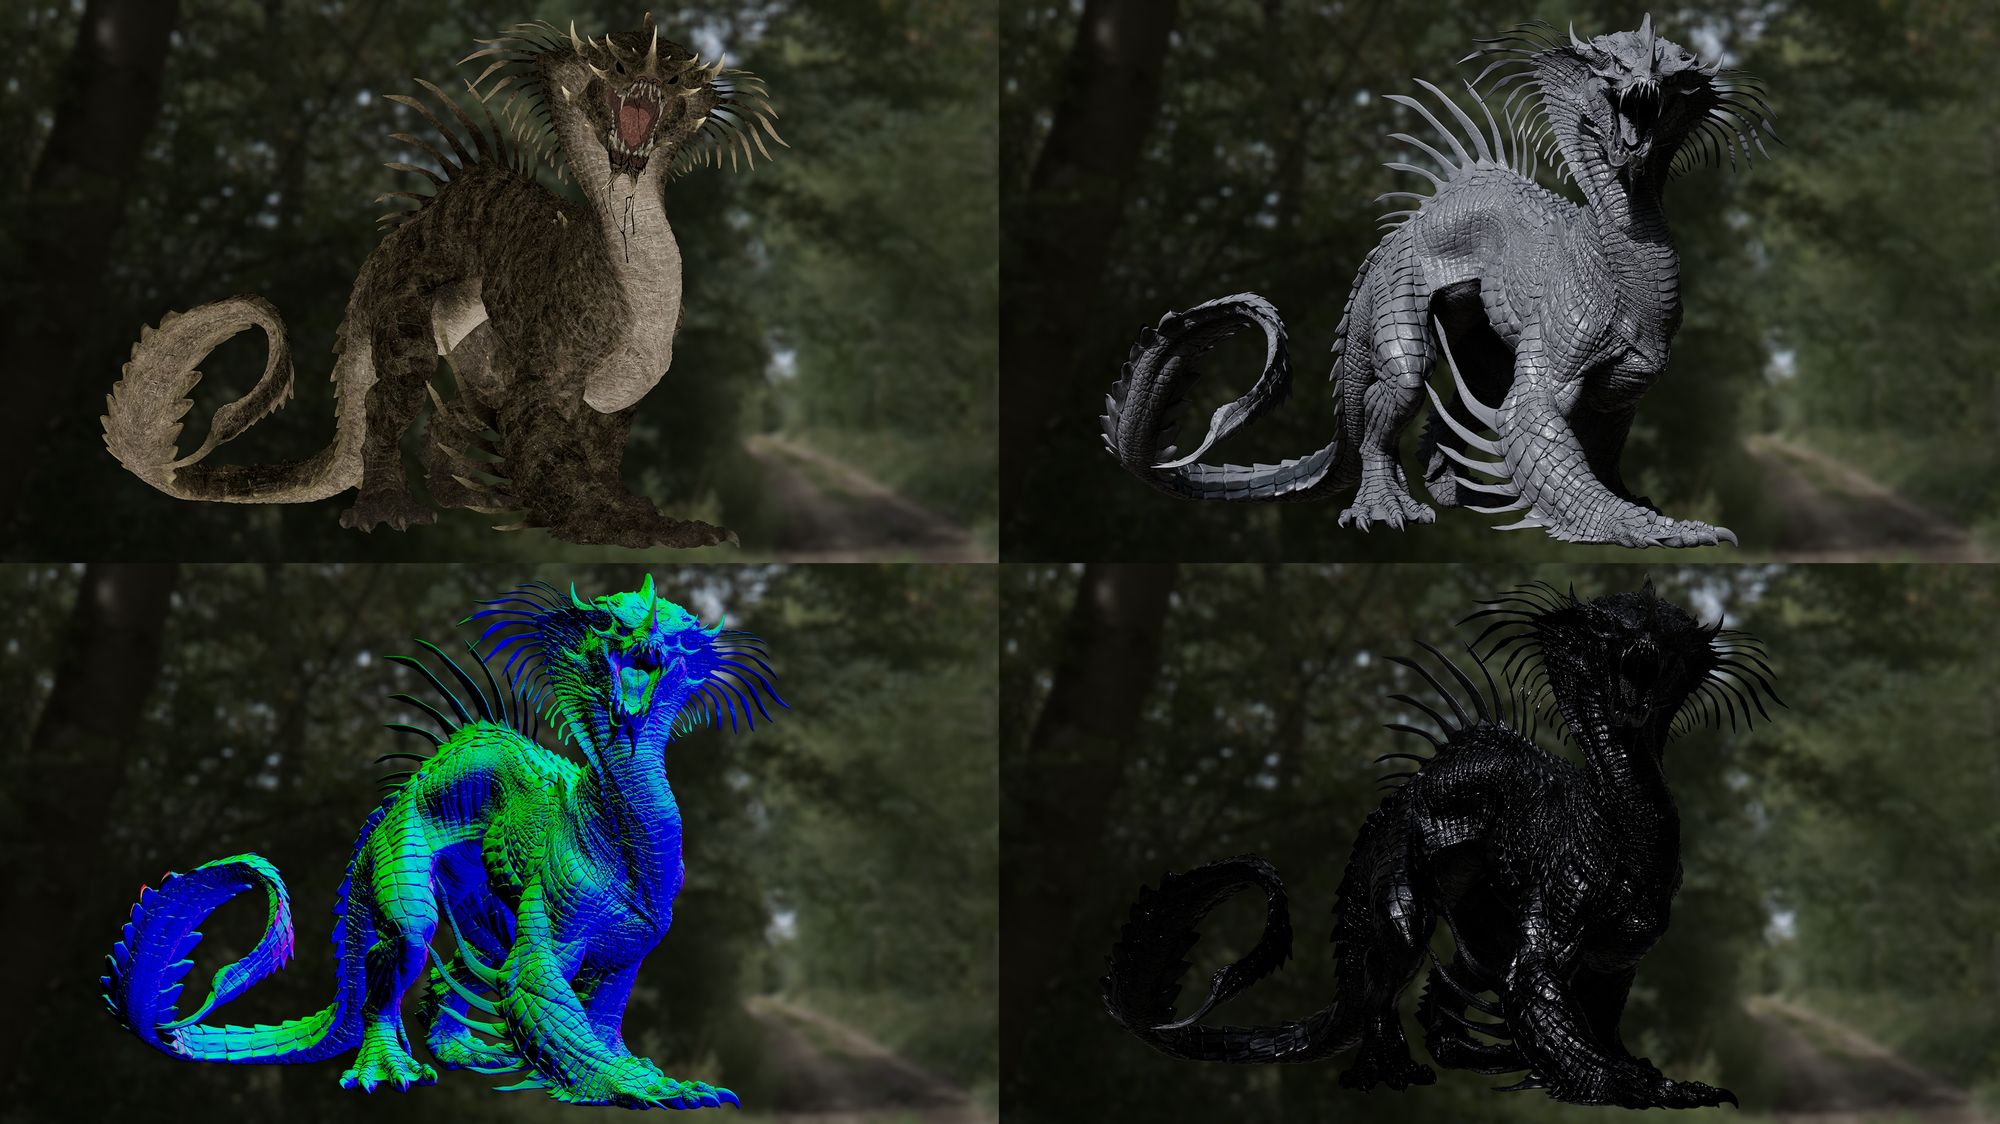
As we transition to the UV stage, it's imperative to prioritise symmetry for efficient texturing in Mari. This ensures smooth texture transfer across UDIMs, maintaining consistent texel density throughout the model. While uniformity is essential, adjusting texel density in key areas such as the eyes can elevate the final render's quality, considering their significance as the creature's focal point.
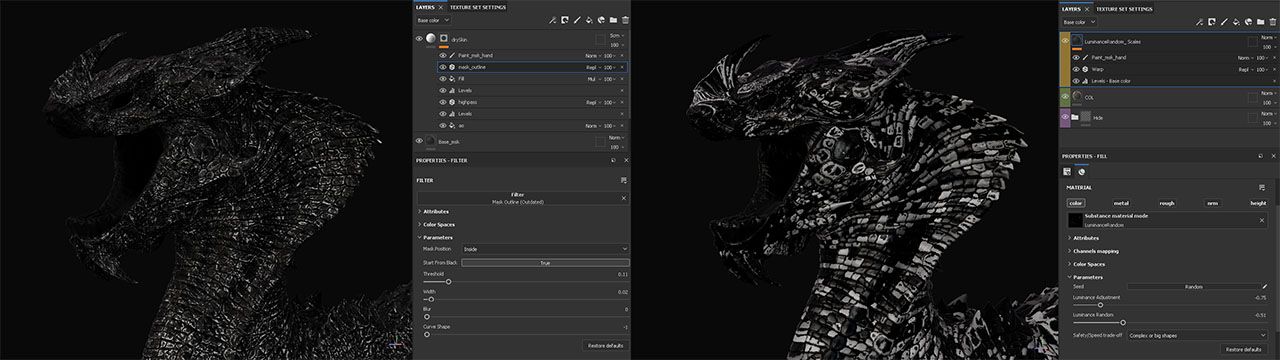
The approach entails using Substance 3D Painter to generate utility masks, which act as controllers for different maps in mask format. Once all the required maps are baked, they're imported into a Mari template, alongside the displacement and normal output maps from ZBrush.
Every mask is controlled via the teleport receiver, and it's essential to maintain the count of node paints and masks in the scene. This ensures that a mask utilised for colour can also influence displacement or roughness, providing versatility and streamlining the workflow.

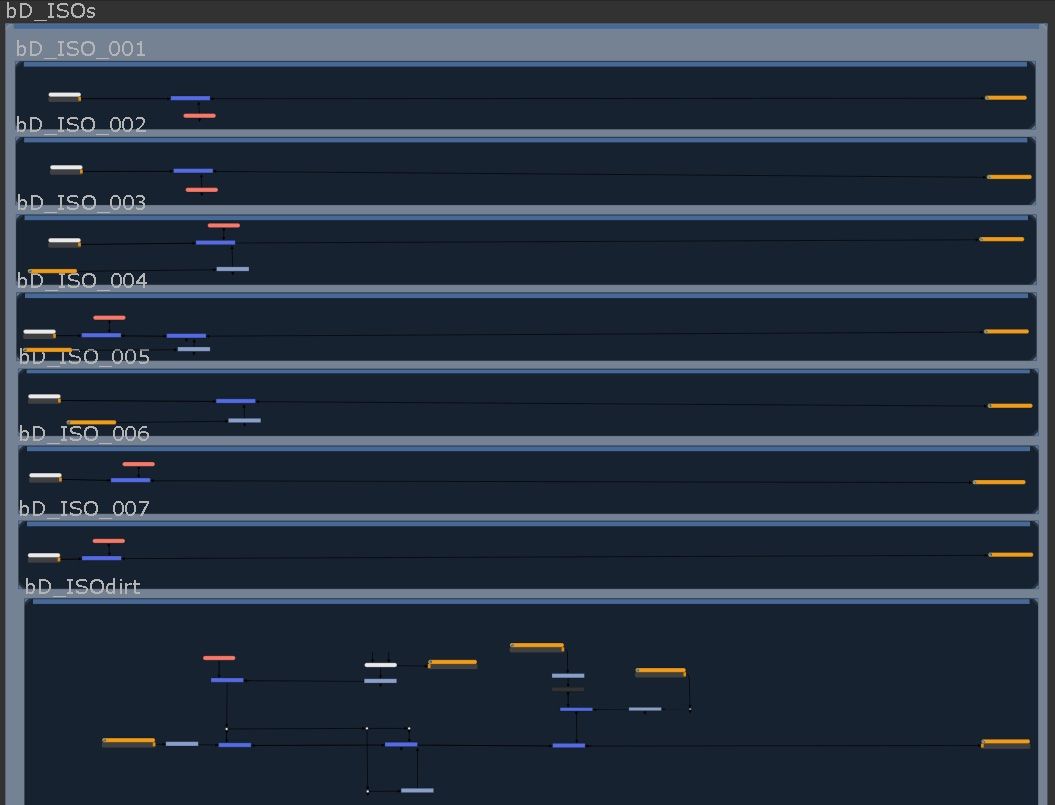
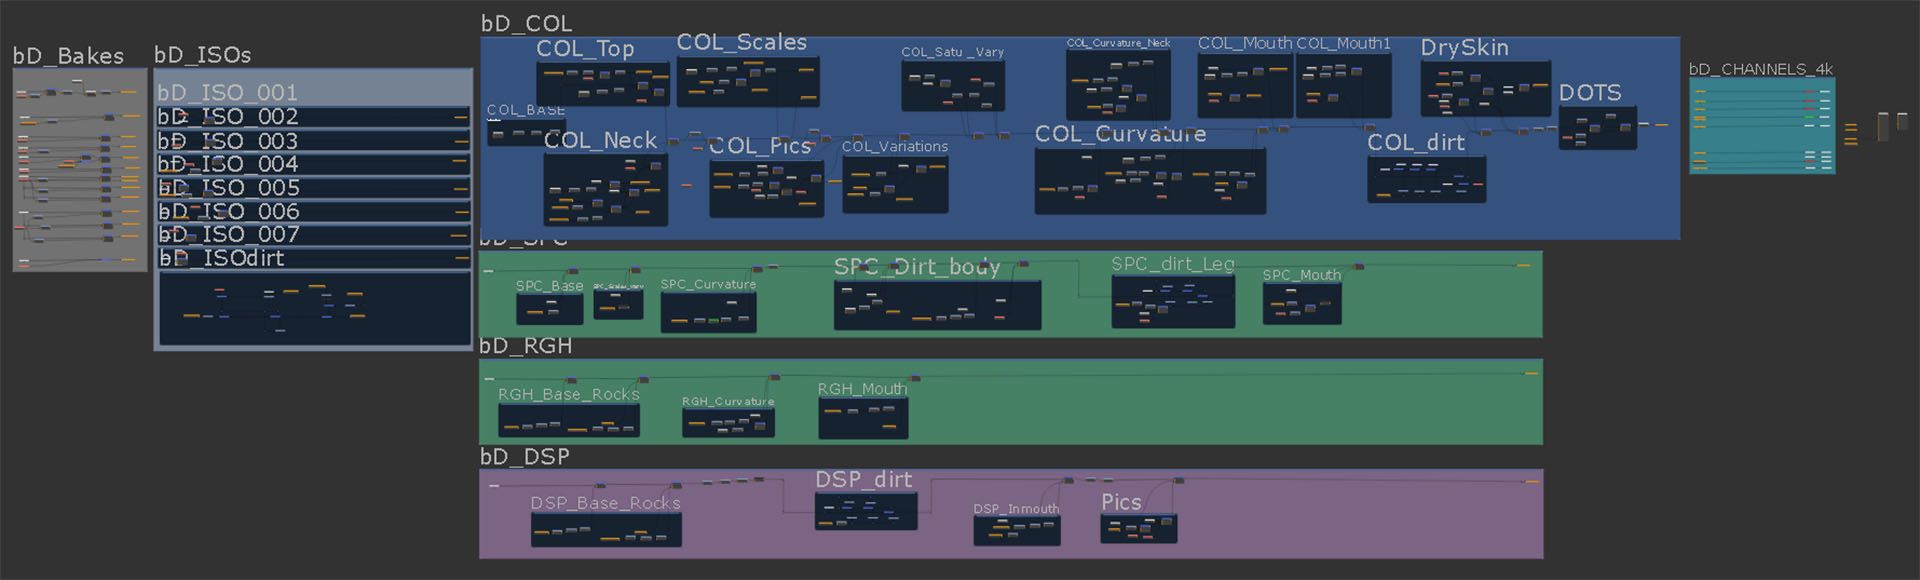
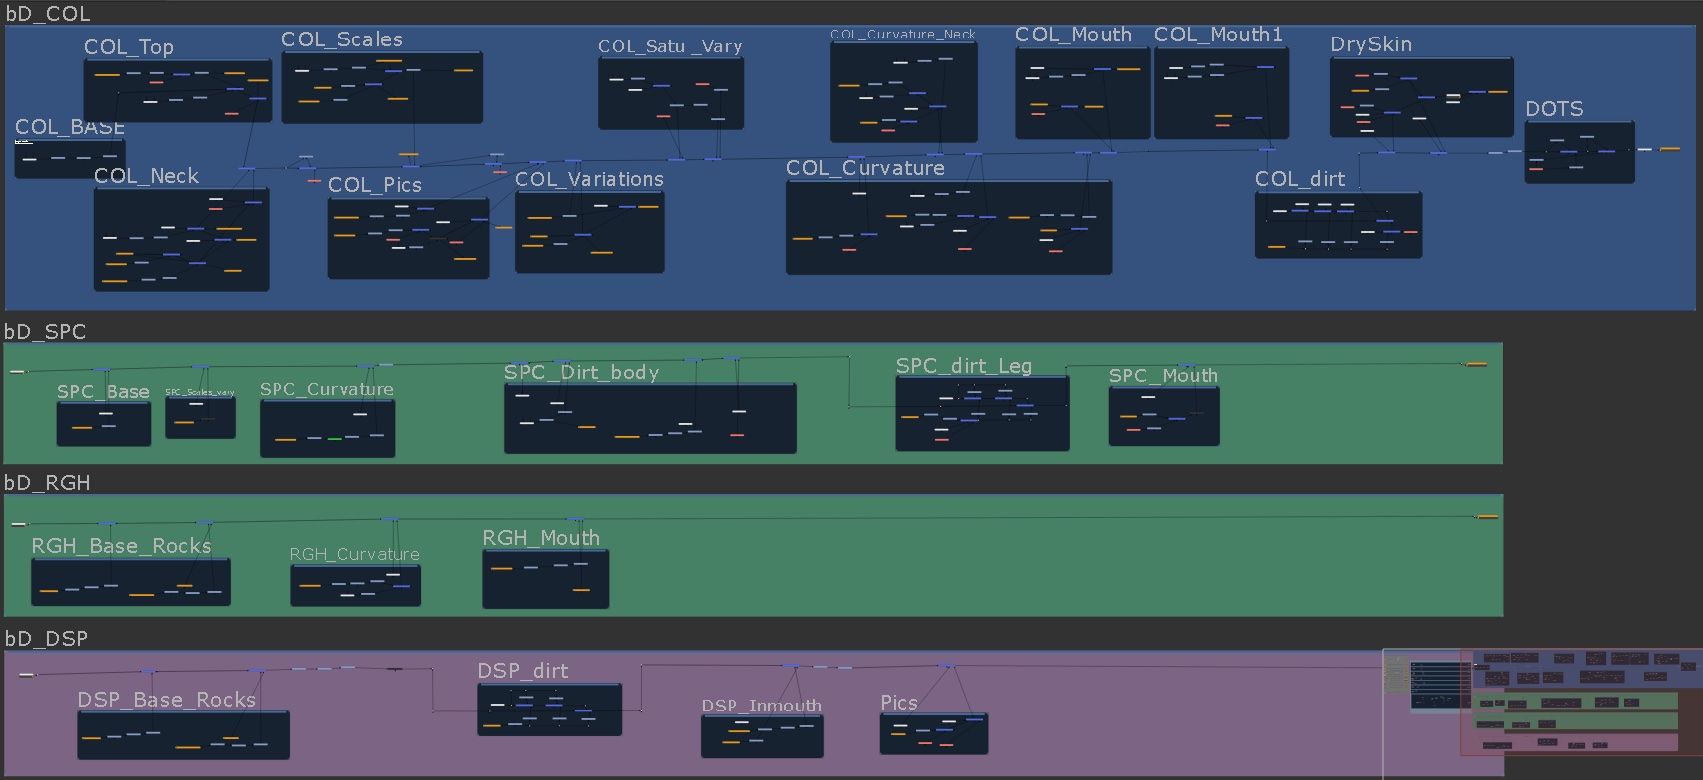
The subsequent phase involves crafting ISO maps, acting as masks within the Mari tree. Once all ISO and bake maps are created and applied, there's room for experimentation, adjustments, and blending to attain the desired results.
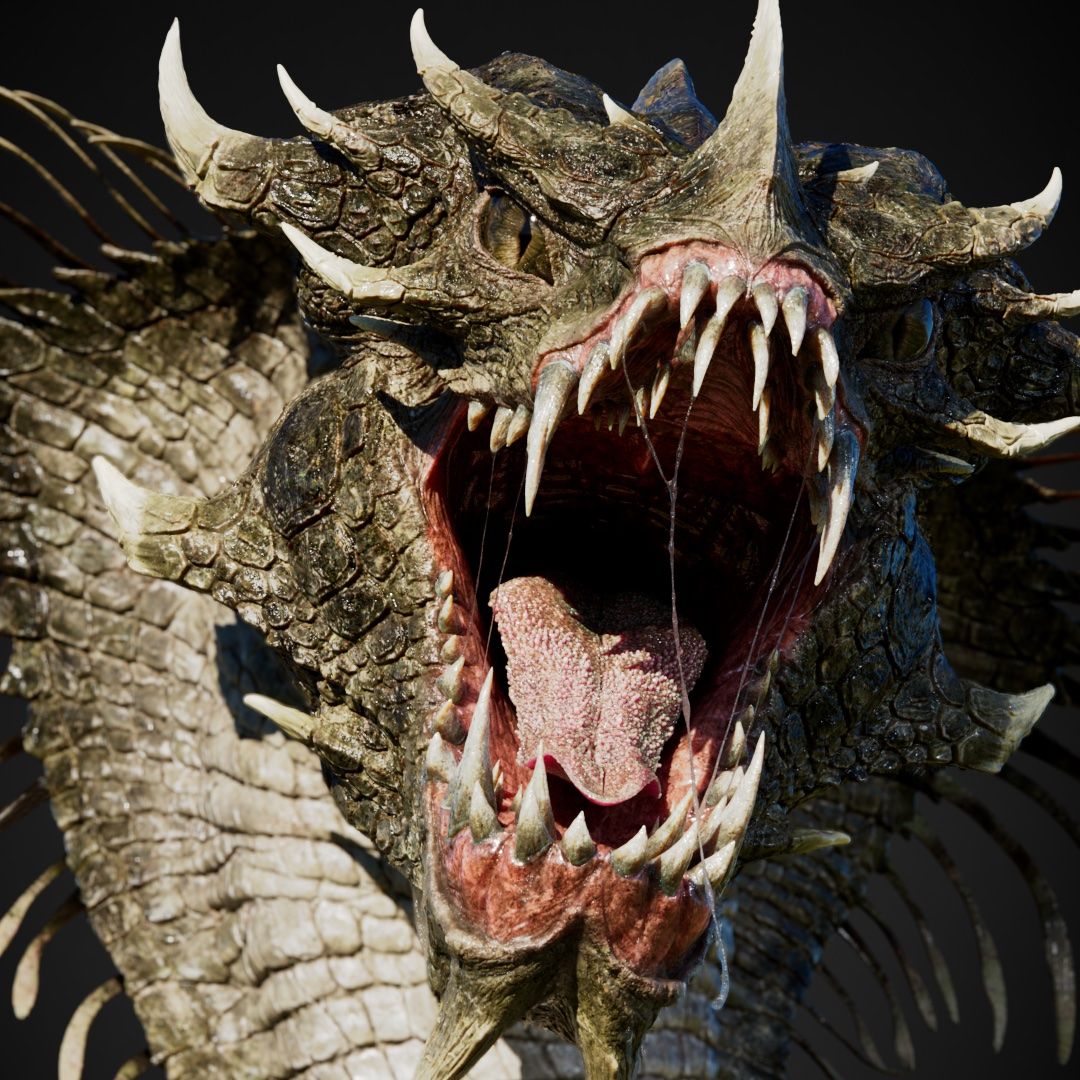
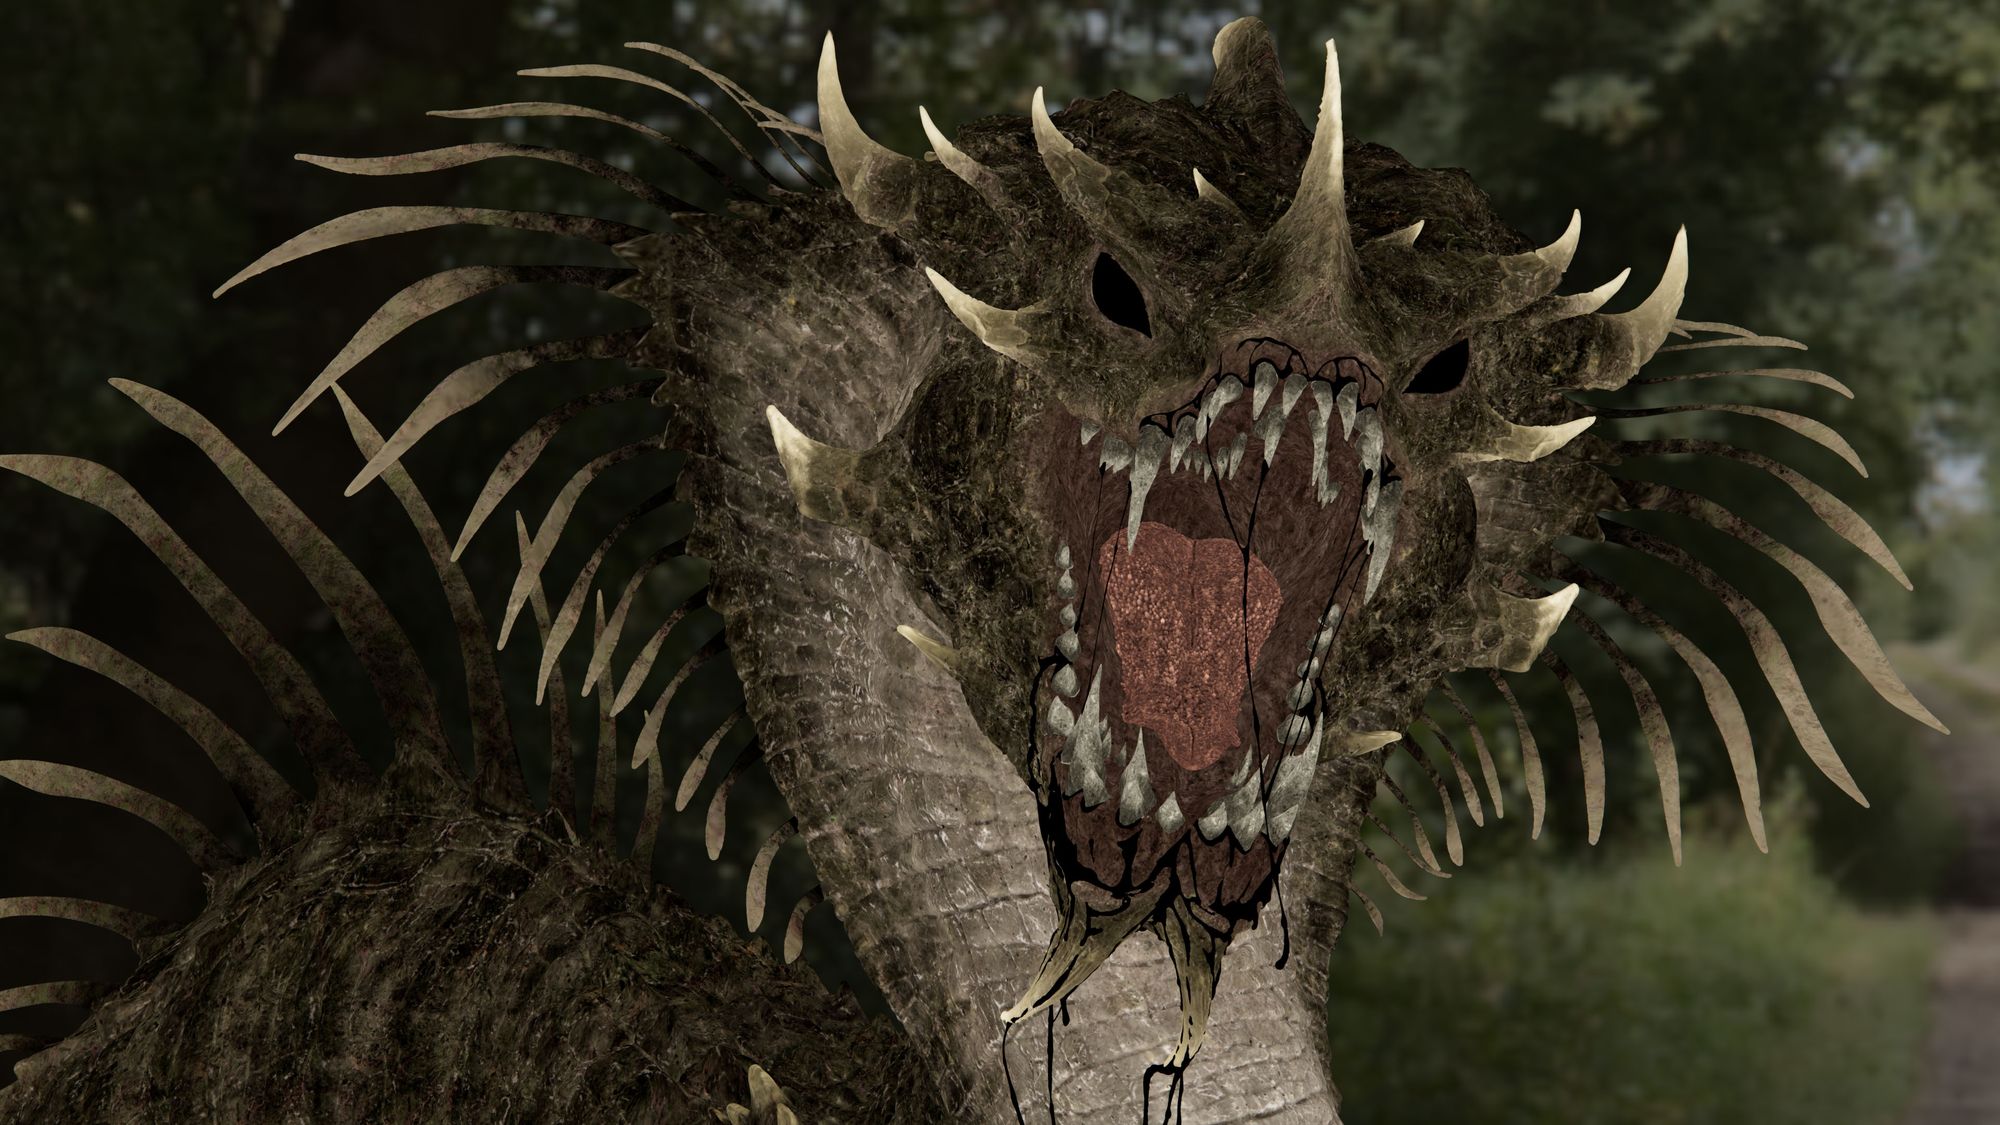
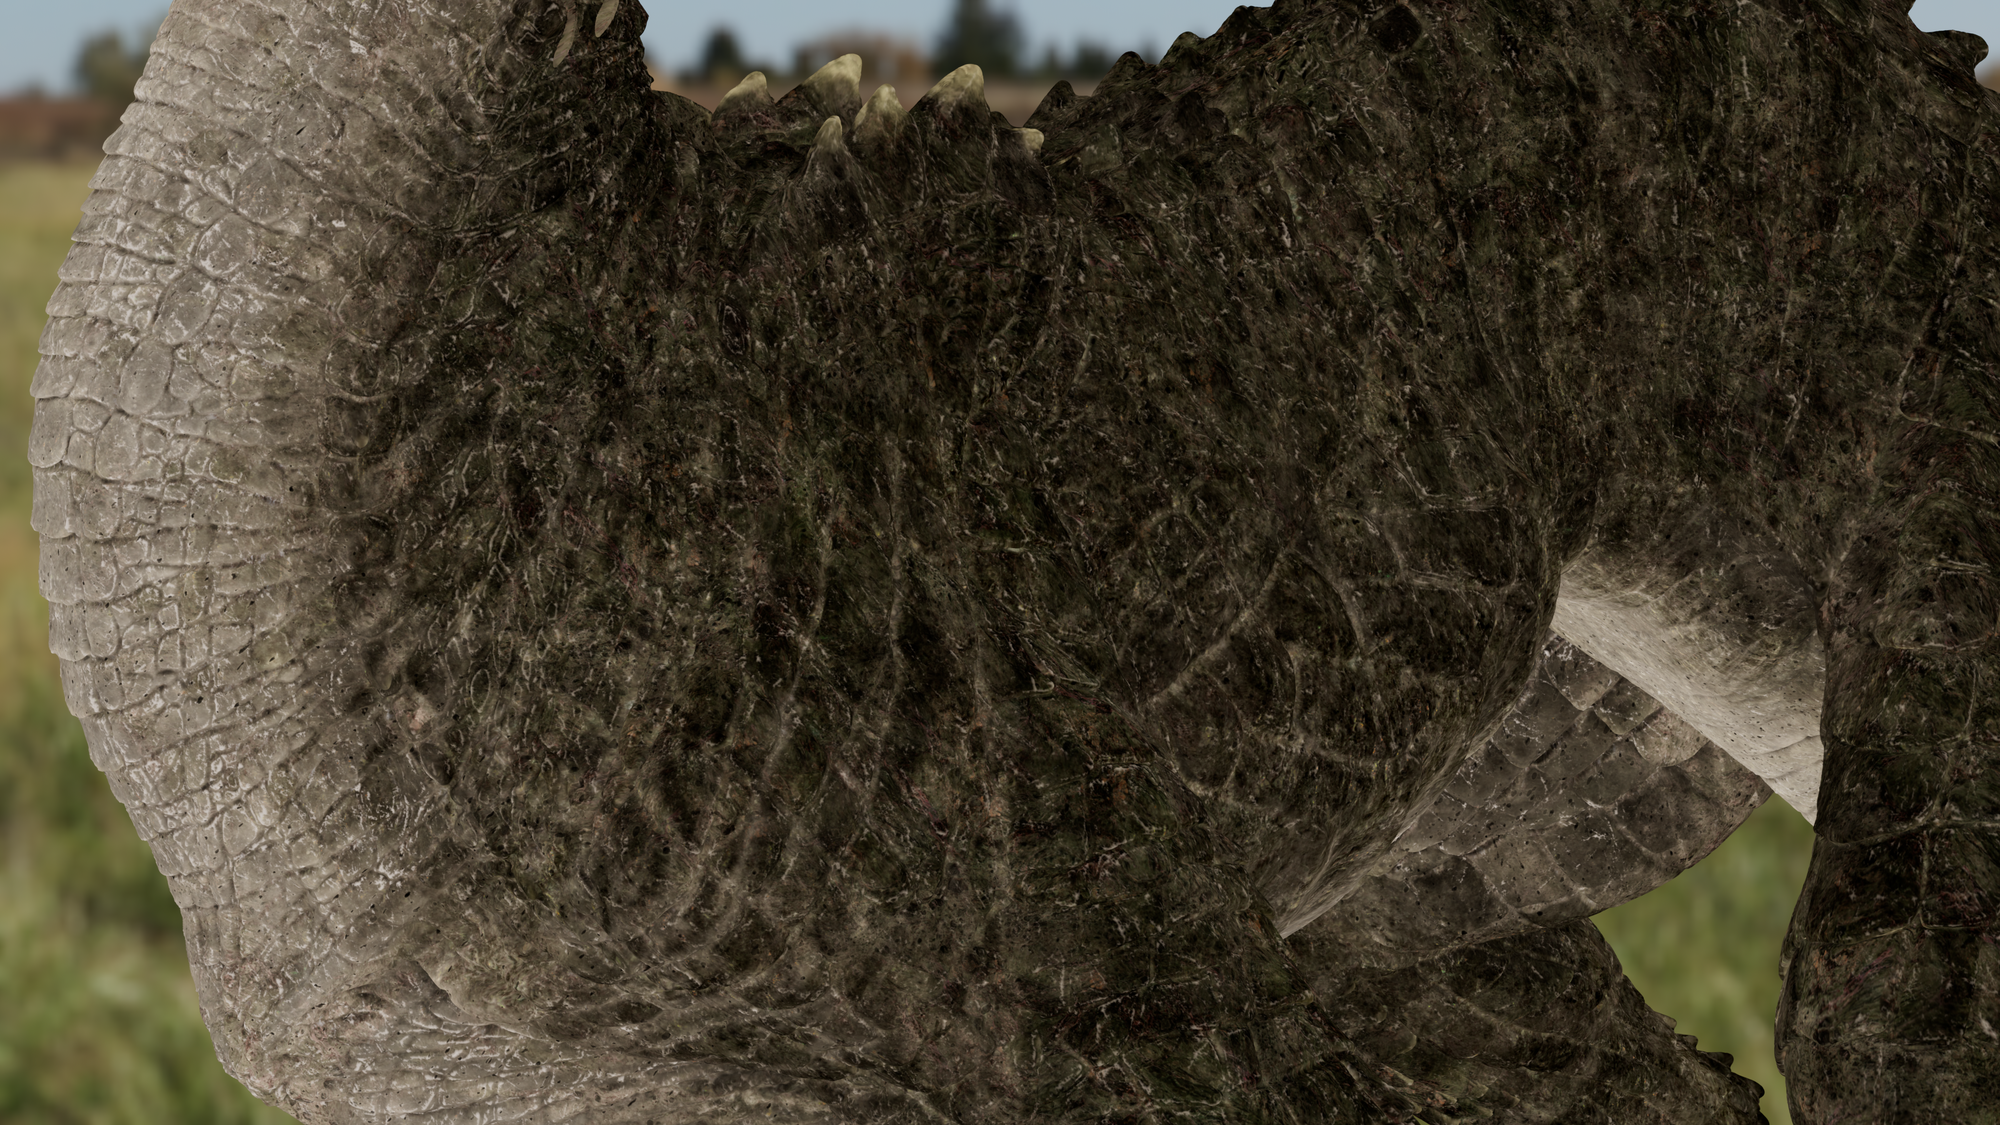
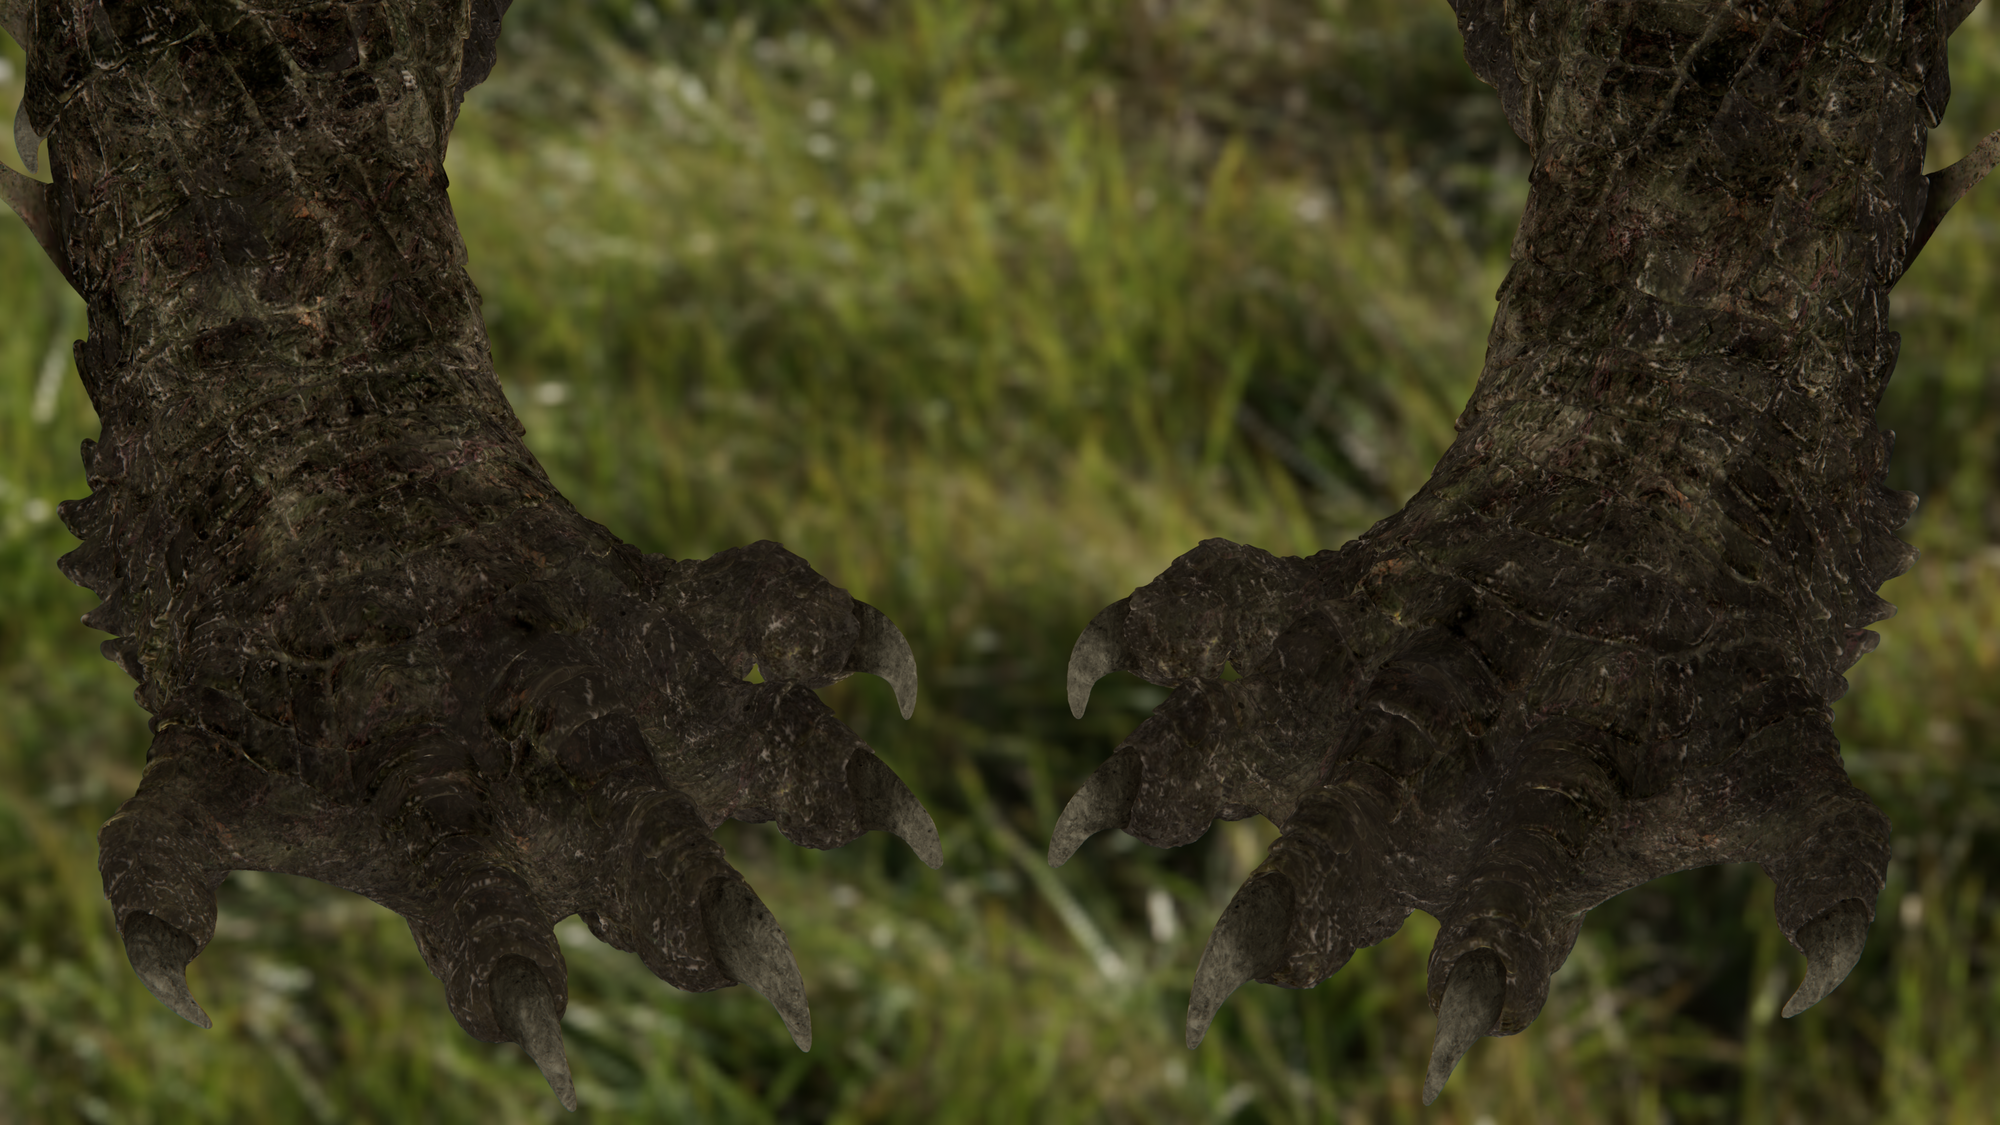
Each mask introduces variations in colour, hue, and saturation, enhancing the natural and authentic appearance. The hue/saturation/value (HSV) values of the asset are fine-tuned for accuracy. Furthermore, each scale possesses distinct attributes, influenced by factors like the creature's posture, which dictate wear and tear patterns. For instance, areas like the creature's belly might display more damage from frequent contact, while its tail and spikes may show signs of wear from combat or environmental factors.
When it comes to working on shader previews, it's best to focus primarily on the displacement channel while minimising distractions by limiting the preview to a single channel like albedo. This approach ensures clarity and reduces the likelihood of confusion that could impact decision-making. However, periodic checks are necessary to ensure everything remains on track.

By utilising the teleport receiver and bake points, a streamlined workflow is achieved, allowing for adjustments to lighten the scene and ensure a responsive viewport experience. This optimisation reduces the time spent on selections, facilitating efficient progress.
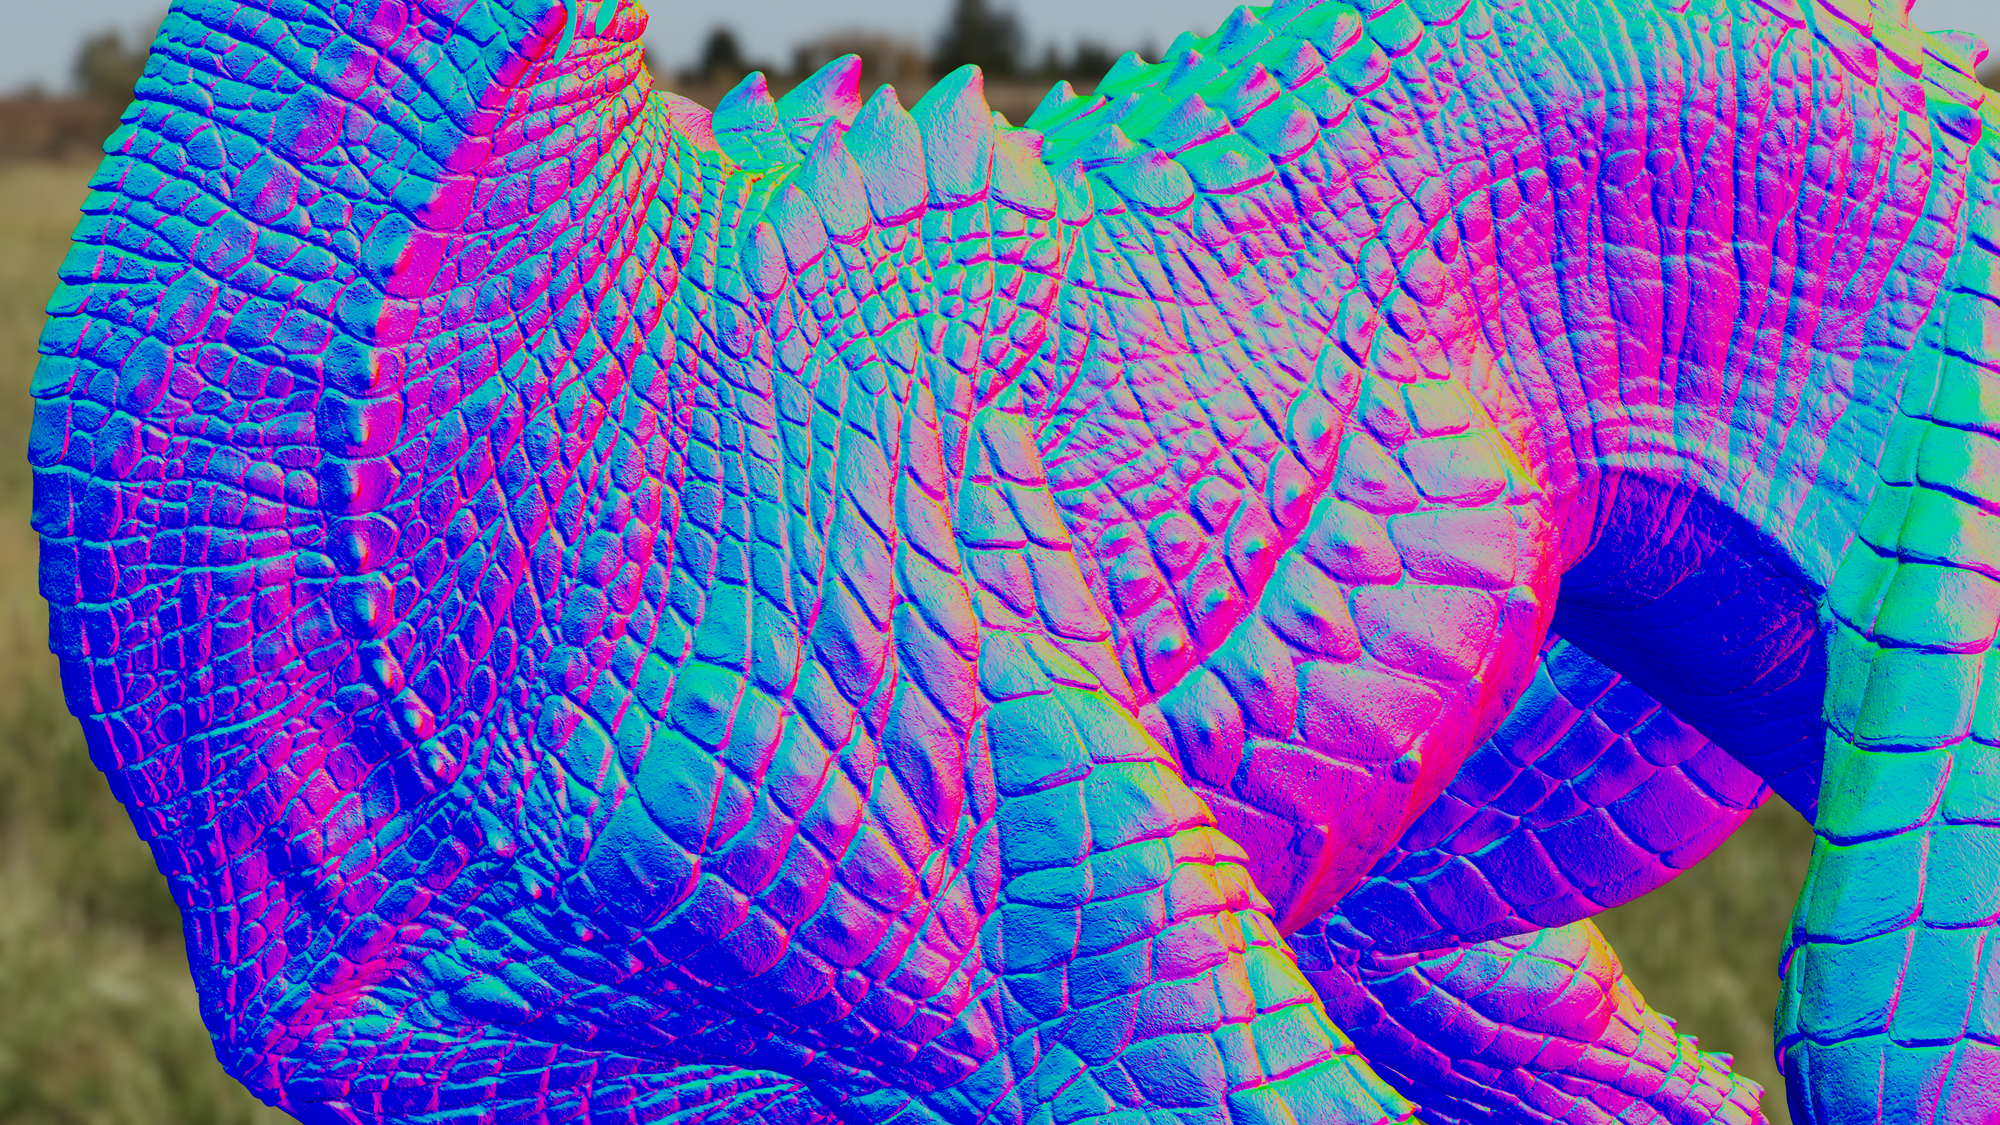
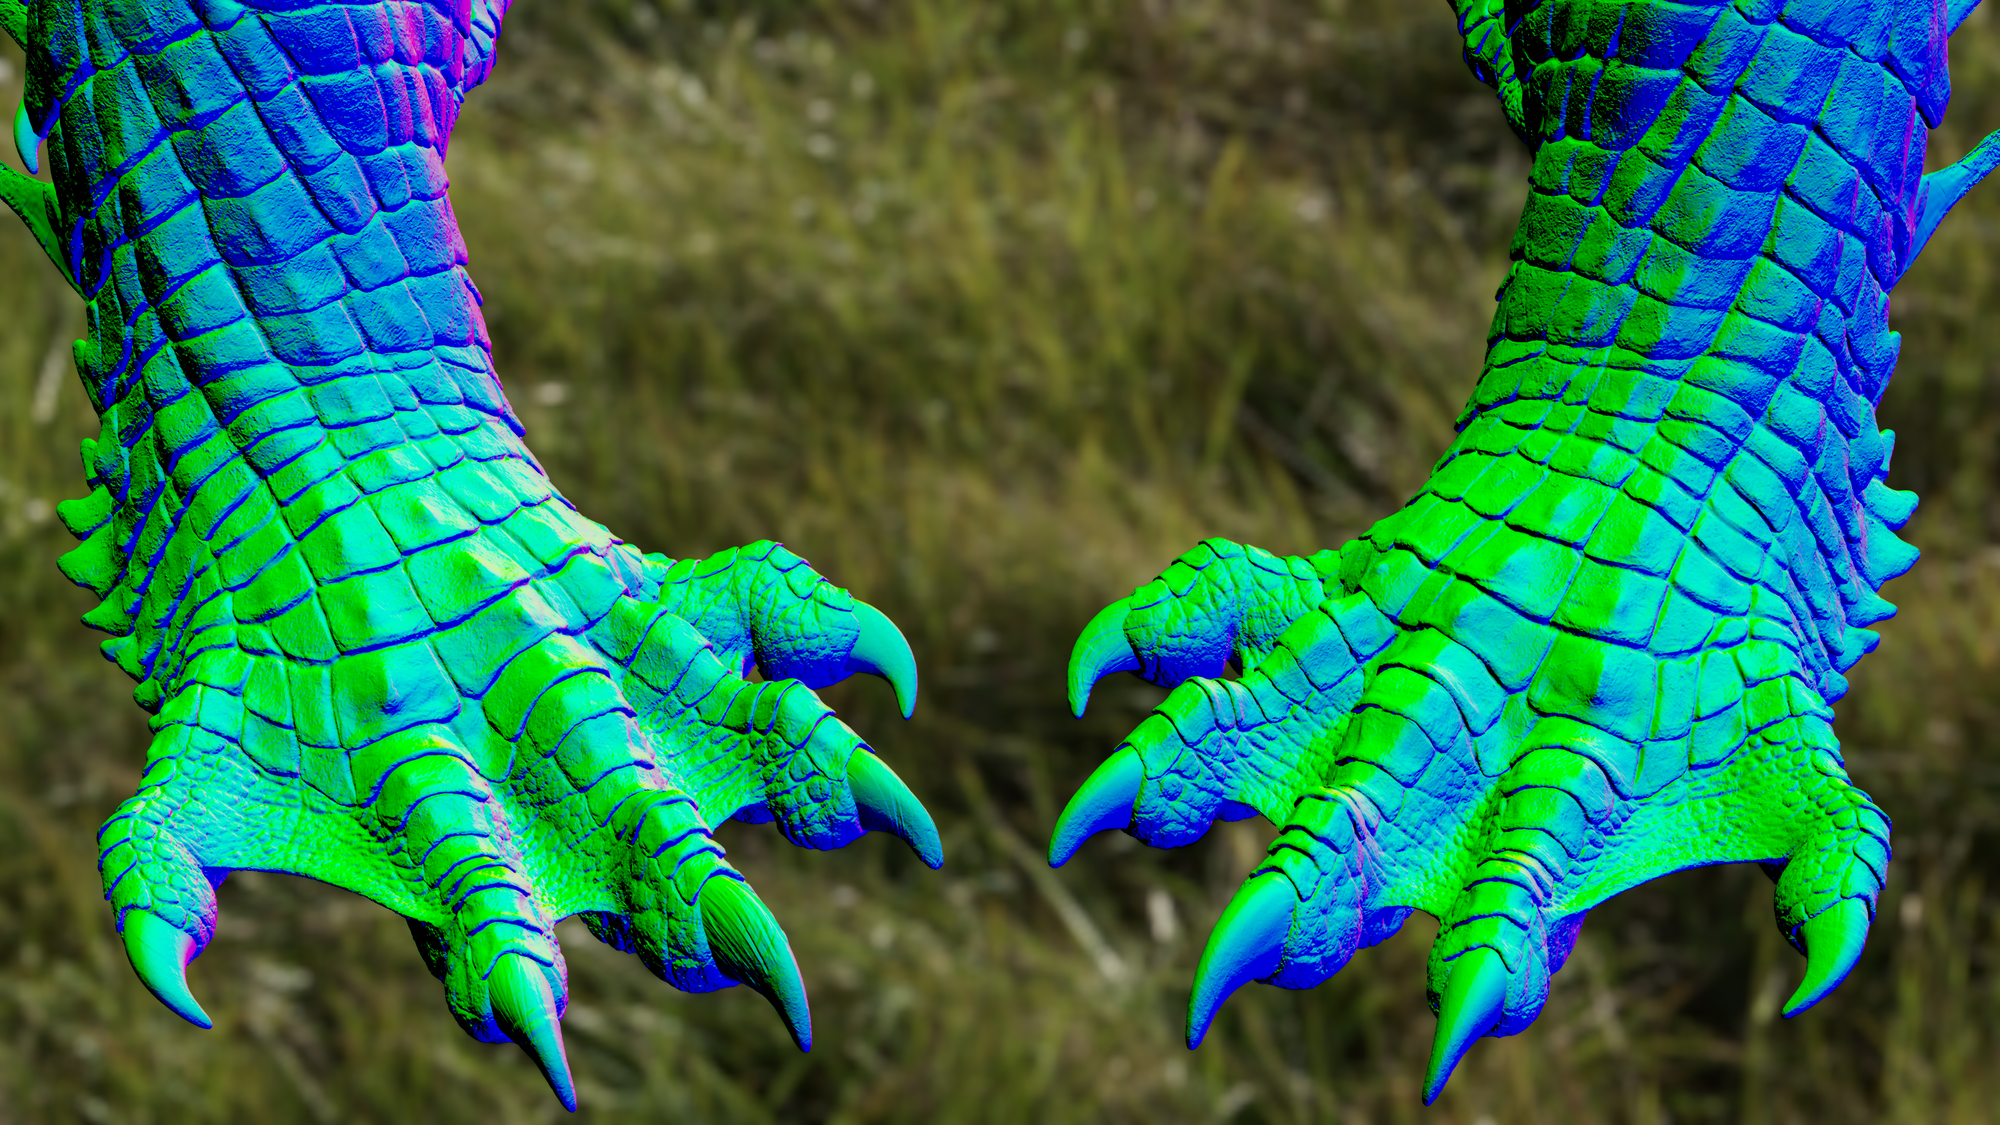
Once all maps and ISOs are aligned, duplicating the left-hand side of the model onto the right-hand side using UV symmetry, as detailed in the modeling section, is recommended. Subsequently, introducing procedural asymmetry through triplanar projection of rock, noise, and oil maps enhances variation across ISO, colour, and bake maps, resulting in a more natural and organic appearance.
In the last step, we enhance specific specular highlights along the scale edges, while also boosting detail in the albedo. After completing the mask creation process, we return to Mari for texture publishing, signaling the shift to the Lookdev stage.
To introduce maximum variation, integrating ISO maps and displacement/utility maps with rock and granite maps in triplanar projection is essential. This approach enhances detail significantly, facilitating smooth transitions between each layer level created within the Mari node.
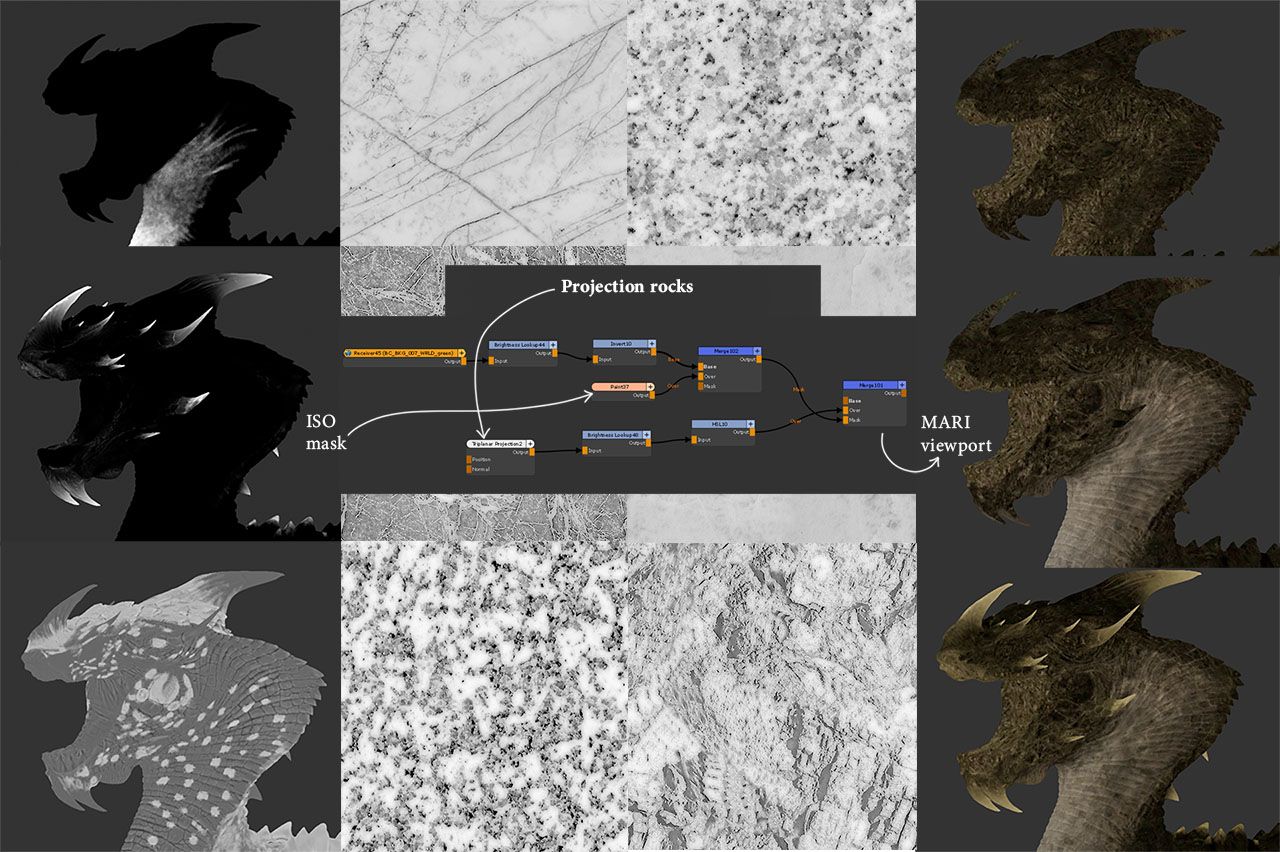
After completing the procedural pass, which merges scanned map projection and procedural nodes, we proceed with a final texturing pass to introduce a wide range of micro-detail variations. Utilising Substance 3D Designer and Substance 3D Painter, we adjust HSV variations on the scales and add subtle details of dead skin, strategically placed at specific scale ends. This phase involves careful consideration of the creature's movement and environment, with reference to texturing materials to guide decisions.

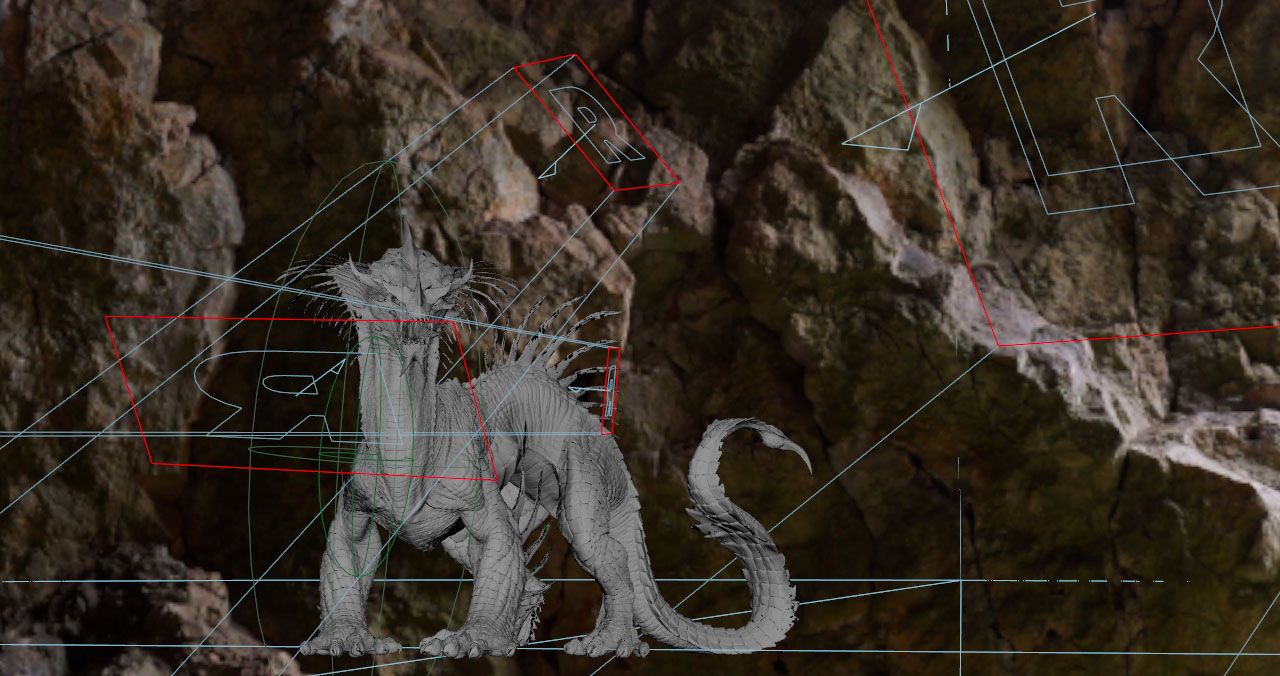
Feel free to vary the previews in Mari by switching from orthographic to perspective view and adjusting your focal length. Analyze your UVs to ensure that your asset works seamlessly in its entirety, covering all angles and perspectives.
In the concluding phase, we delve into refining specific specular highlights along the scale edges, enriching the intricate detail within the albedo. Once the meticulous process of mask creation reaches completion, our attention shifts back to Mari for texture publishing, signifying the commencement of the Lookdev stage. This pivotal transition underscores the meticulous attention to detail and the iterative refinement integral to achieving visual excellence in our project.
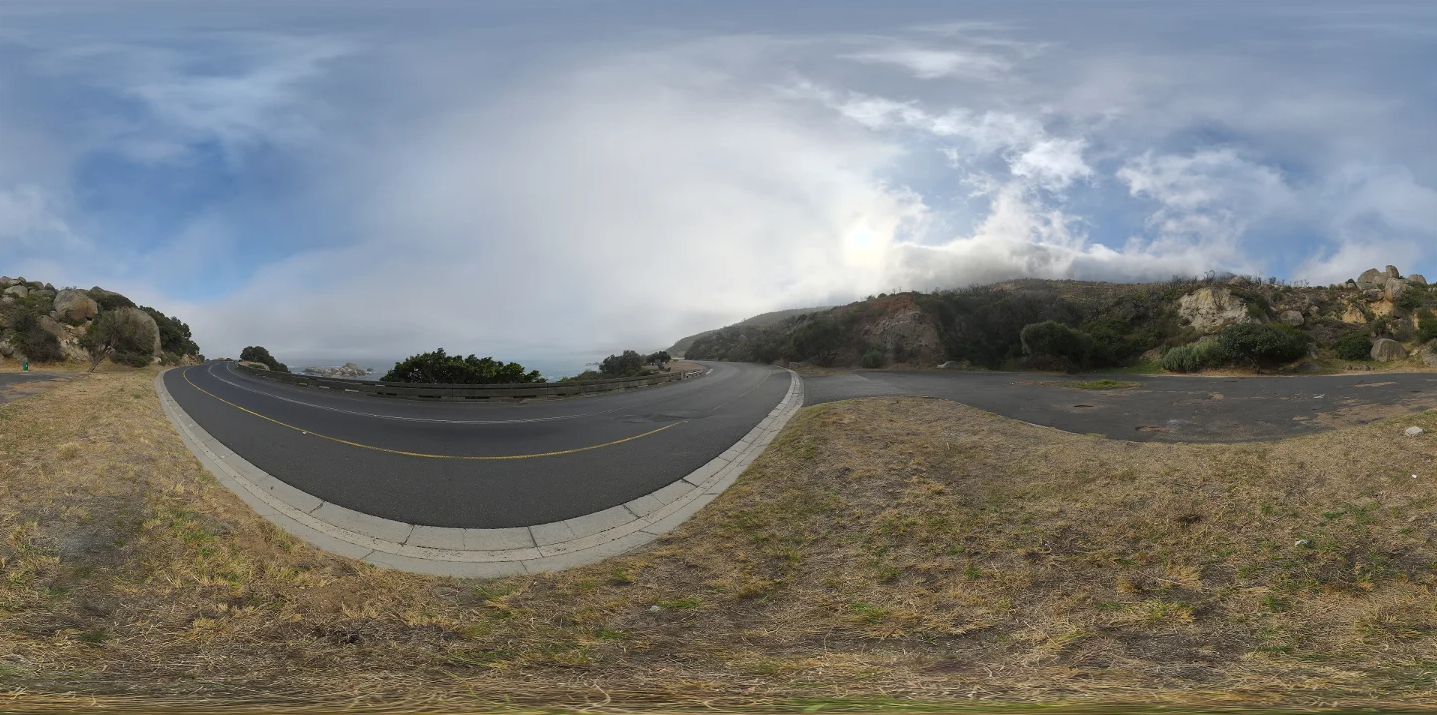
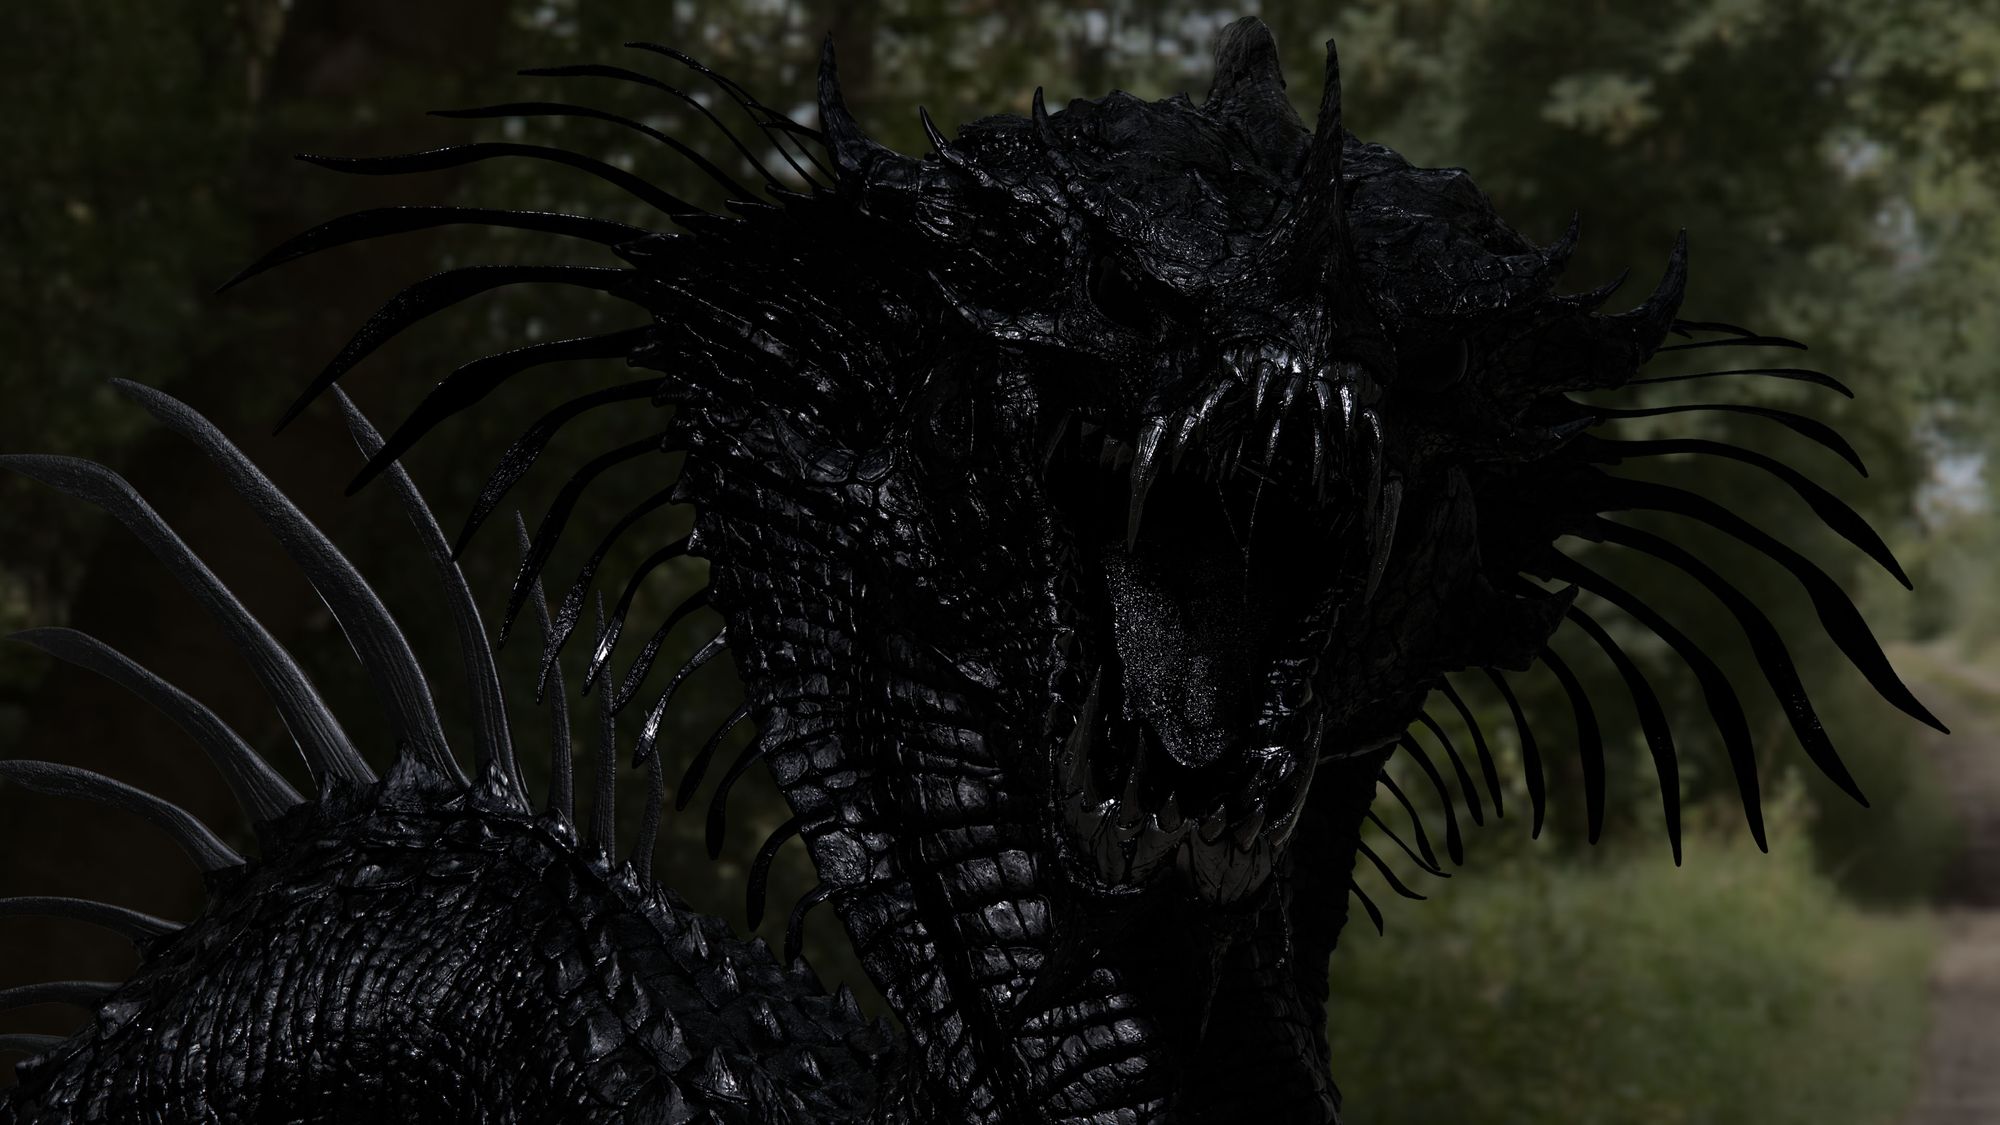
In your Lookdev scene, start with neutral lighting following traditional principles, incorporating chrome balls/grey balls and a Macbeth chart. Set up a key light, a backlight, and an HDRI from Polyhaven to provide fill light and define the studio's boundaries. While keeping it neutral, add your personal flair to the scene. This not only prepares your assets for shading but also elevates the presentation, making it more appealing to potential studios or clients.

Switch light rigs frequently during the shading process to maintain the asset's neutrality, making it adaptable to different environments and lighting conditions. This method reduces the necessity for extensive shader modifications for each shot. Use HDRI environments like full sunlight and a diffuse gray sky to refine your shaders efficiently.


The initial crucial phase in Lookdev entails configuring the displacement output from Zbrush to ensure minimal frequency loss between ZBrush and RenderMan. A meticulous displacement setup is implemented, which organizes the detail levels per map into primary, secondary, and tertiary categories.
Each map is exported with an average gray value of 0.5 and is centered in the PxrDispTransform node in RenderMan to prevent model distortion, ensuring that the value of 0.5 remains undisturbed.

The PxrDispScalarLayer provides precise control over each map, allowing adjustments based on the intensity of the PxrDisplace. Additionally, utilising a PxrBump with a minimal value assists in doubling the displacement maps, recovering some of the lost volume frequencies during map exports.
The primary displacement map, exported from ZBrush's Subdiv 3 of the Kurtis model, preserves essential bake information in topology to accurately convey all displacement data. The secondary map, exported from Mari, reflects volume alterations based on colour variations. Finally, the tertiary map is generated using a mask created in Substance Painter, then imported into Nuke for blending and the creation of additional volume variations. This process involves enhancing the map with a Highpass filter and employing expression nodes to introduce small details such as dead skin and minor breaks.
In the second phase, when working with specular components, employing three distinct lobes maximises the shader's effectiveness.

The first lobe, Primary Specular, is controlled by a map that regulates specularity in specific regions, such as the paws and the curvature of the scales. Additionally, this lobe is influenced by a scalar roughness map, which determines the specular roughness across the scales.
The second lobe, Rough Specular, adds an overall specular effect to the entire model, appearing significantly rougher than the first lobe. This helps to soften the spread of specular highlights over the scales and spikes.
Finally, the Clearcoat lobe enhances the specular highlights on the mucous membranes inside the mouth. This lobe is managed by an ISO mask map, which restricts the additional specular highlights to designated areas where they are desired.


Once the displacement and specular components are properly configured on your assets, the final step involves refining the albedo to determine the colour and subsurface characteristics of the scales. Adjusting the gain ensures that the combined values of color, subsurface, and single scatter approximate 1. For the mucous membranes, emphasizing the viscous quality inside the mouth is achieved using the single scatter lobe.

Maintaining distinct parameters for scales and mucous membranes allows for maximum control over the shader, reducing the need to switch back and forth between Mari and RenderMan. Utilising the full range of parameters available on the PxrSurface shader is essential, with the understanding that each parameter is influenced by the gain. For example, adjusting the mean free path distance in the subsurface requires corresponding adjustments to the shader parameters and the gains on each lobe.

After completing these steps, thoroughly test the reliability of your shaders under various lighting conditions before proceeding to shot and environment settings. This ensures the shaders perform consistently across different scenarios, guaranteeing optimal visual quality in your final renders.
Make sure to always check your different AOVs to easily access your specular or color parameters, for example. This will allow you to simply verify the progress of your work.

A higher resolution render at this point doesn't hurt either, as it helps us check for any texturing inconsistencies under ideal conditions.

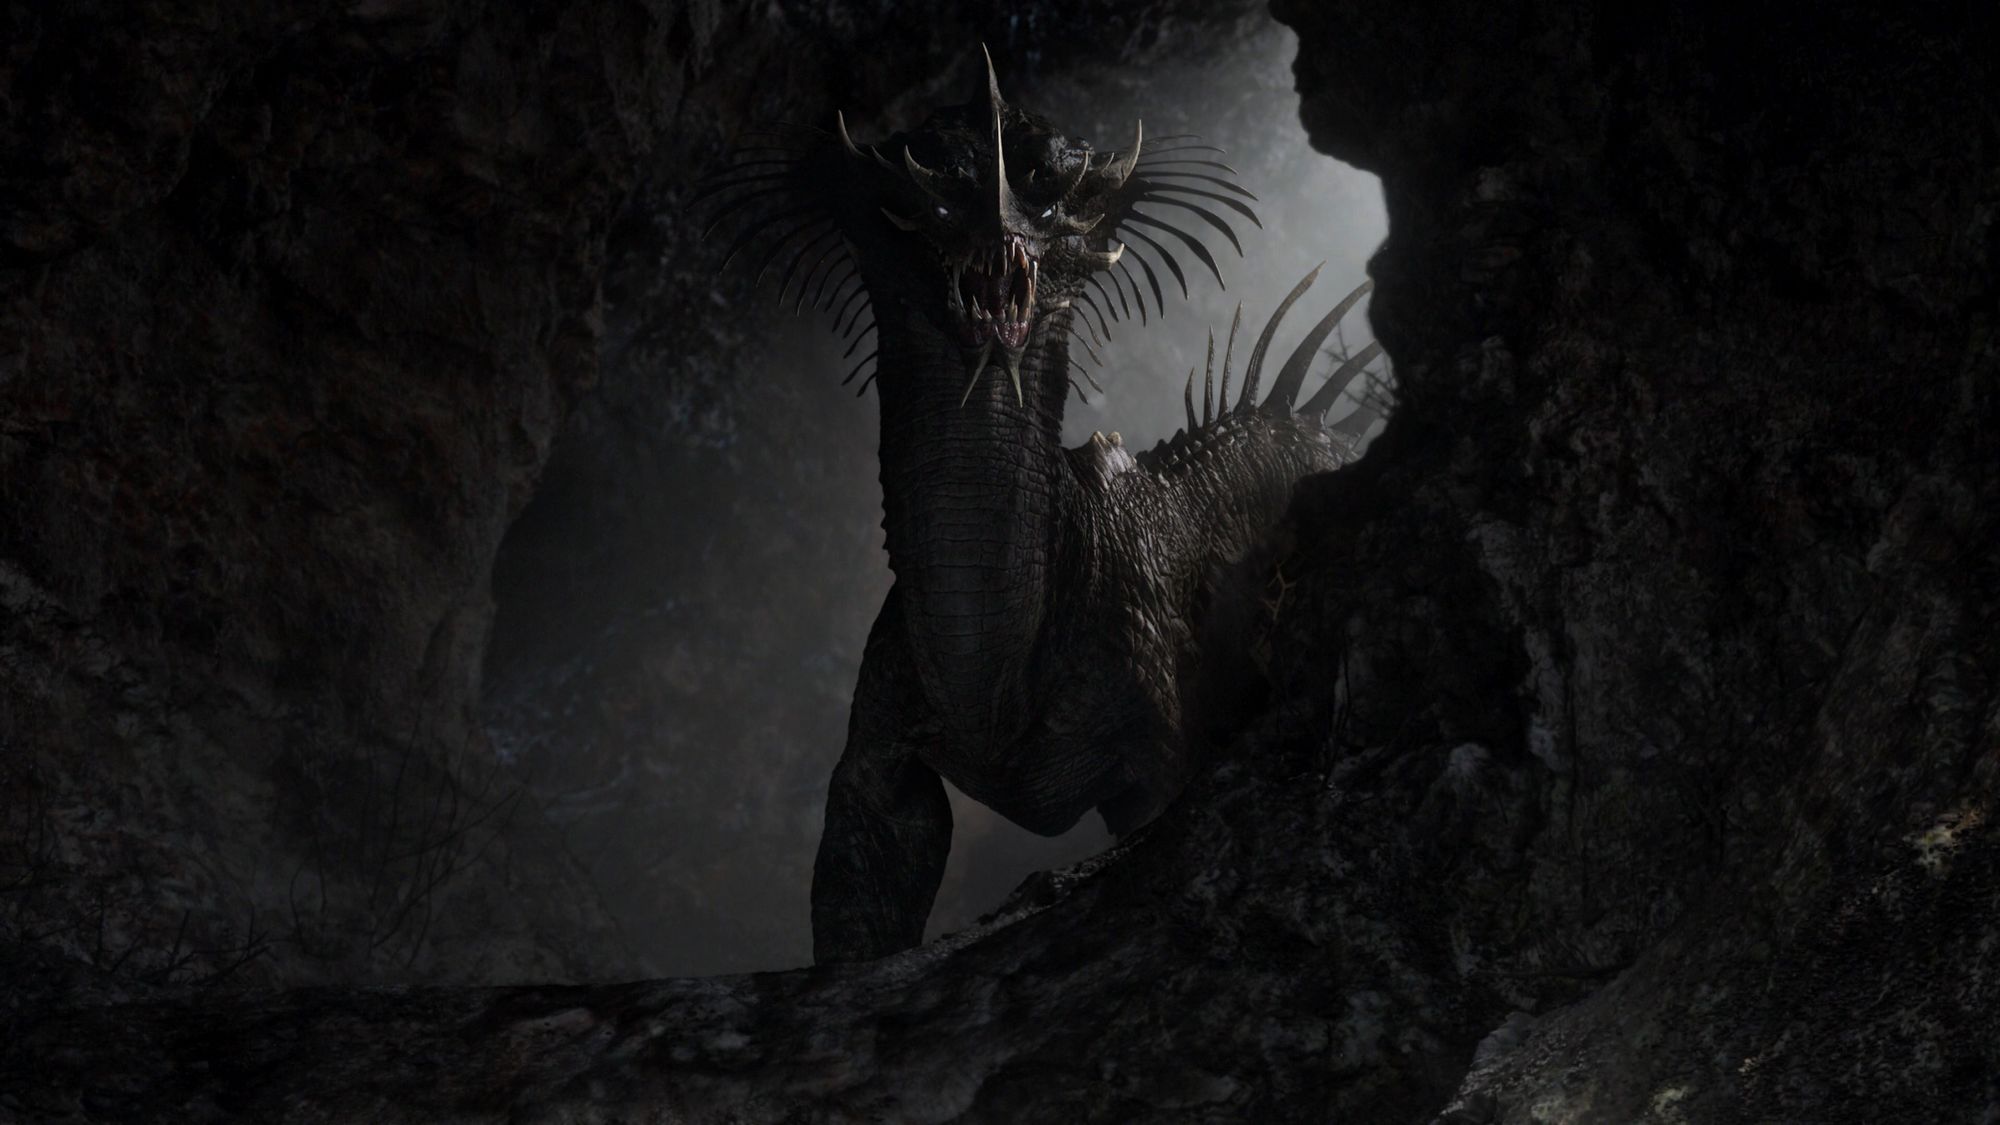
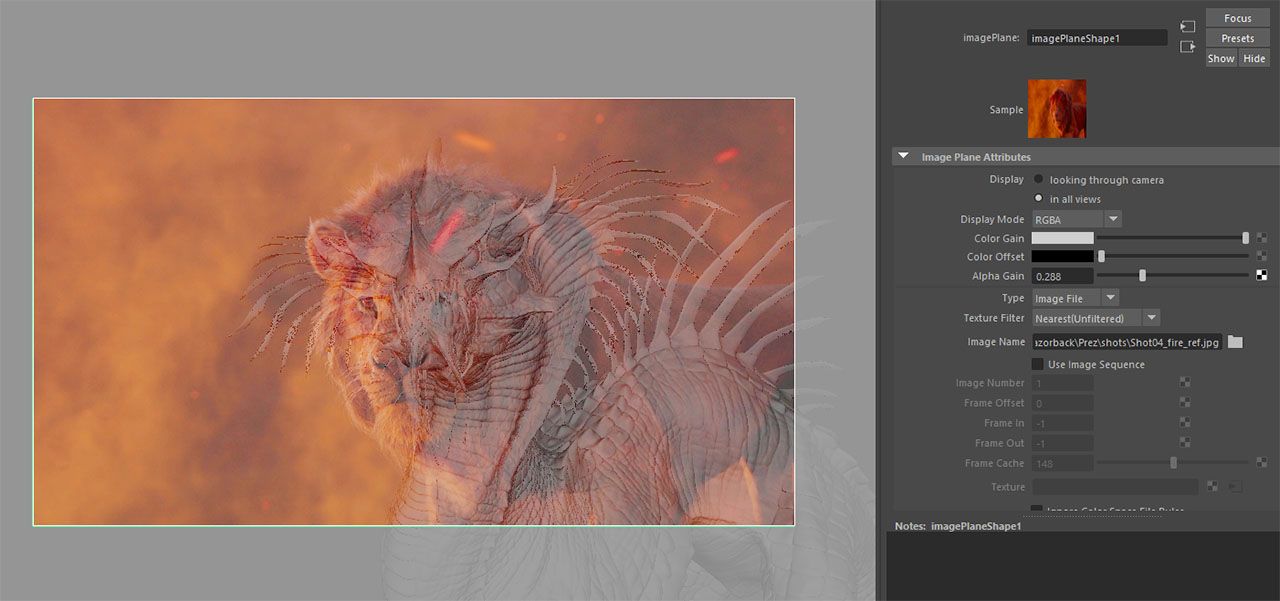
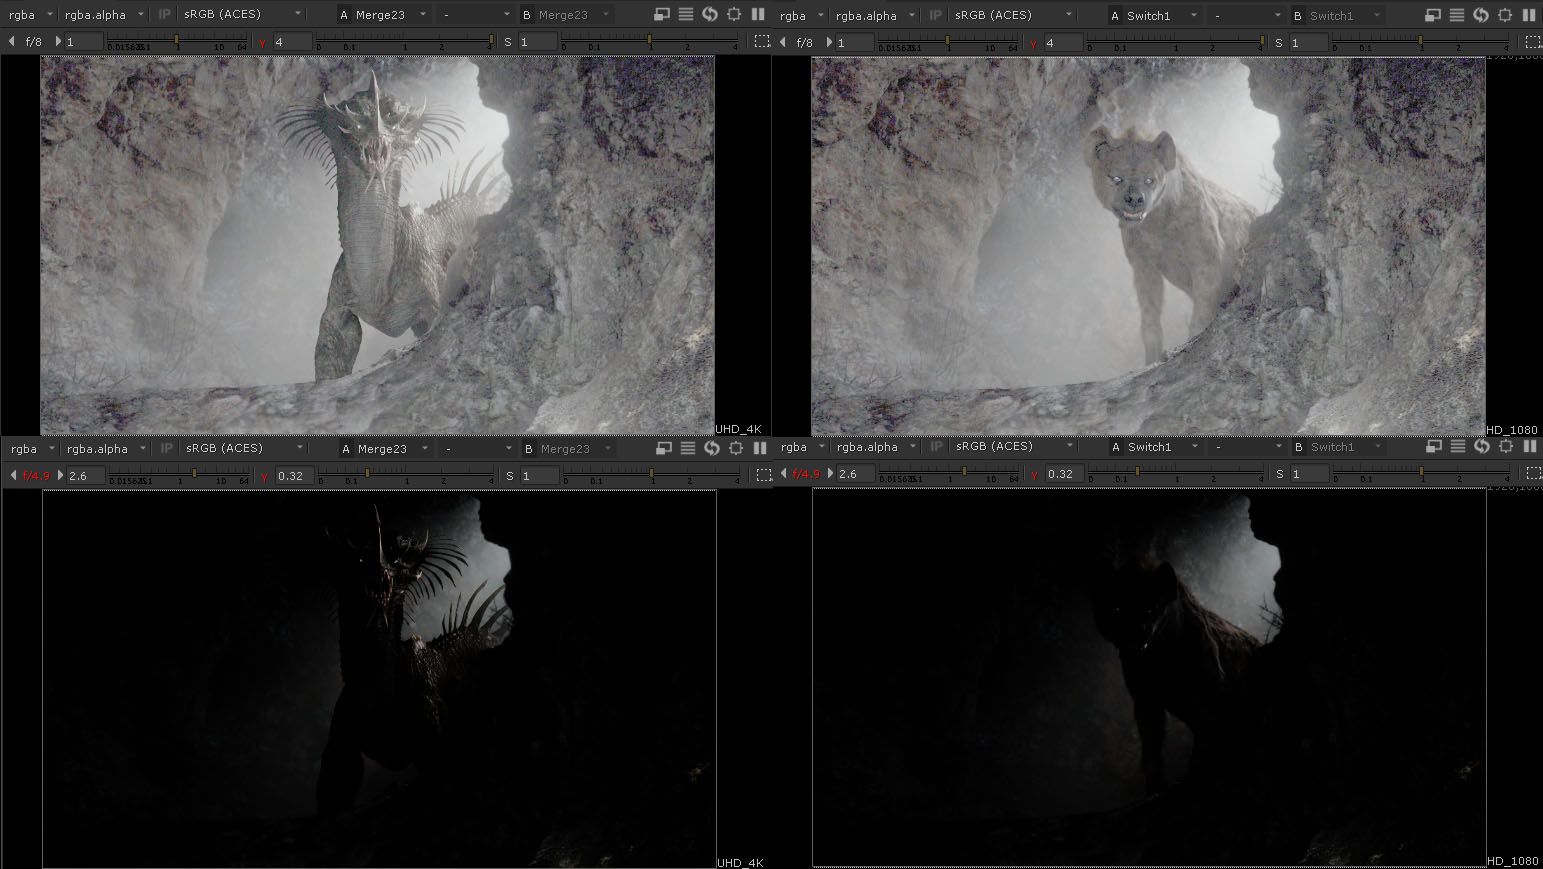
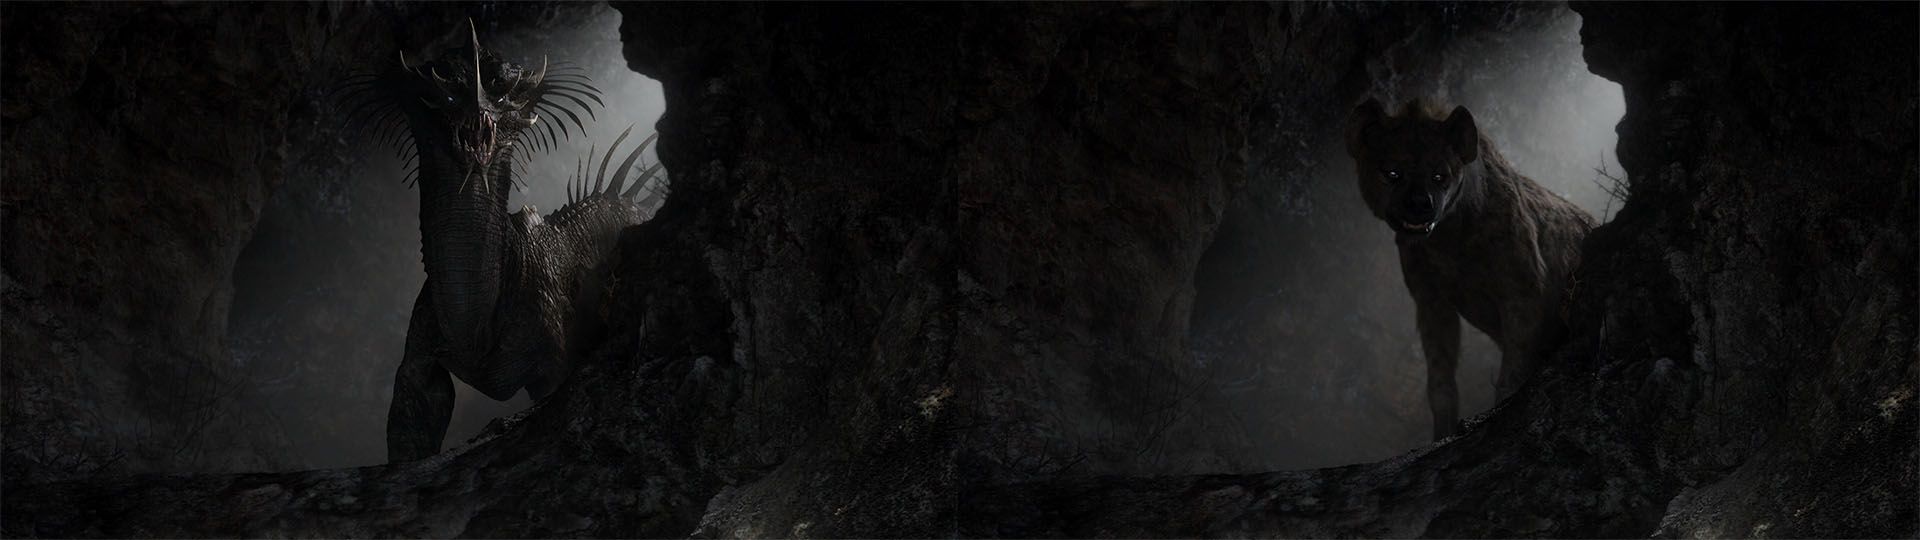
I've chosen to integrate my Razorback into various environments as an alternative approach. This method offers valuable insights into how the asset fits with different settings and lighting conditions. To source diverse environments, I extensively used Shotdeck, a platform providing access to film references. I spent countless hours meticulously selecting the most compelling references, many of which came from the 2019 Disney film, The Lion King. These references serve as excellent benchmarks for aligning my creation with established film sets.

Integrating my creature into these environments is an invaluable exercise in lighting, allowing me to refine my skills in image analysis. This involves studying light sources, their quantity, intensity, exposure, temperature, and more. Each integration acts as a lighting workout, providing opportunities for growth and development in understanding and manipulating light within a scene.
Engaging in light matching exercises is a highly effective method for refining your lighting skills. By analysing light sources, their intensity, and how they interact with your asset, you can enhance your visual acuity and understanding of lighting principles. Each question posed during this process deepens your knowledge of reference analysis and lighting techniques.

Upon completing the lighting match, utilising AOVs (Arbitrary Output Variables) provides maximum flexibility in compositing. These additional render passes allow precise control over individual elements, enabling fine-tuning and refinement in post-production. By harnessing the power of AOVs, artists can achieve greater artistic control and produce polished, professional-quality results.
When setting up render layers and AOVs, it's crucial to output one Light Path Expression (LPE) per main light. Alternatively, you can group lights with similar functions, like rim lights. However, be cautious with excessive grouping as it can reduce flexibility in compositing. Additionally, separating diffusers from specular highlights allows for precise adjustments and corrections between shading and lighting.
Ideally, if everything is perfectly calibrated, such separation might not be necessary. However, in situations where a light's intensity is too strong and causes exaggerated specular effects, separating AOVs becomes invaluable. This approach enables targeted adjustments, helping to correct issues and achieve the desired visual outcomes during post-production.

For compositing, consider using an additive reconstruction method with the shuffle node to rebuild your entire set of AOVs and recreate the final "beauty" image. After completing the reconstruction, you can enhance the light and colour intensity to closely match your references using utility nodes. Also, ensure that defocus and motion blur are consistent with the references, if applicable.
To accurately match your references, adjust the gain and gamma at both ends of the spectrum to align the grain and black-and-white points. Testing extreme values can offer additional visual and technical insights, helping you fine-tune the image and improve integration.
Keep in mind that you're matching a reference with different assets, which may result in variations in shaders, specular highlights, and contrast. For example, scales will reflect light differently than hair due to their inherent properties. Therefore, adapt your adjustments to achieve cohesive visual consistency while considering the unique characteristics of each asset.
Finish the compositing process with a final colour correction pass, adding glow, vignetting, and grain to integrate the asset seamlessly into the shot environment. Custom-built nodes or those available from Nukepedia can provide technical tools for precise adjustments, ensuring the final result is accurate and polished.
Utilise the node switch and the W key to facilitate an effective comparison between your reference and your rendering. Examine your reference closely, zooming in and out as needed, and test various screens with different colorimetry and calibration, as these factors can influence perception.
By toggling between the reference and your rendering, you can identify areas where adjustments are needed to achieve closer alignment. Pay attention to details and nuances, ensuring that your rendering faithfully captures the essence and characteristics of the reference image. This meticulous approach enhances the accuracy and quality of your final output.
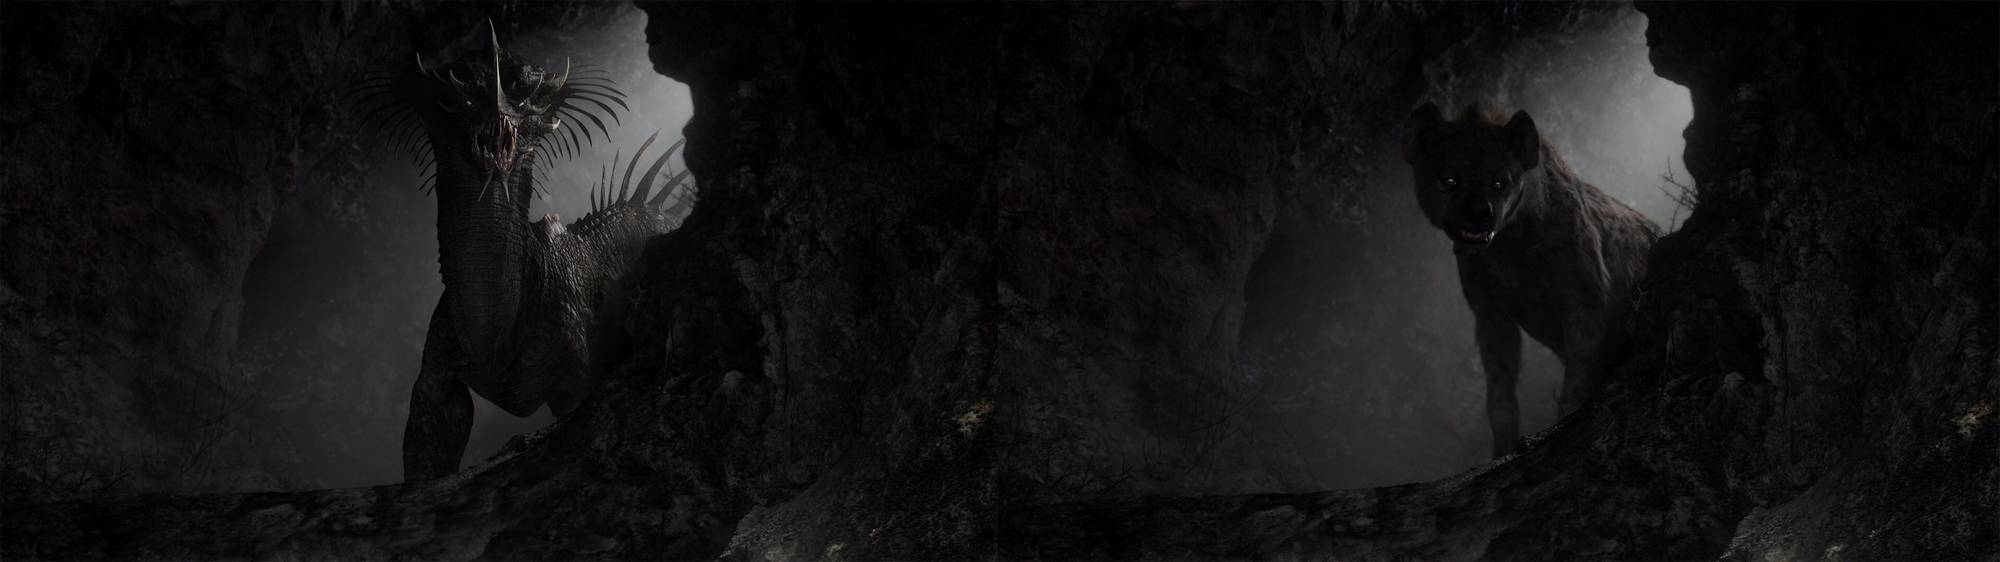
To finish up, here are some renders matching film plates from The Lion King:


The entire project can be downloaded from the Renderman website
I would like to extend my gratitude to Kurtis Dawe for his amazing model, and to Loucas Rongeart and Sebastiano Dalla Mora for their invaluable help with this project. I also want to thank The Rookies for the opportunity to share and create this article. If you're interested, check out my Rookies profile here, where I have other posts and projects with a similar vibe that you might enjoy.
