The Treehouse: A ZBrush Sculpted Diorama
Savvas Saroglou, studying Game Graphics Production at Howest University of Applied Sciences - Digital Arts and Entertainment, shares an exciting project from his digital sculpting course.
Savvas Saroglou, studying Game Graphics Production at Howest University of Applied Sciences - Digital Arts and Entertainment, shares an exciting project from his digital sculpting course.

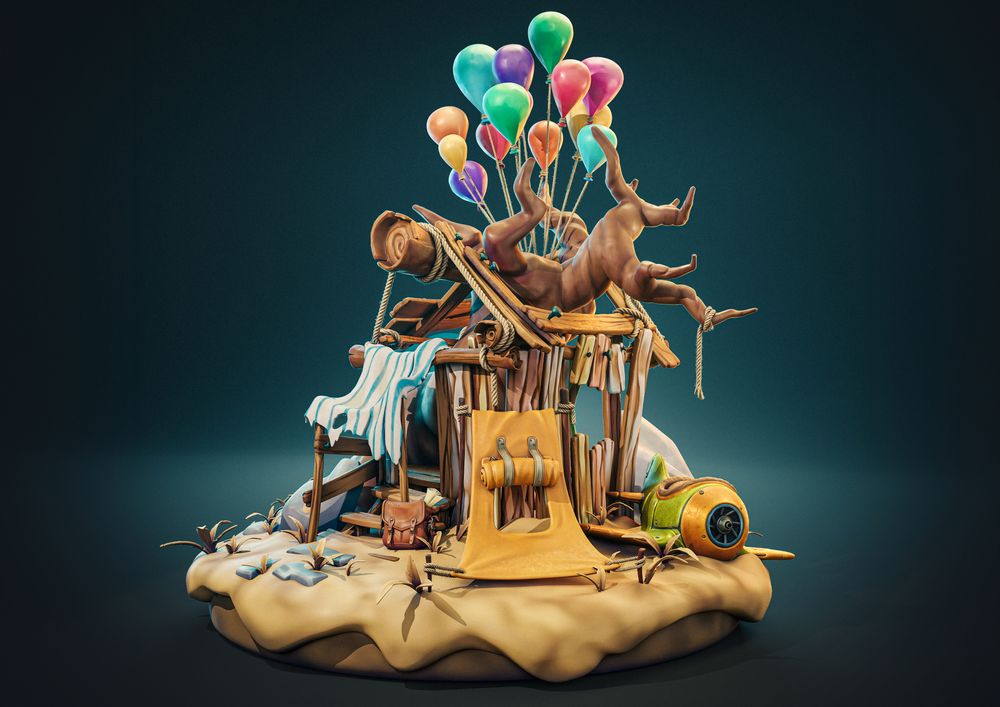
Savvas Saroglou, currently enrolled in Game Graphics Production at Howest University of Applied Sciences - Digital Arts and Entertainment, is here to share an exciting project from his digital sculpting course. In this article, he'll dissect an assignment that tasked him with designing and sculpting a 3D diorama featuring a treehouse and props, inspired by a fairytale character. Savvas selected "Carl Frederiksen" from the movie "UP!" and envisioned a treehouse that reflects his world at the age of 10. Using ZBrush, he modeled and sculpted his diorama, pushing his skills to new heights. To complete the project, he applied polypaint to the model and created captivating beauty renders in Blender. Join Savvas on his journey of creativity and skill development!
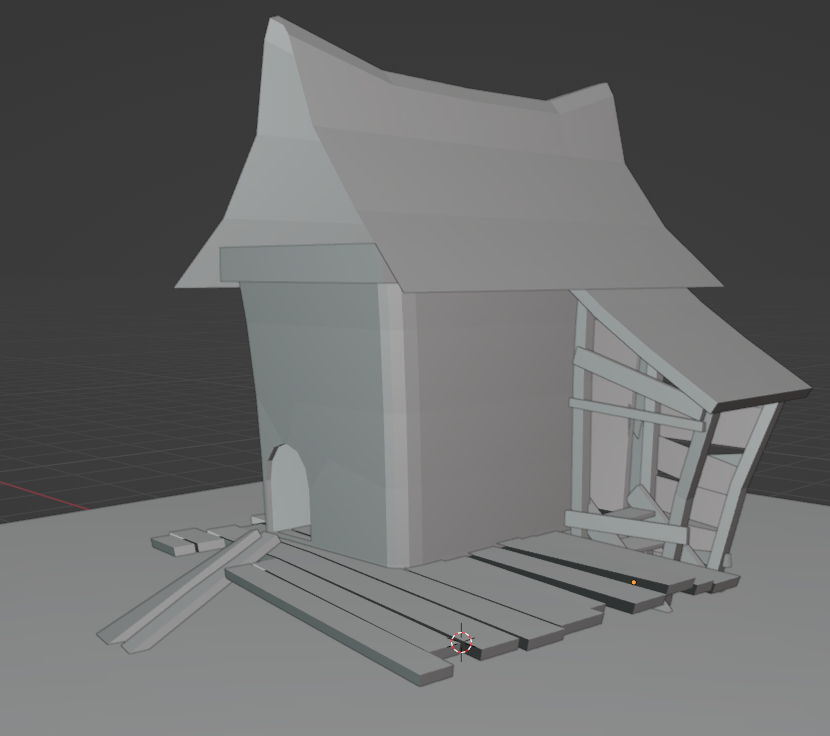
I came up with an original idea and ended up firstly blocking out the main shapes with low poly modeling in Blender, at least for the house itself.
Of course, the design didn't remain the same during the process of trying to achieve something eye-catching. With some rough sketching in Photoshop, I managed to develop a more solid design, complete with a captivating silhouette for the entire diorama. However, this design later evolved as I transitioned to the 3D modeling stage.
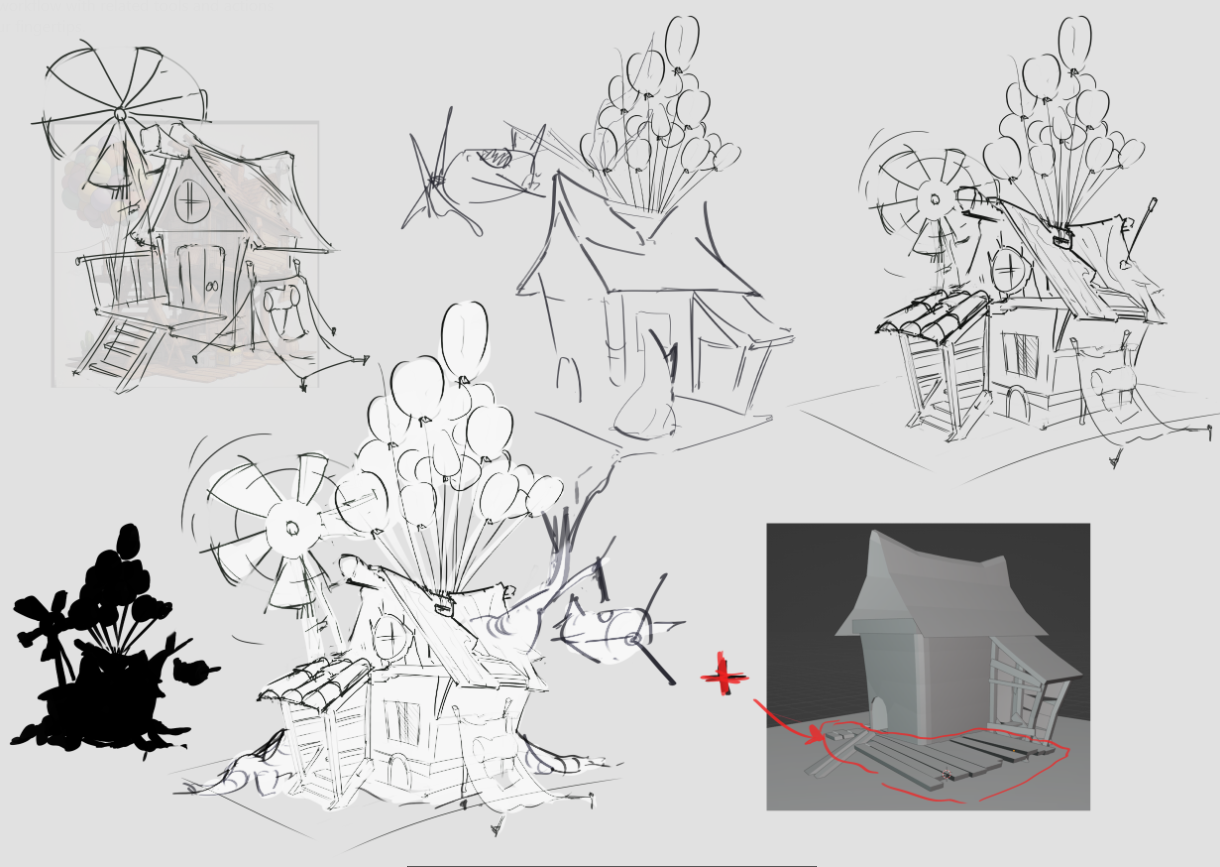
These rough sketches really helped me start the project and incorporate a tree penetrating through the house into the design, a requirement that hadn't been specified until that point for the "treehouse" assignment.
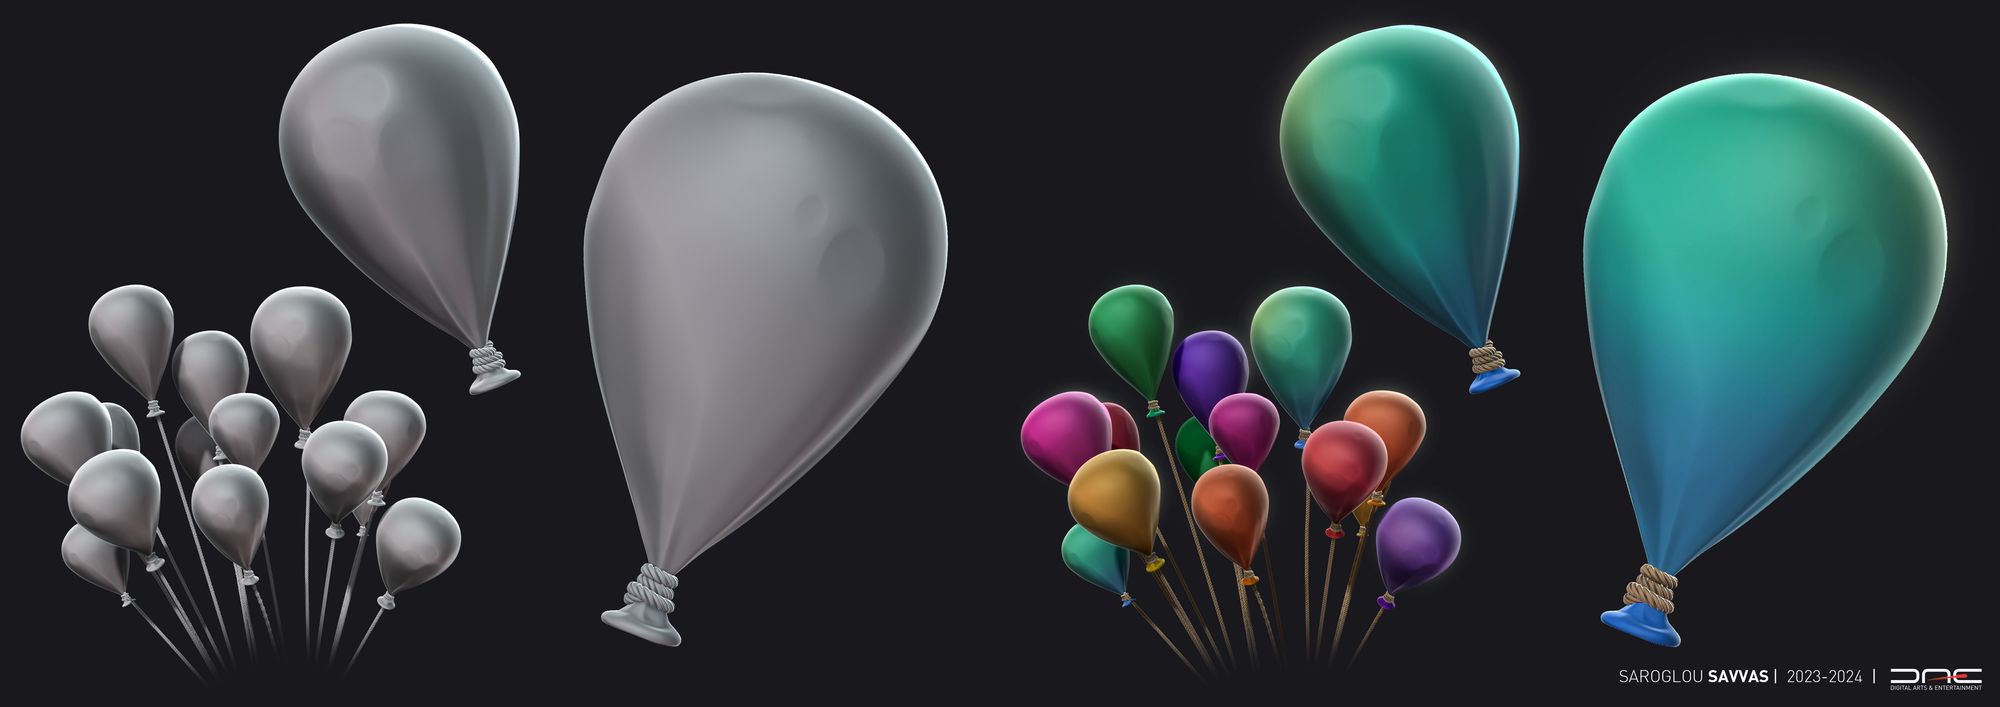
These sketches were inspired by references gathered from the internet before I began the project. The central concept revolved around the main character of the movie "UP," Carl Fredriksen. Of course, a crucial detail essential to the design was the balloons that enable the house to fly in the movie. Additionally, a significant inspiration later on was Vladimir Zhuk's amazing project, "The Treehouse," on ArtStation. This project served as a reference for the sculpting style of the items I placed in my diorama.

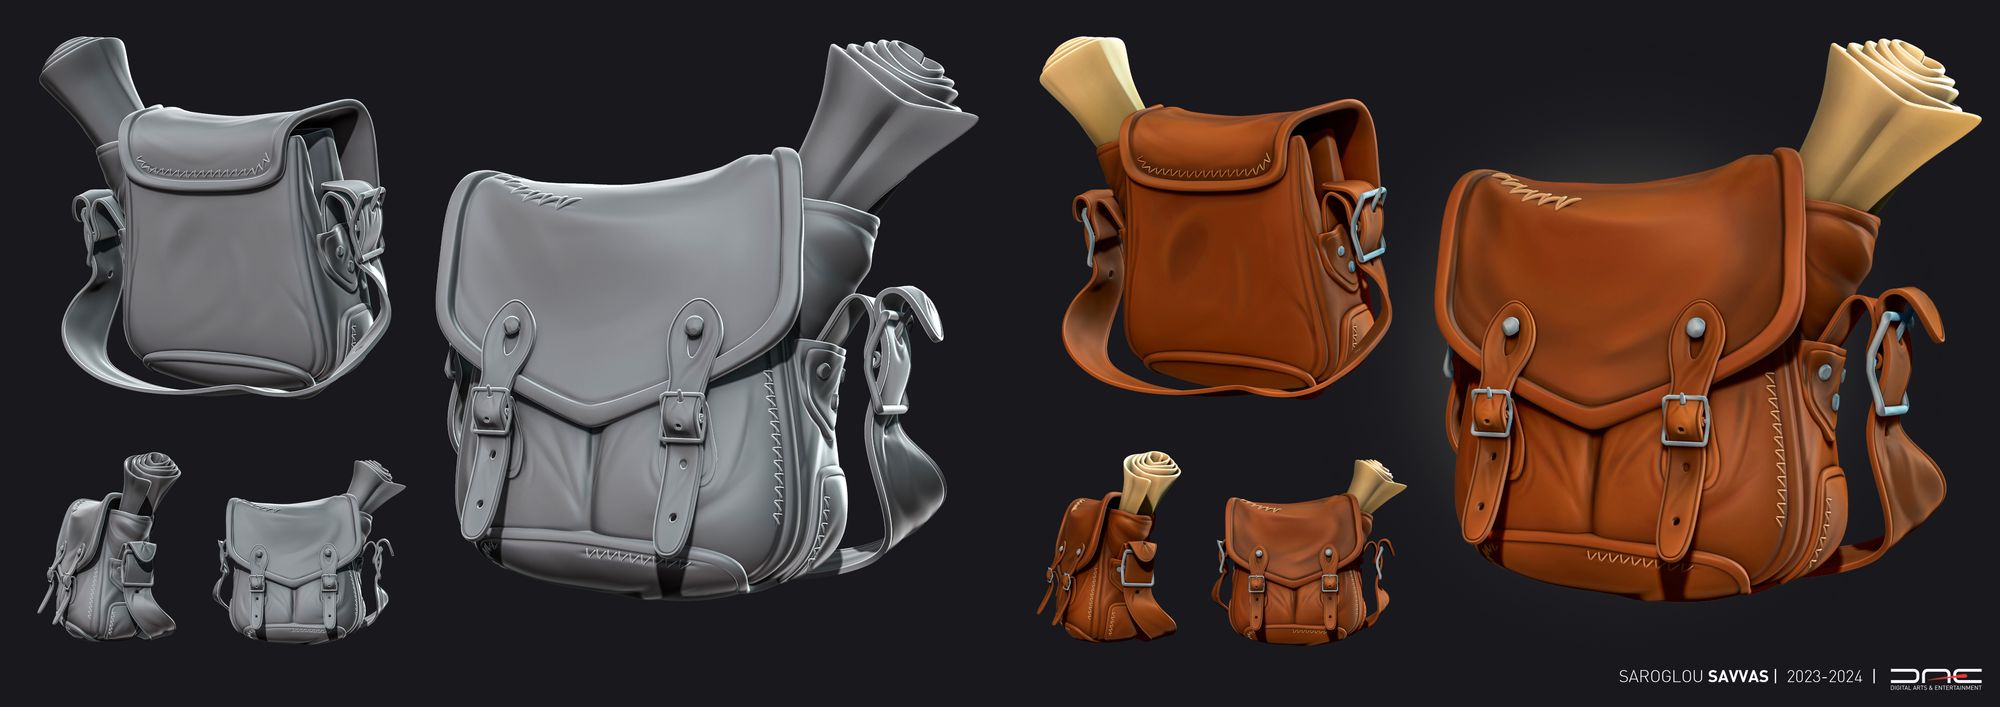
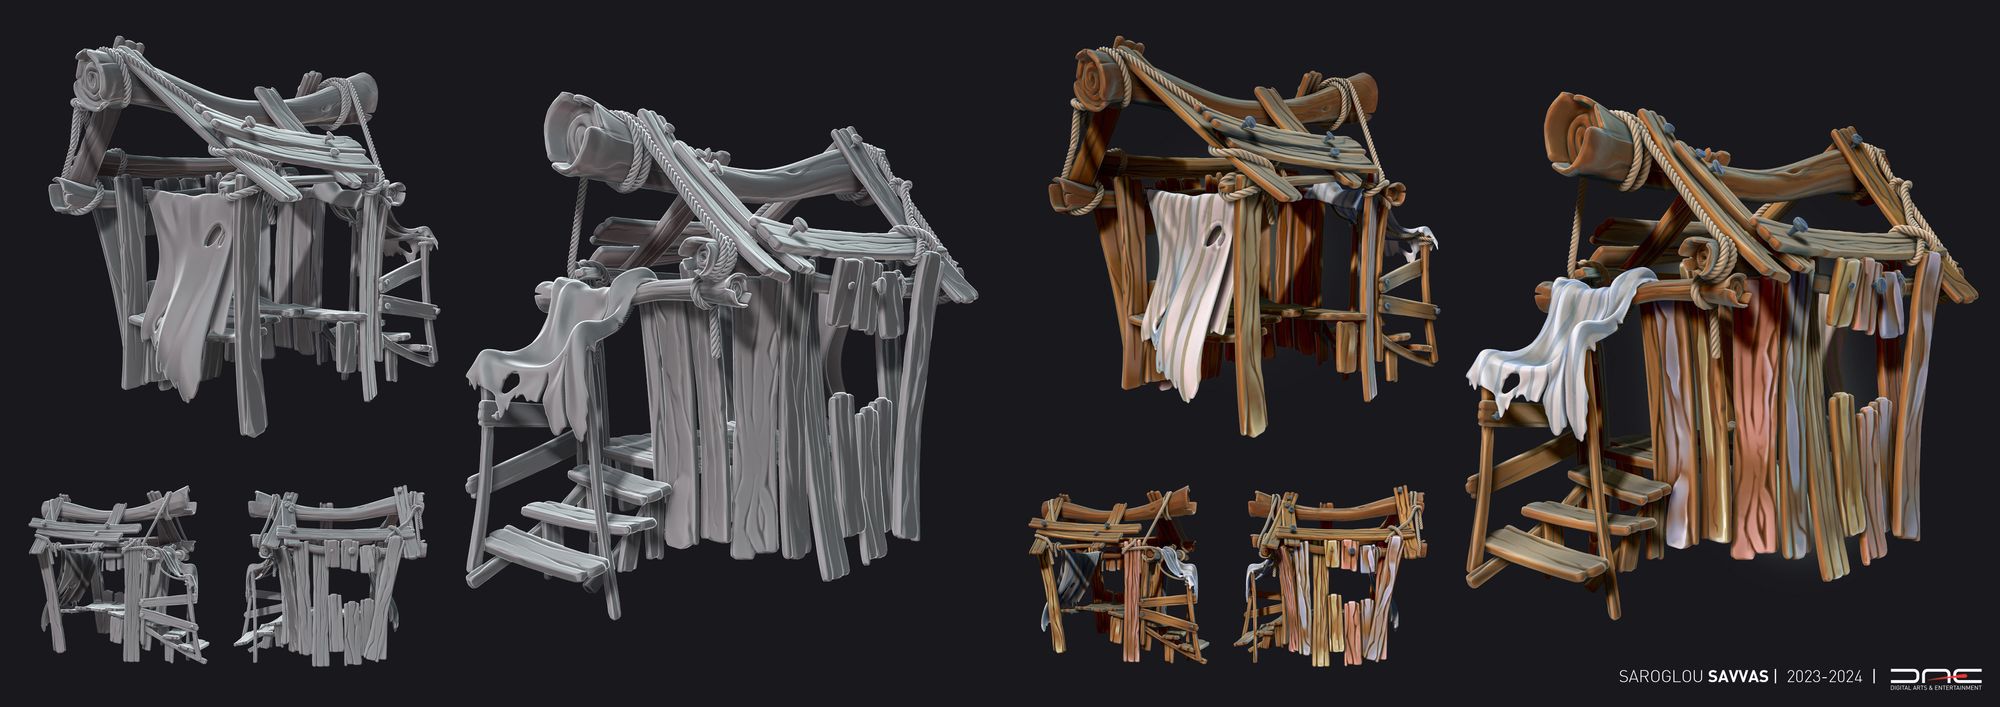
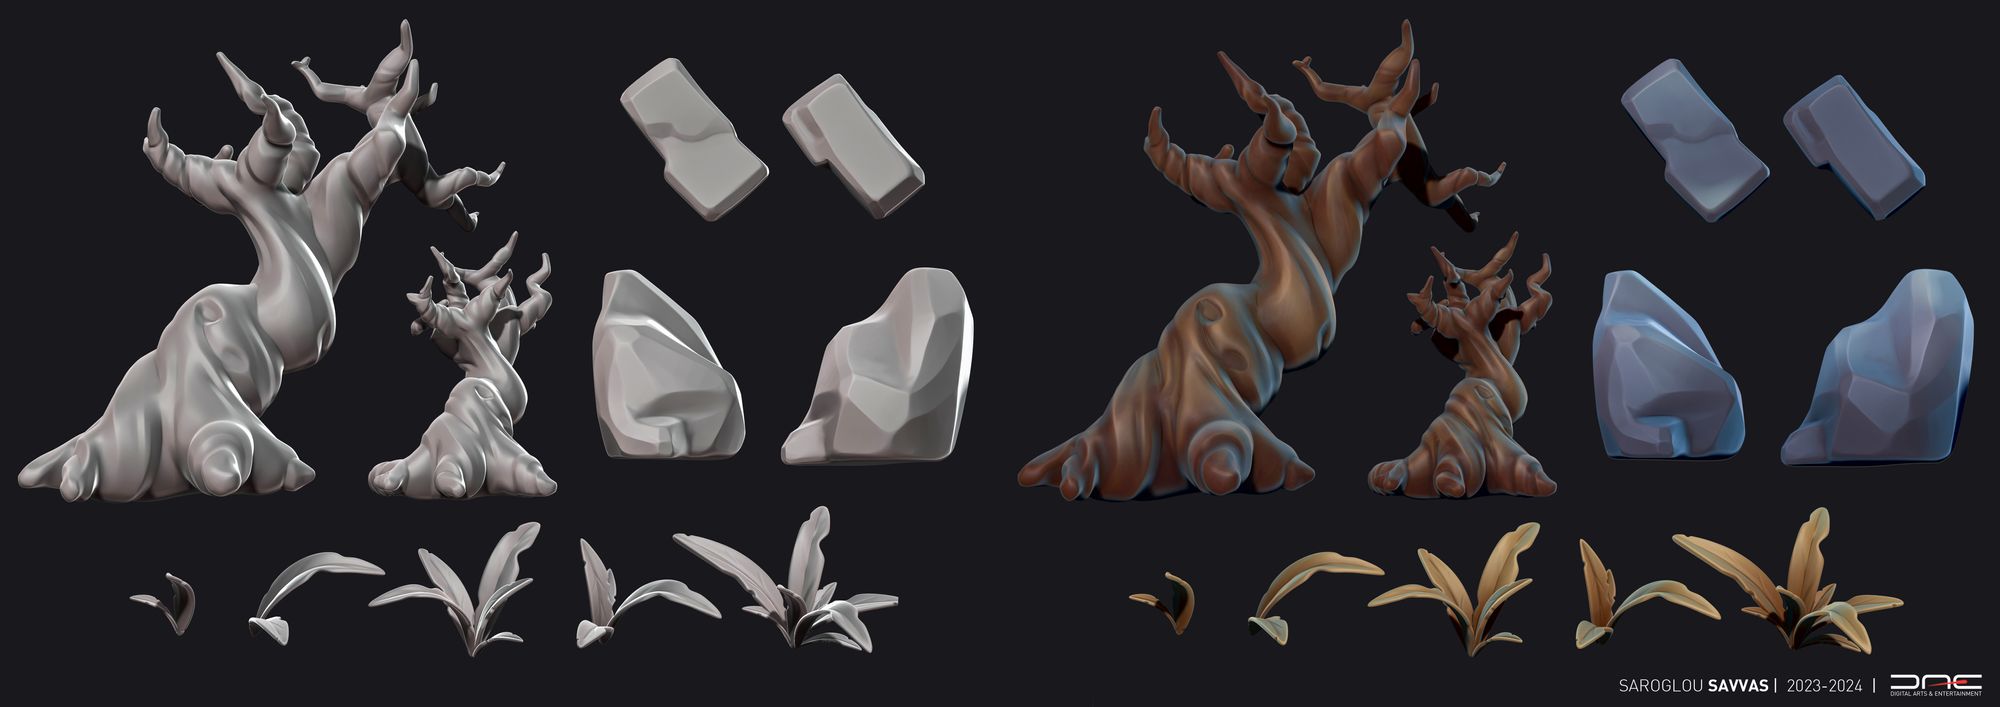
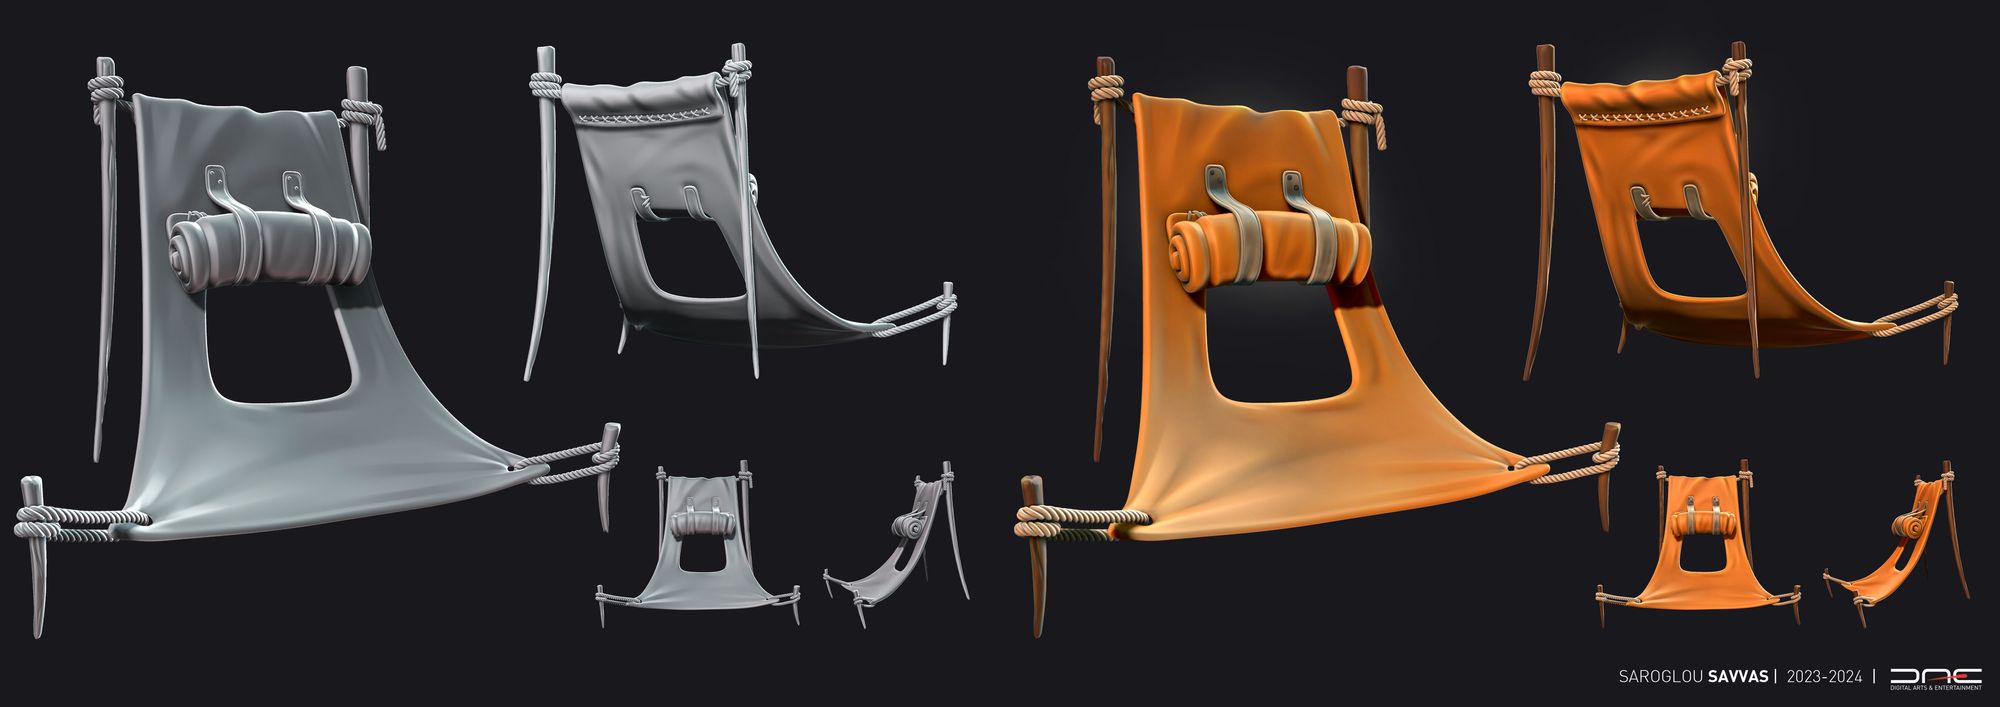
For the assignment, it was a requirement for us to have a clean topology base for all the objects. This ensured that when the models were subdivided, there wouldn’t be any issues with the resolution of the mesh. This approach allows for cleaner sculpting results compared to using "dynamesh," which, although useful in other situations, can be considered messy.


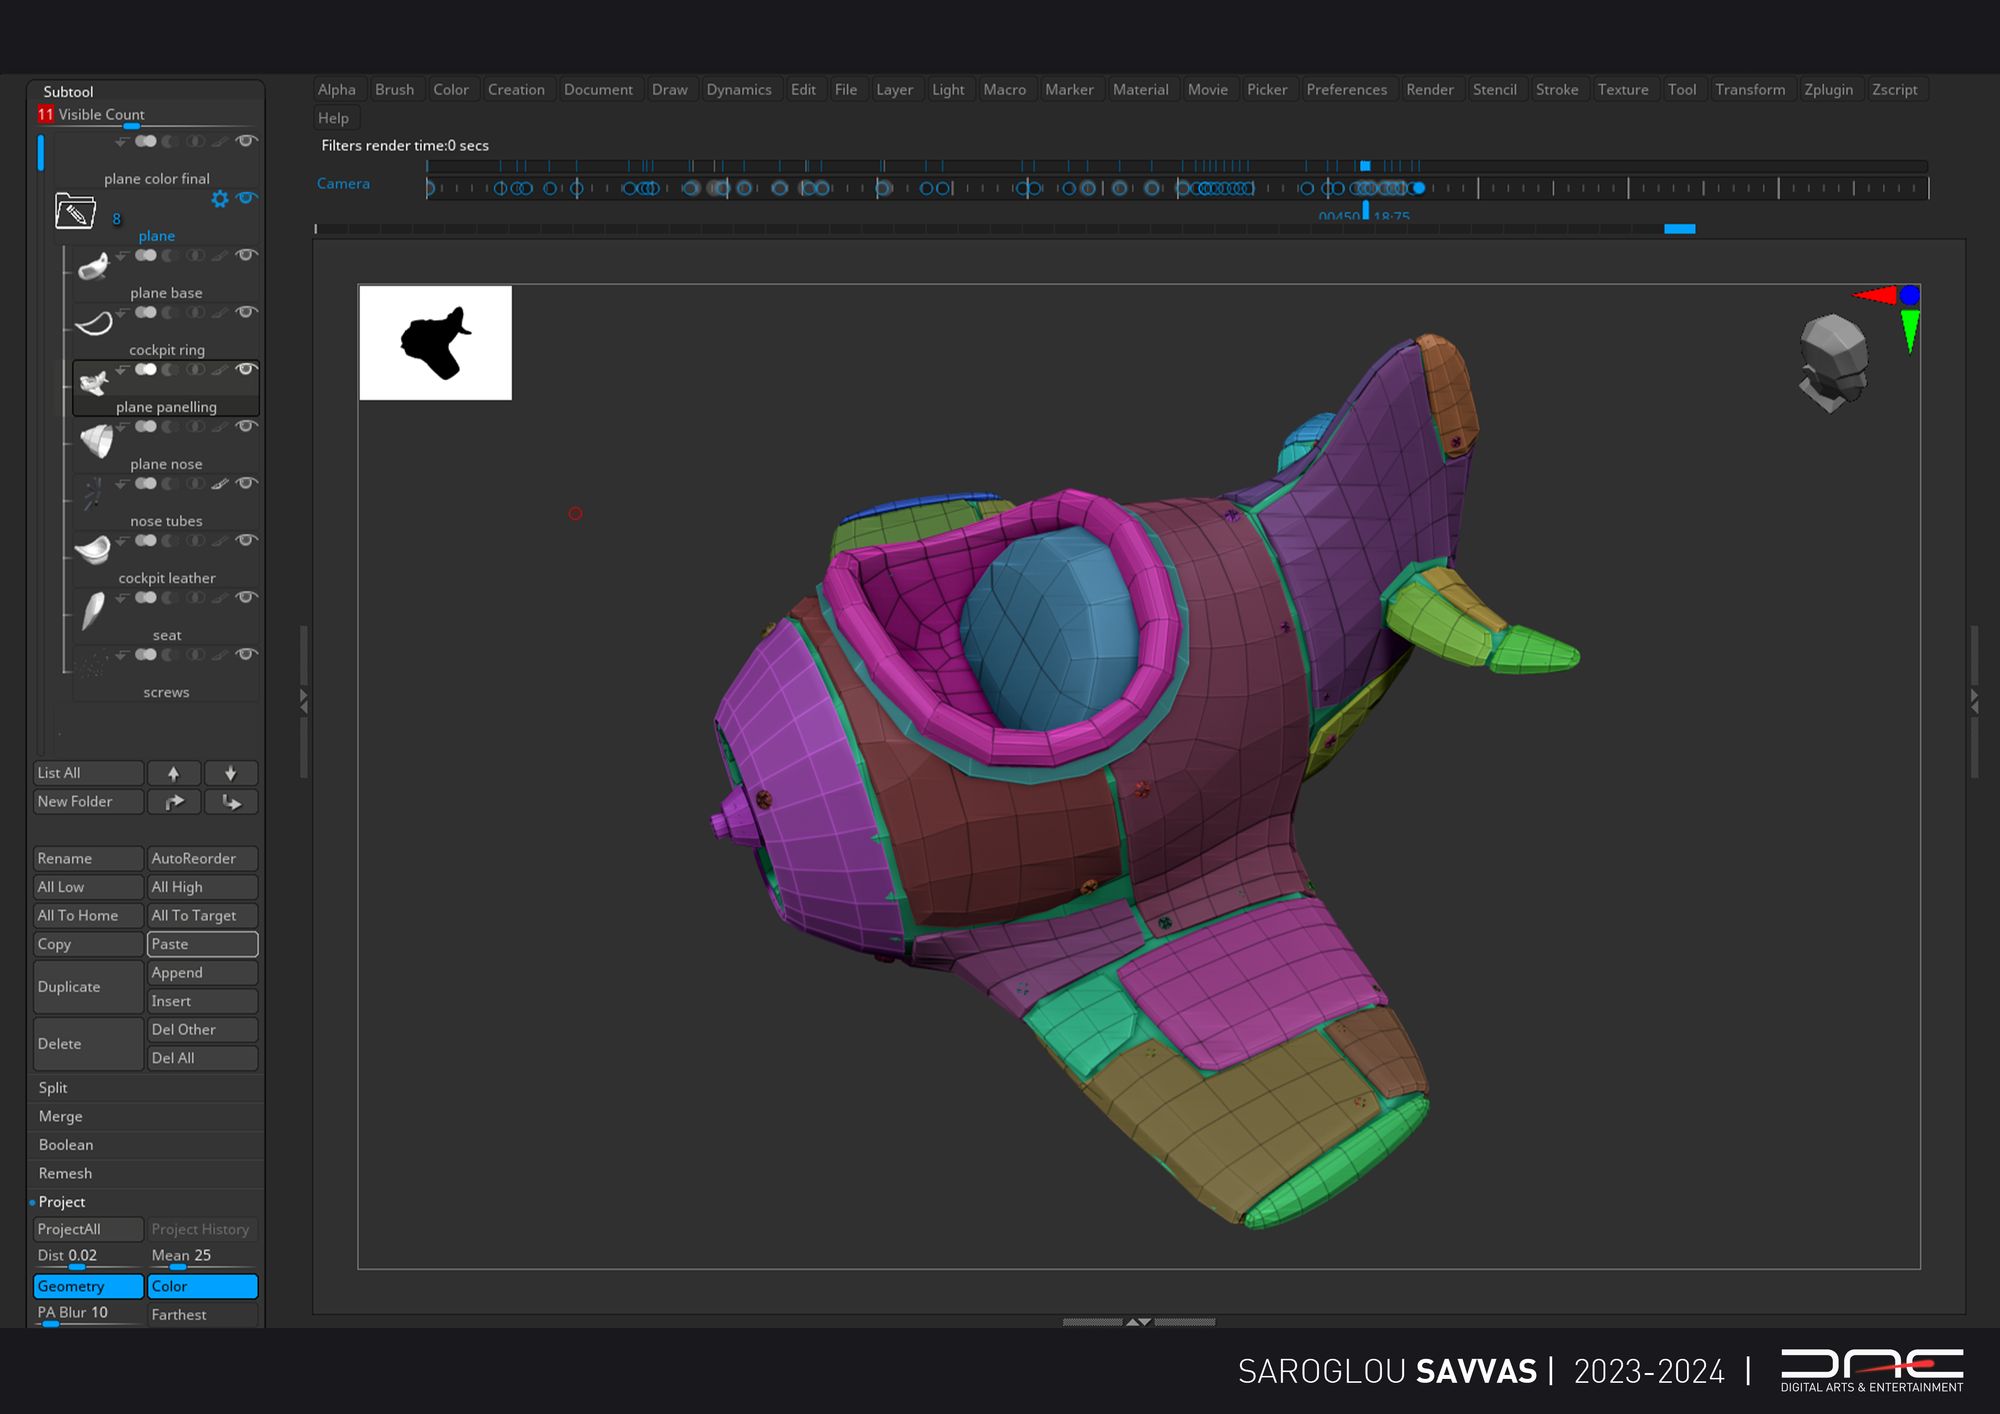
Personally, I decided to dedicate more time to this process as I planned to create all the low-poly models entirely in ZBrush using the ZModeler tool. This allowed me to enhance my skills with the software and become more comfortable in ZBrush without wasting time on the importing and exporting process from other software. Of course, this approach has its advantages and disadvantages, as there can sometimes be limitations.
After the low-poly stage, I continued my workflow by creasing the sharp edges on my objects and subdividing the mesh 2 to 3 times. The next step involved uncreasing all the edges and then subdividing further. This process impressively achieves micro-beveled edges for a very smooth base ready for detailed sculpting.

After ensuring that there is enough resolution to start adding detail to the subtools, I finally began sculpting to give them their final high-poly form and shape. During this process, I found the Trim Dynamic brush, in combination with the Hpolish brush and the ClayPolish function of ZBrush, to be very useful. These three tools enabled me to achieve a stylised look on my objects with sharply defined edges where needed (e.g., wood).

I found the OrbCracks brush very handy as well, for creating all types of creases on wood, cloth, and metal. This, in combination with the previously mentioned brushes and some ClayPolish, gave me the results I was looking for with all my objects. To make the scene more presentable, we were also assigned to Polypaint our objects. I aimed to keep this process as simple as possible, focusing mostly on gradients and colouring gaps and creases with the help of "masking by cavities" in ZBrush. At this stage, the sculpting and polypainting process of the individual objects was complete, and the assembly of the diorama would follow.
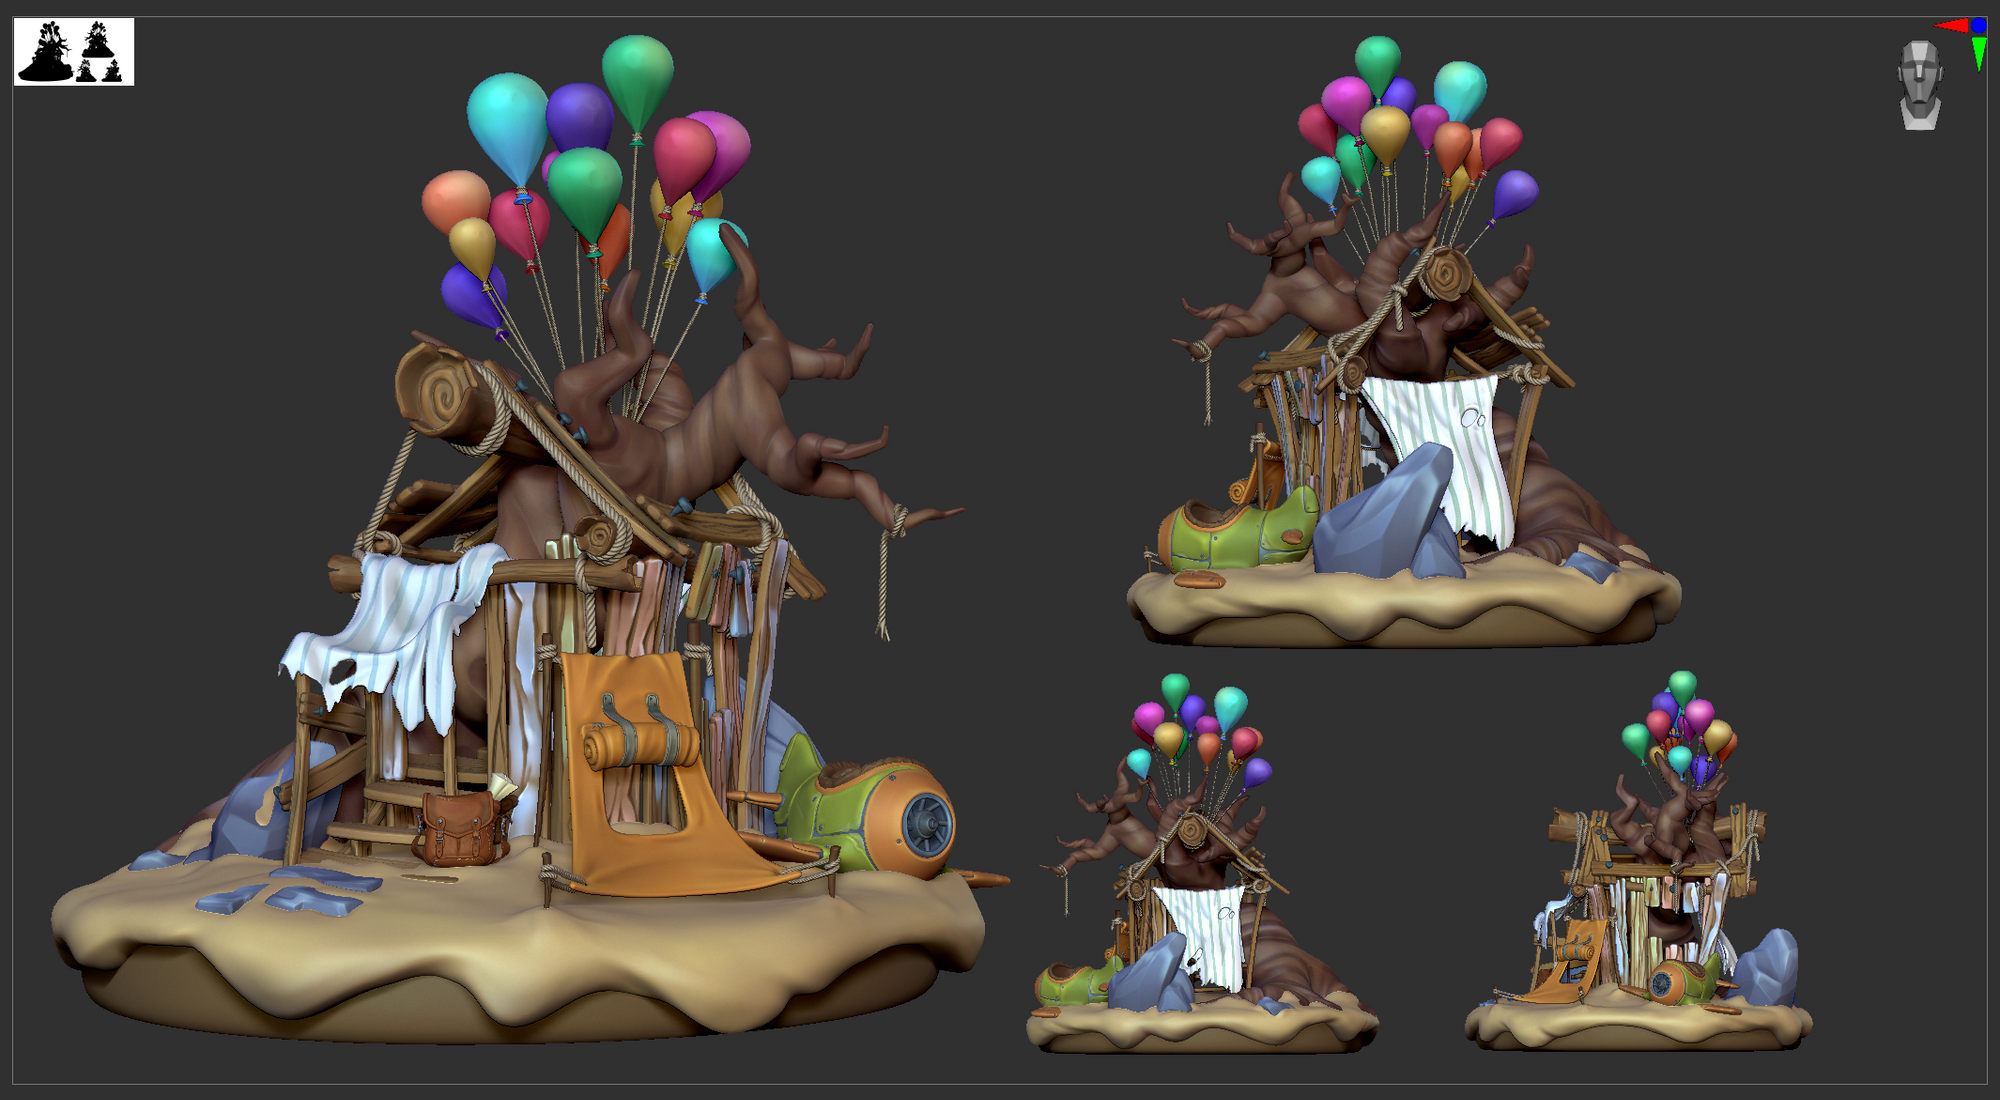
For presenting the individual objects, I decided to use the ZBrush PRB rendering with a custom lighting setup, and by tweaking some settings to enhance ambient occlusion and shadows.

I began this process by creating a very simple diorama base to position all the objects, aiming to achieve an eye-pleasing composition. The base also includes a layer of polypaint. Following this, I started placing the objects around the scene, still within ZBrush.
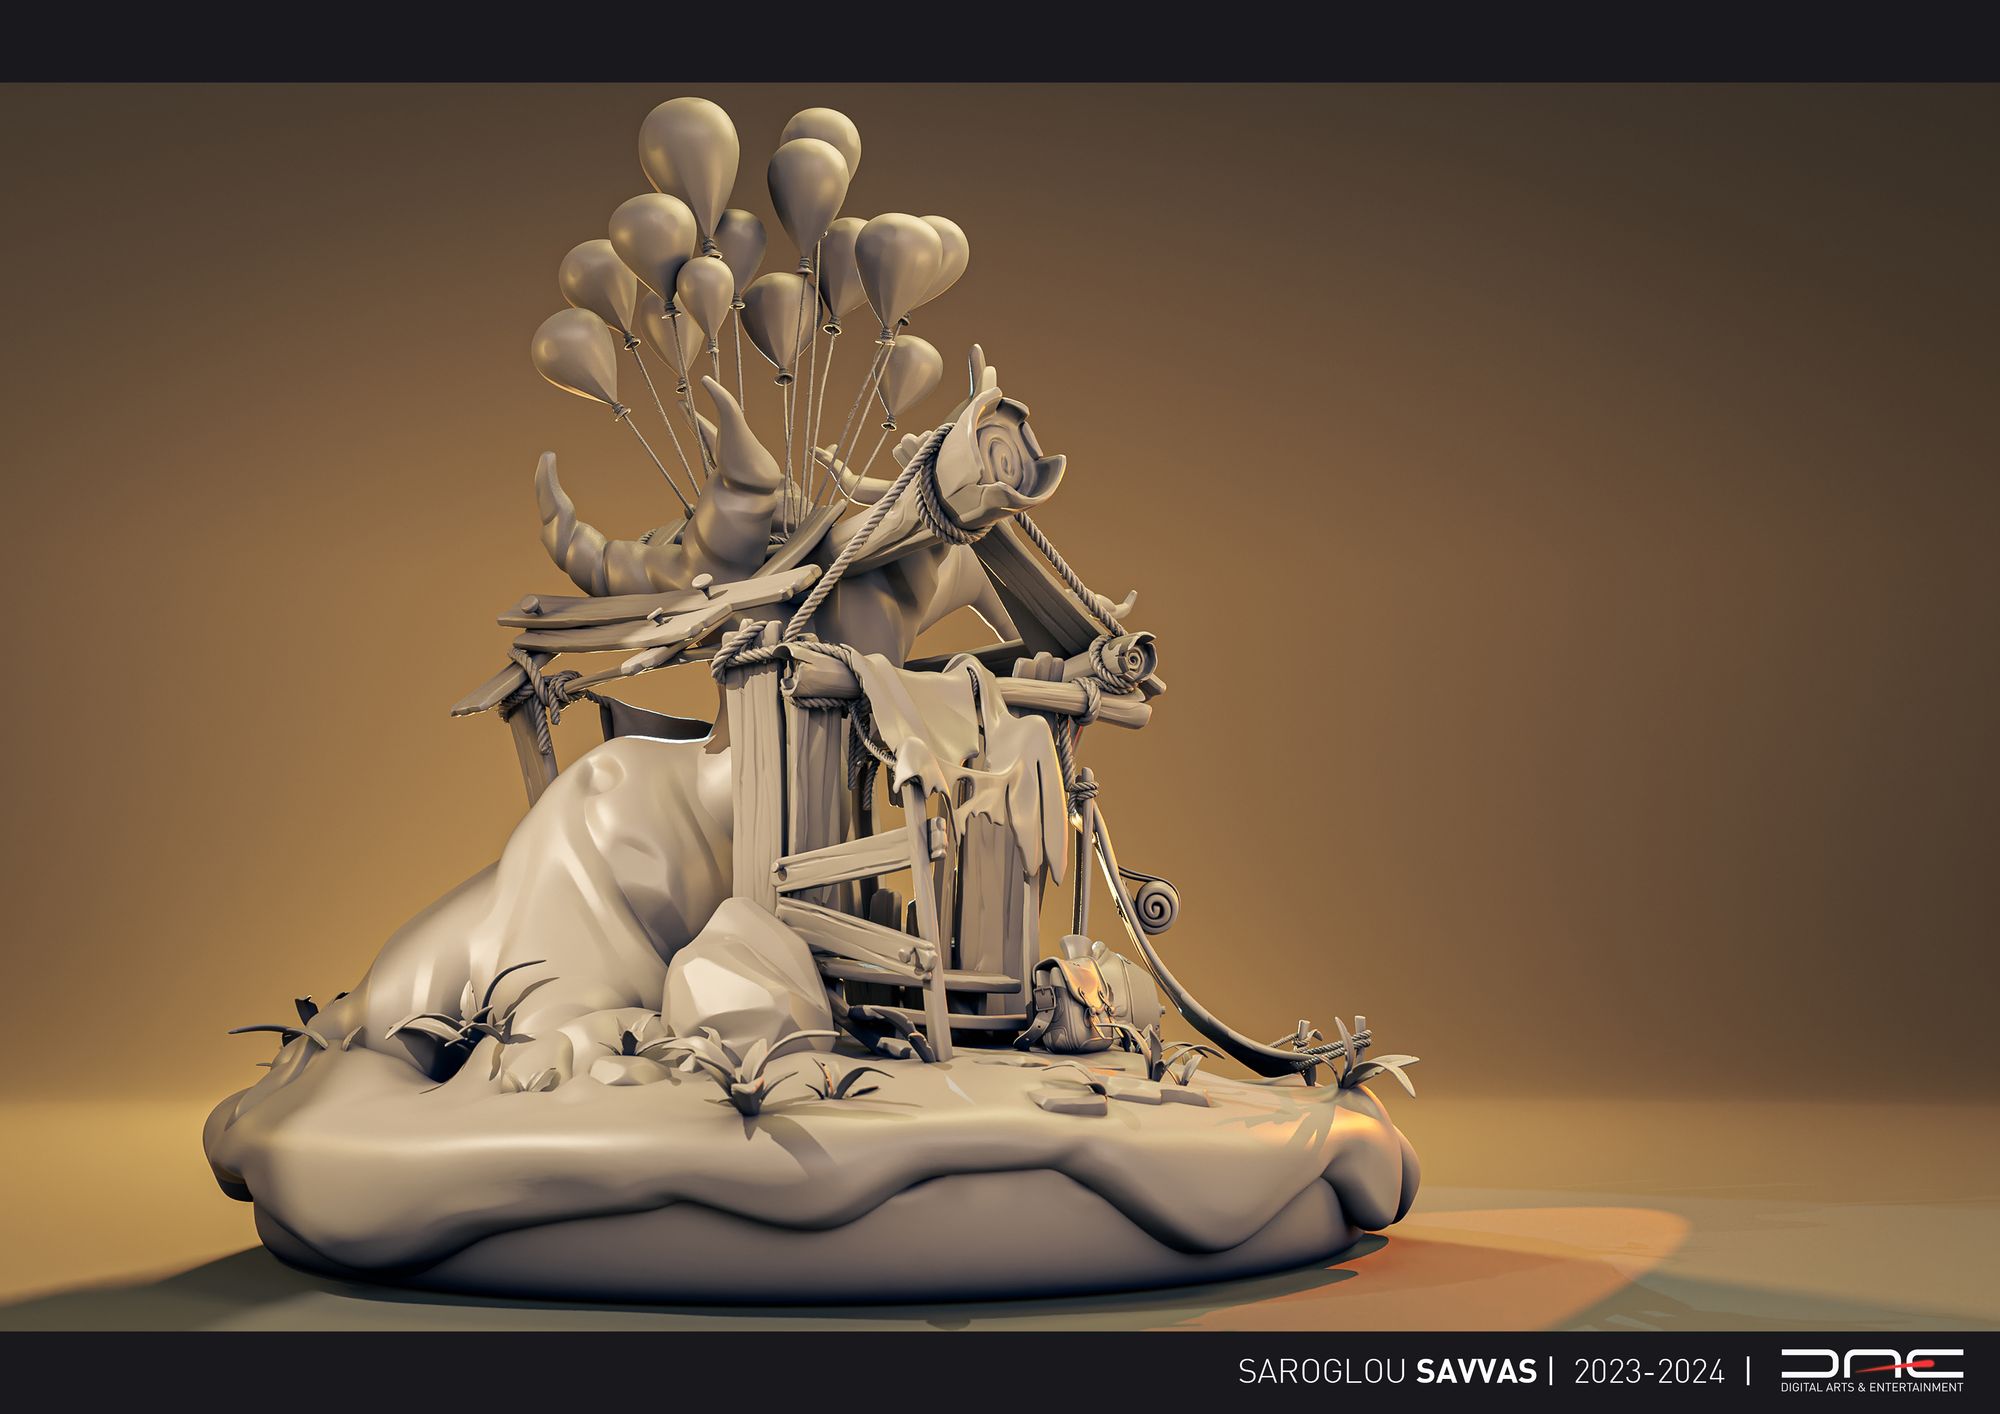
When I was satisfied with the result, I began decimating the entire scene to prepare for exporting the FBX file. At that point, the polycount of my scene was around 90 million. The decimation process significantly reduced that number, making it manageable for another 3D software like Blender. However, there is a slight downside to this process; some of the details became blurry due to the loss of detail in the mesh.
After importing the mesh into Blender, I applied a basic material to all my objects so that I could apply the polypaint from ZBrush. I achieved this by connecting the vertex colour of the mesh to the "base colour" input of the BSDF shader node in Blender's shader editor. Additionally, I added some dark blue Ambient Occlusion to the diorama, enhancing the visibility of each object.

For the lighting of the scene, I employed a more complex lighting setup, but the foundation was a simple studio 3-point lighting arrangement. This setup consistently delivers effective results and adds depth to the scene, with a rim light applied where necessary to separate objects from the background.

What I tend to find helpful in the render sometimes is a cube that covers the entire object, scattering the light falling on it. This is achieved by setting the material of that cube to "volume" and setting the density very low. With this little trick, more atmospheric results can be achieved in the render.

Afterward, I proceeded to render the image in high resolution and then performed some very simple colour correction in Photoshop. Additionally, I created some clay renders with slightly more cinematic lighting this time. By using only two lights aimed at the scene, I managed to generate more shadows in the render, revealing additional sculpt details compared to the brightly coloured version of the diorama.

Concluding, this project was a learning experience for me and I can confidently say that I am happy with the results as I saw improvements in my sculpting skills, as that was also the point of the assignment. I hope the project inspires you!
Reach out to Savvas and check out more of his work via his Rookies profile here.