From Imagination to Realisation: Taking a Concept to a Complex 3D Environment
Alicia Rugama García, a Lightbox Academy student, aims to be a VFX Artist on global projects. Her portfolio prompted us to explore her approach to large-scale environments, shared in this article.
Alicia Rugama García, a student at Lightbox Academy, aspires to work as a VFX Artist on global projects. Her impressive portfolio prompted us to reach out to learn more about her process for approaching large-scale environments. In this article, she shares her process for interpreting concepts and bringing them to life in a 3D world.
Introduction
Hello! My name is Alicia Rugama and I'm pleased to be able to share my work named Steampunk city with The Rookies.
Steampunk city is a project that I am very fond of and that's why I have decided to show you the process.
Why this project?
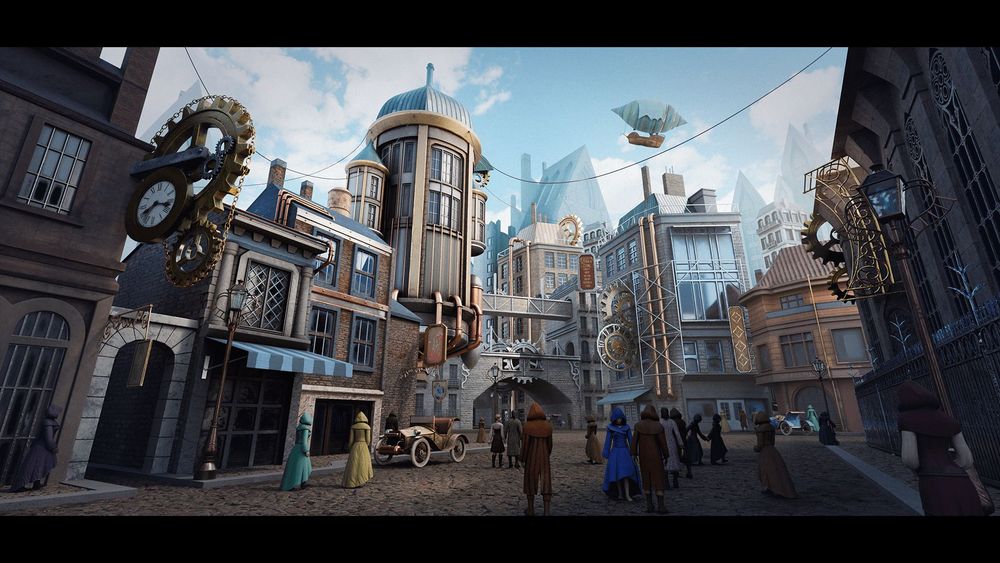
I was looking for ideas for my next project when I ran into this amazing concept from Leartes Studios and Netease Games.
Original concept
I decided to give life to this concept as it was an exterior atmosphere that included many elements in which I could show and simultaneously improve my skills. Furthermore, the steampunk aesthetic has always drawn my attention due to the industrial and old style of the whole world that involves it, so this idea was ideal for me.
The first step to create a scenery based on a concept art is to find references to be as close as possible to the original work. This way, I improved my ability to bring the concept to a 3D space. In this case, I searched for all types of props, places, lighting and outfits related to the steampunk aesthetic to have a clear idea of the bases of this style. I also added new references to give it that personal flavour.
I collected all these images in a PureRef document to have a clear view of what I had to achieve.
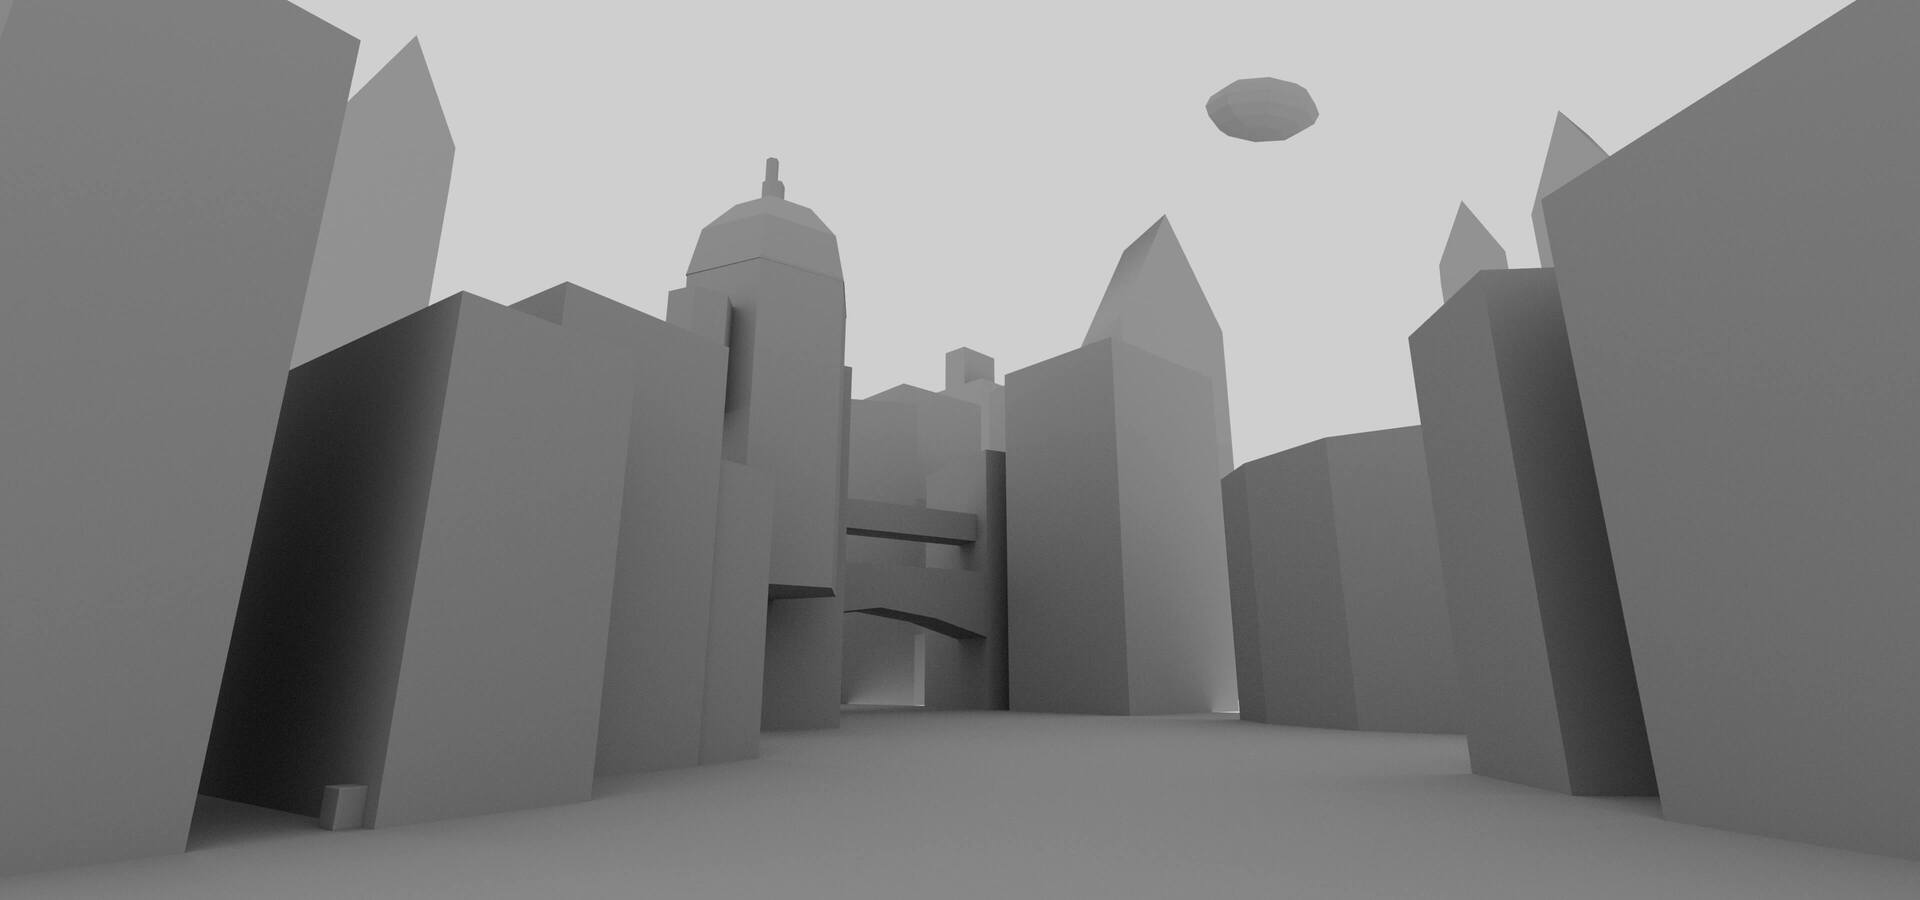
Blocking
Once I had all the references that I needed, it was time for the blocking to visualise the scales and shapes of the buildings and objects that conform the city. In addition, I distributed the main lights to have a general view of the lighting. After trying many different cameras, I finally created the camera with the same aperture used in the concept. I obtain the camera aperture by focusing on the points of perspective to have every detail exactly as the concept. This is one of the most important steps, because you need to have everything clear before starting modeling to avoid future problems.
Secondly, I made a document in which I listed all the pieces that make up the scene, due to the large amount of objects that needed to be modeled. This way, I wouldn't forget any elements and could distribute the right time to each part.
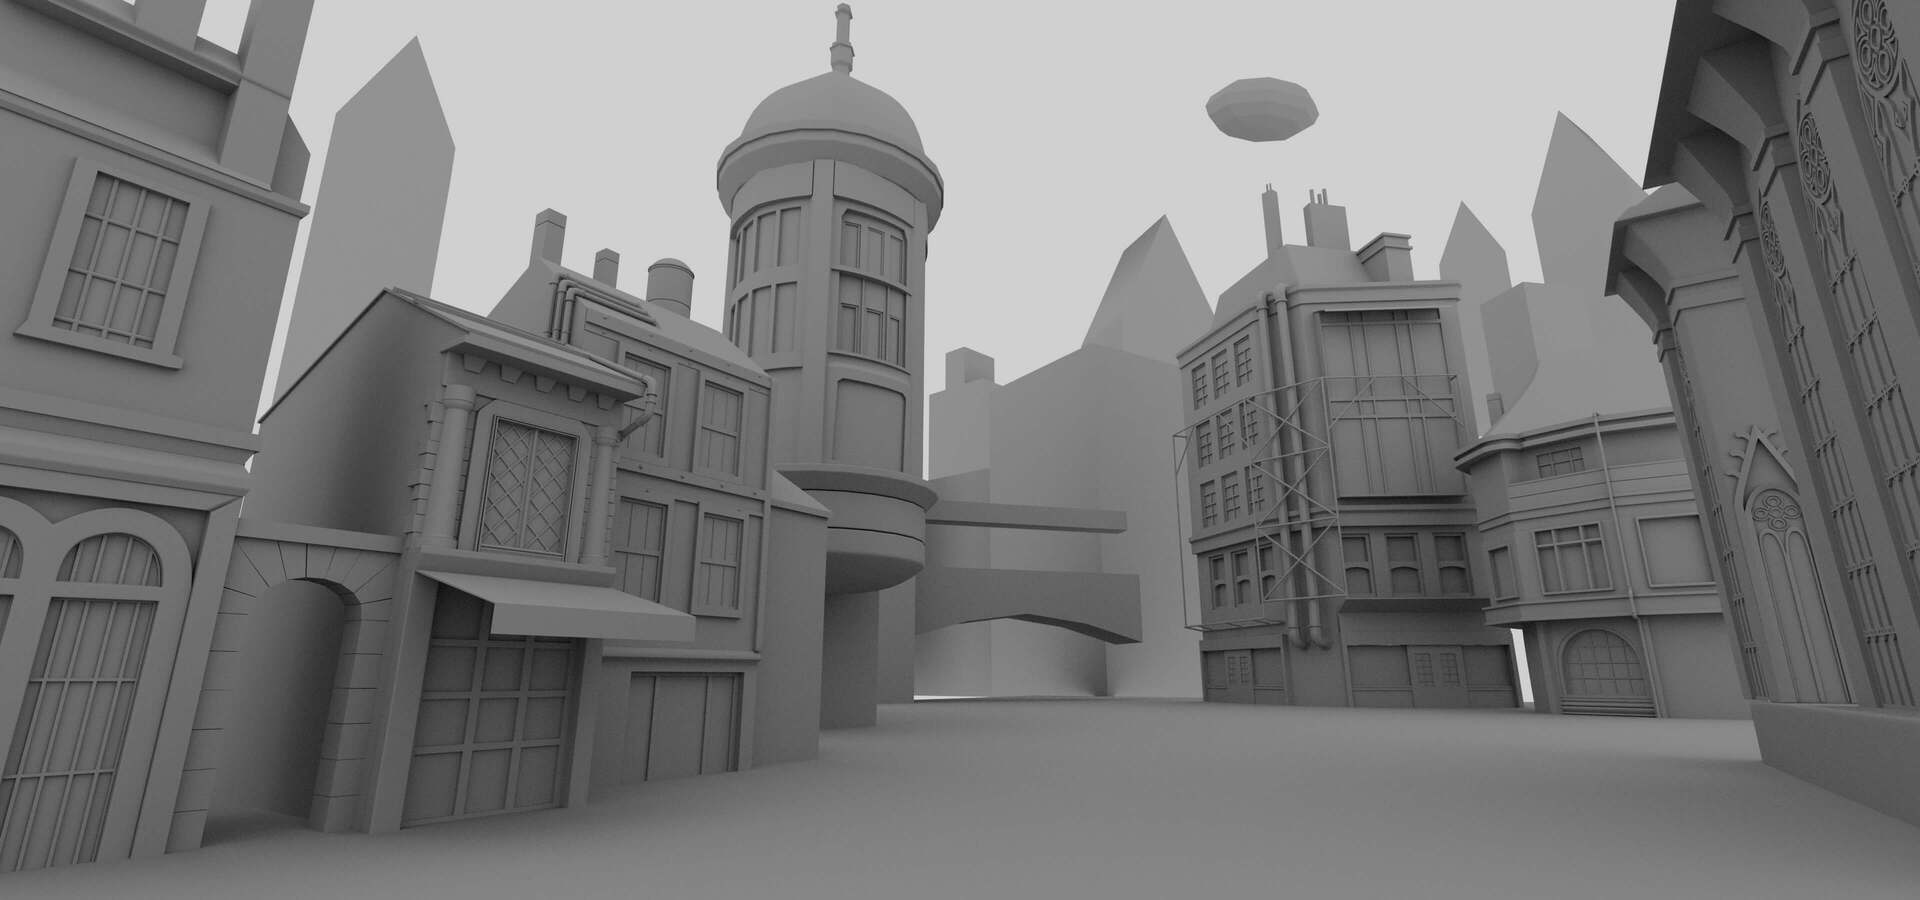
Modeling, lighting and texturing
After the planning phase, it was time to start modeling with Autodesk Maya, closely following the shapes that appear in the concept. I began with the buildings in the foreground due to their importance in the scene. I always start with a general shape of the object I want to model and then gradually add details, paying special attention to the geometry. I modeled the geometry and made the UVs simultaneously, which makes the work more pleasant since UV mapping is often seen as the most tedious part of modeling. Additionally, handling UVs early keeps your mind fresh for mapping and avoids leaving this task for the last moment.
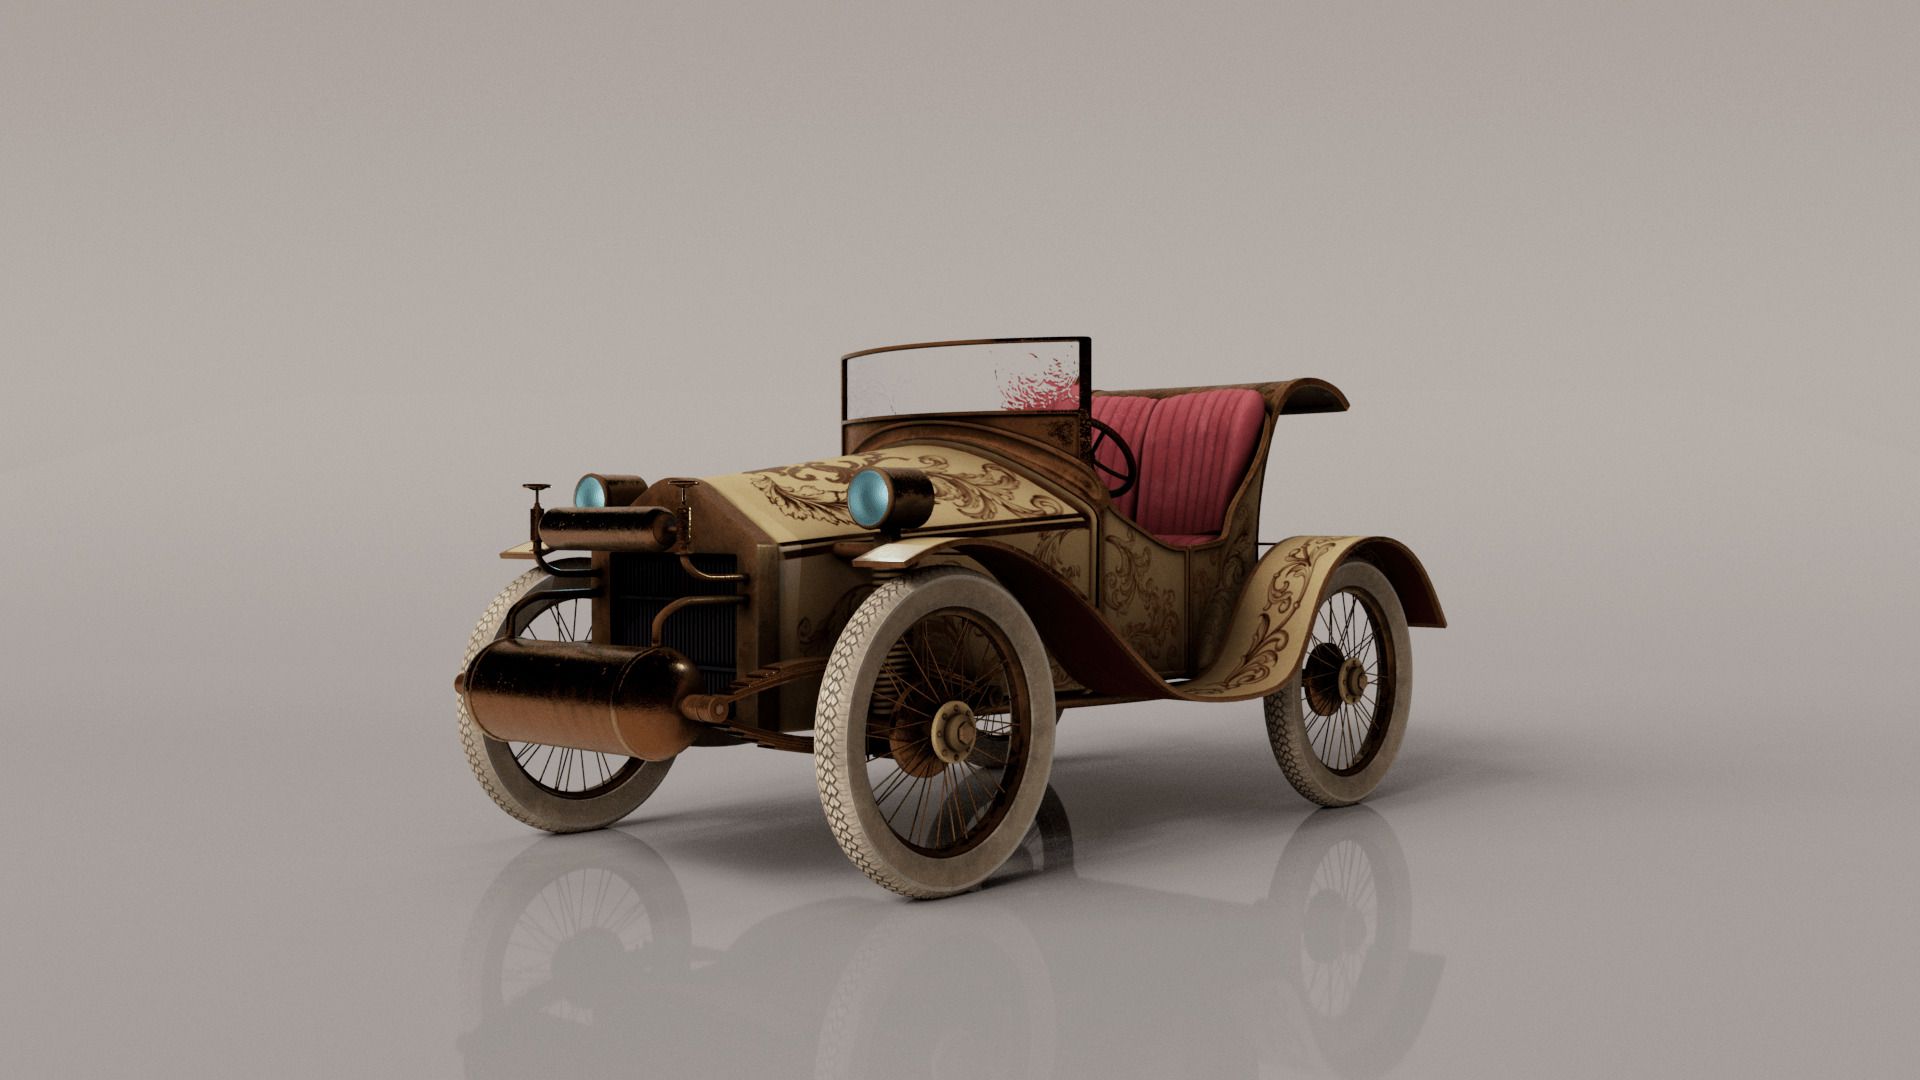
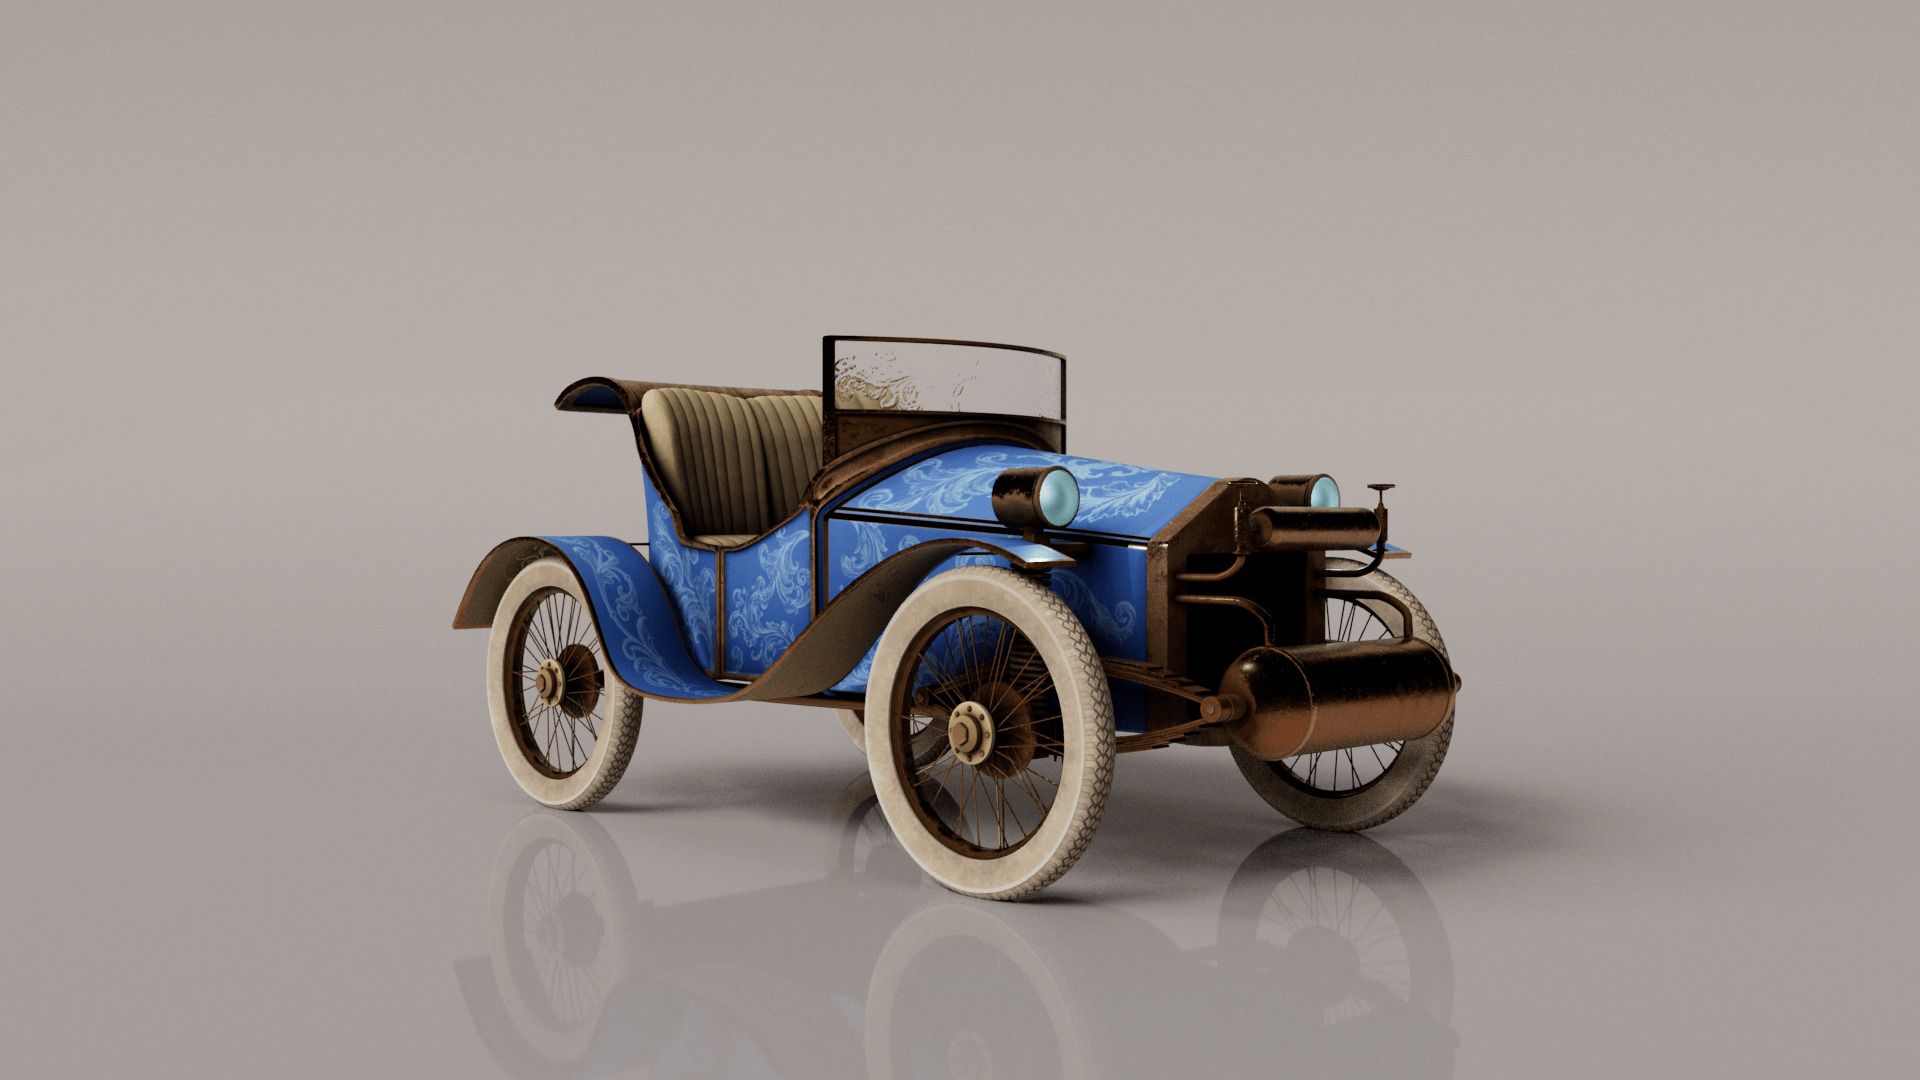
I continued with the other large buildings, following the same steps as I did with those in the foreground. It was tricky to match and balance the shape and size of the entire scene, but the buildings ended up being as similar as possible. Then, I added the remaining details and began working on the props. For the vehicles, I changed the design by mixing various references and experimenting with shapes during modeling to see which combinations fit best, ultimately creating my own steampunk design.
After that, I set up the lights. It's important to study the type, color, and position of the lights to match the concept's lighting ambiance. I began with the bounce lights to get a general idea of the scene's illumination. Then, I added the fill lights to complement the previous lights. The final light was the key light, which always has a strong impact on the overall render. I always put extra effort into lighting a scene, as it drastically changes the entire mood of the environment. The approach must be similar to the frame, but sometimes you need to add variations since physical lighting does not always behave like 2D lighting.
At this point, all the hard surface modeling was done. I began texturing the models in Substance 3D Painter in the same order that they were modeled. In Substance 3D Painter, I started with the base material and color of the props. I used some base maps from Quixel Megascans to get a rough idea of how the surfaces should look and then began texturing. For extra detail, you can paint directly in Substance Painter to achieve the exact design you want, providing total freedom in the design process. You can also create vectors and typography in Photoshop for good results. In my case, I used both software programs for these details: painting in Substance 3D Painter and creating typography in Photoshop, downloading fonts from the internet to match the concept as closely as possible.
After obtaining all the base textures and high poly bakes needed for details, I added scratches, dust, and general damage to make it look realistic. Once the texturing was complete, I imported the maps into the Maya project and made some modifications, adjusting the lighting and adding volumetric lights to see how it looked.
With the texturing finished, there was one last task: the characters from the concept art. I modeled the characters in Autodesk Maya and then sent them to ZBrush for more detailed work. I sculpted the details in high-quality geometry, then exported the displacement (high poly) to bake in Substance 3D Painter. I decided to experiment with ZBrush to improve my skills in another software.
I didn't aim to model the characters exactly as in the concept art; instead, I wanted to explore new sculpting techniques. I modeled two different female characters and two male characters. To make them look distinct, I varied their outfits and clothing colors. Finally, I rigged them and created different poses for each character.
When it was all done, I finished fixing some details and making some colouring work as contrast and saturation with Davinci Resolve.
Conclusion
Steampunk city was the project that I have enjoyed the most, thanks to all the different things that I did to bring to life this stunning concept. It was a huge project that brought me so much knowledge and improved my skills.
Lastly, thank you for taking the time to read my article and I hope that it helped or inspired you in any way!
Check out more of Alicia's work in her Rookies profile here.