How to Design a CG Diorama: A Creative Process
ESAT student Ana Climent Sapena tackled the challenge of designing a CG Diorama, portraying a mystical scene, from concept to final render.
ESAT student Ana Climent Sapena tackled the challenge of designing a CG Diorama, portraying a mystical scene, from concept to final render.

ESAT student Ana Climent Sapena embraced the challenge of designing a CG Diorama depicting a mystical scene: A Witch's Room, from concept to blocking, to final render. Read on for inspiration if you are looking to tackle a similar project to share on your Rookies portfolio!
The creation of a diorama is a highly valuable creative process. As ESAT University students, we need to create a diorama using reusable pieces. Working across different specialties can be intriguing and can ease future work. For this assignment, I decided to develop a creative process from start to finish.
Extensive planning at the start of a project, setting objectives, and estimating time is crucial. Visual aids also help. Following a premeditated scheme can help us avoid wasting time on disorganised thoughts and ideas.
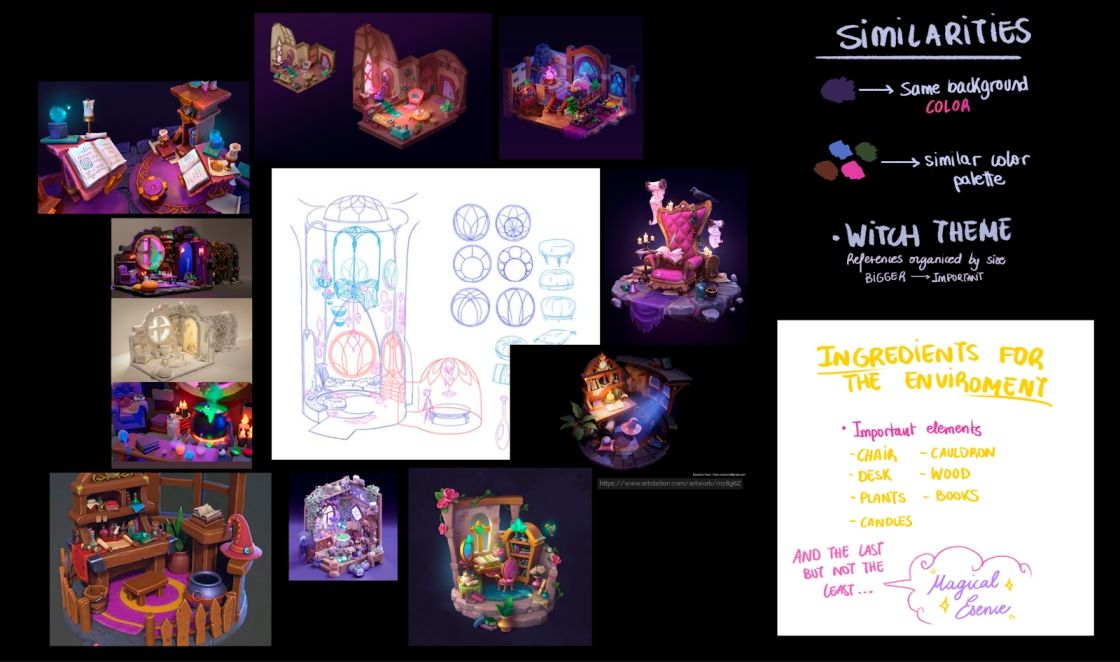
Personally, I found the concept I wanted to work on through an extensive search for references of different styles. I realized that many of them used similar themes and colors, so I started working.
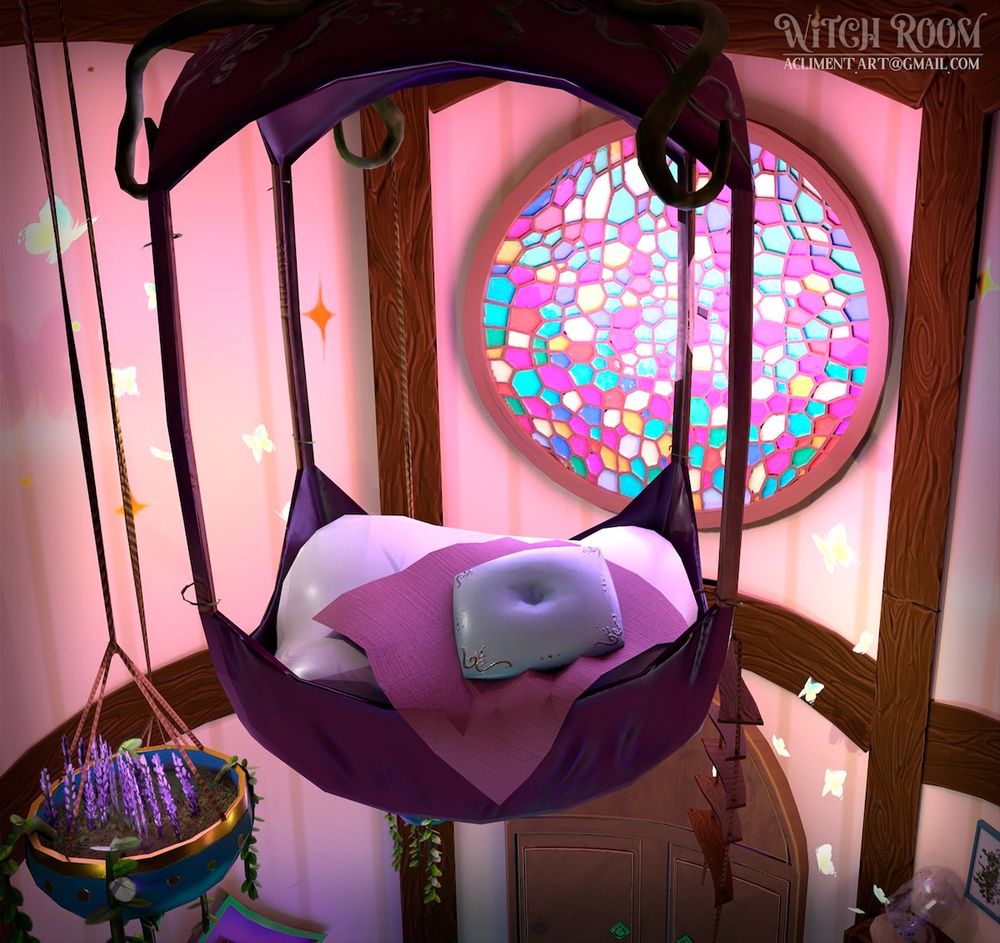
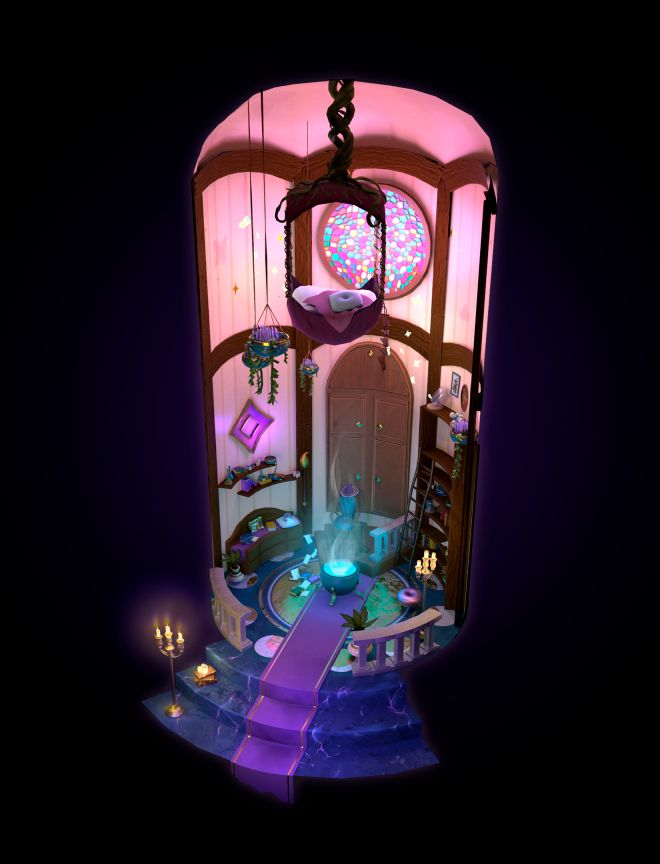
The main reference caught my attention with its high ceiling and hanging bed. These two ideas will be really important for the development of the concept and the overall essence of the room. The surrounding references provide me with different types of information that I would like to apply in my environment, such as assets, colors, and compositions.
An important aspect to consider is the composition and visual weight. It's important to keep in mind that the environment we are working with is going to be in 3D. While the visual weight may look fine in 2D, it could potentially appear empty in 3D.
Once the concept was semi-finished, I started doing a blocking.
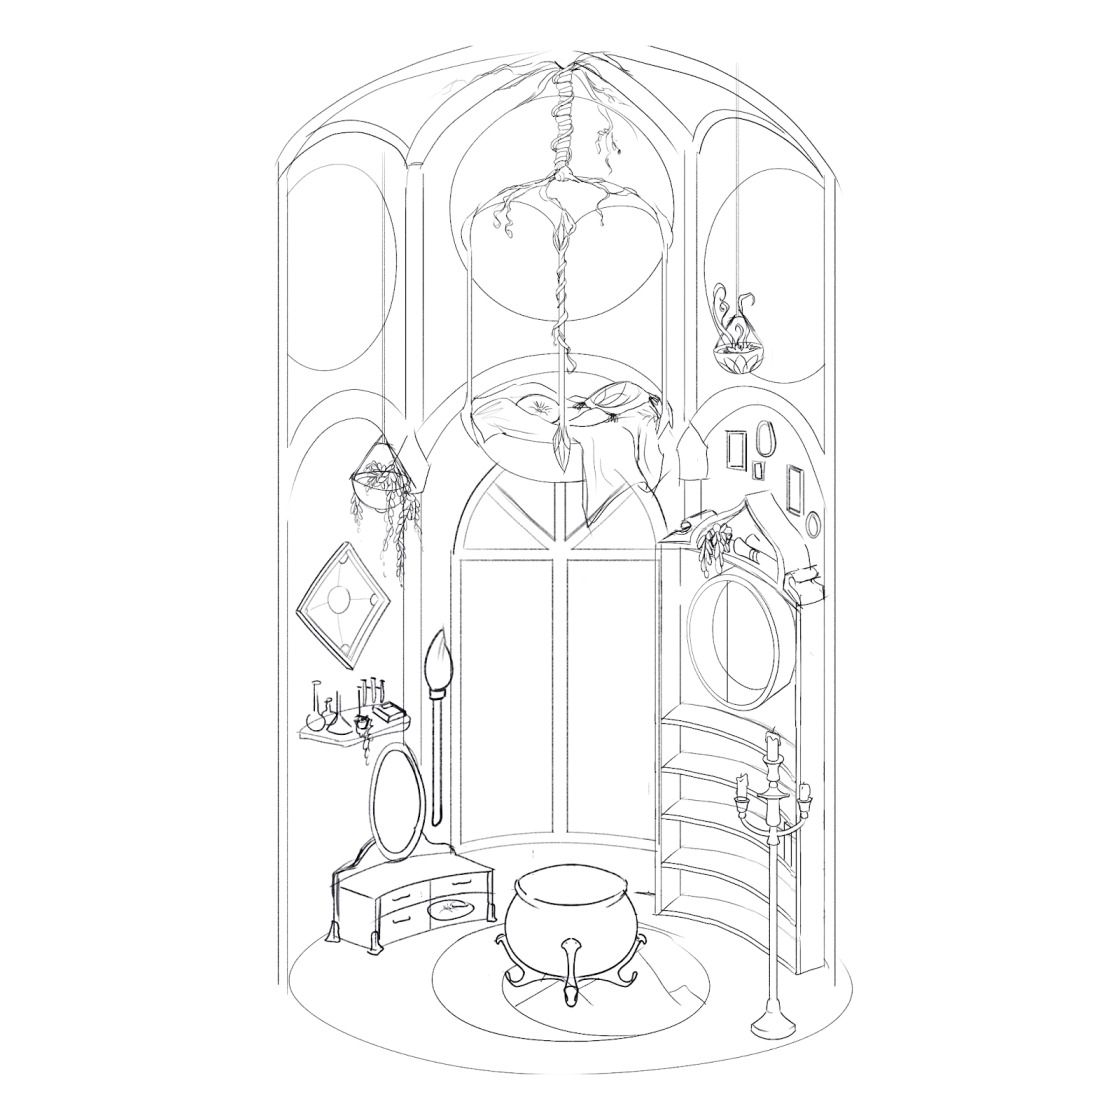
It is really important to know how the 3D volumes are going to impact the visualisation of the scene. I also thought about making the scenario interesting but not overcharged with unnecessary stuff. Making a list of the principal assets you are going to use is always a good way to organize yourself.
At this point, I realised my concept was just a reference to what the scenario would finally look like. Many empty places were found, so I started modifying the volumes and their position in the scenario.
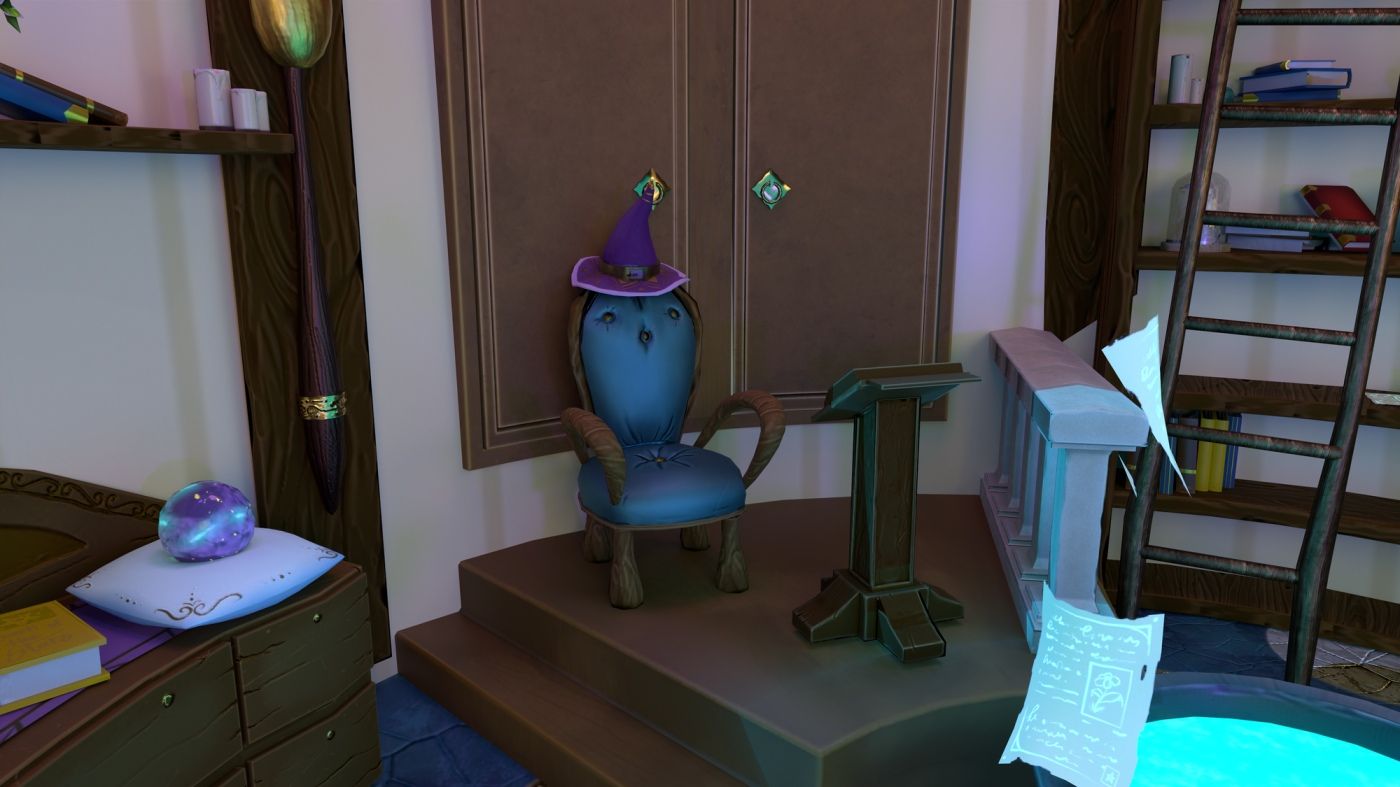
Making the scene look alive is really important because of the main theme. The concept I imagined was positive and funny, featuring a messy little witch who is trying to learn how magic works. To create this cute environment, organic shapes are used throughout the scene. The wood has little spirals and undulating veins, and the witch's seat is made of roots and cloth.
I placed some books and papers around the cauldron, with some of them floating because... the spell is working! There are also assets like plants, a huge window, and stained glass windows.

To be honest, I initially considered making a very bright room. While modeling, I envisioned where and how to incorporate colours and lights, eventually settling on the idea I developed. I felt that making the entire room too bright would diminish its interest, so I opted to work with two different lighting schemes. The room itself has distinct spaces: the upper rest area and the lower study area. Leveraging the dynamic lighting provided by the stained glass, I designated the upper part as a calm and resting area, while the lower area features more visual information about lights and assets, creating a parallelism with the purpose of the zone.
The other part of the modeling process involved creating high-topology assets, most of which were done in ZBrush. However, I encountered problems resizing some assets because ZBrush uses a different measurement system. To resolve this issue, I used the Scale Master plugin to resize the assets before exporting them. Once I finished sculpting and resizing, the next step was to export them to 3ds Max. I organised the assets into two different folders: one for the low assets and the other for the high ones.
I planned to have four different UV IDs, each related to its purpose: Cloth, Furniture, Objects, and Infrastructure. This approach served both aesthetic and organizational purposes, allowing me to work faster by quickly locating specific assets. Additionally, it facilitated texturing by providing a distinct mood for each UV. I arranged the UVs to avoid aliasing and deformations in the textures, organising them using the ID's option in 3ds Max, assigning different materials, and then exporting them in FBX format to Marmoset.
In Marmoset, I baked different maps, such as AO and Normal, as I have found better results using this software. For the remaining maps, I utilised Substance 3D. The texturing process involved planning the idea, developing it, and adding details. My concept for the diorama centered on using purple, blue, and gold as the main colors. Most of the cloth featured purple shading with golden details, except for the chair, which I wanted to stand out by placing the witch hat above it, implying that the seat belonged to her. The long carpet included gold details on the sides to draw attention to the viewer's gaze direction.
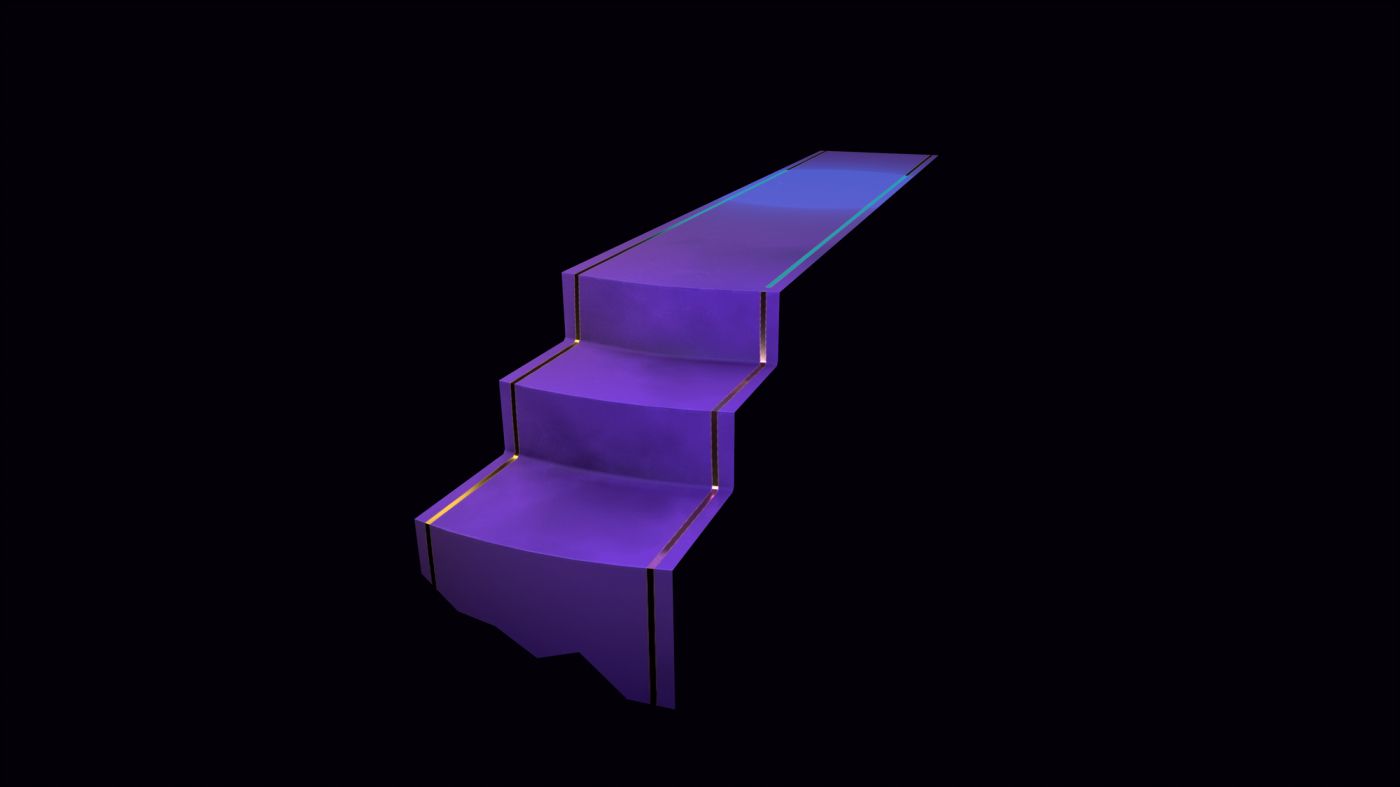
Also, the stone stairs give an interesting silhouette to the diorama. I wanted them to be important, but not striking, so I painted them as normal stones (grey shades). In places with cavities, I have but some luminous veins to give the feeling that the house has life or is magical. also has it like the chandelier gives the same energy of attention, but not too showy.

The cauldron acts as the main asset of the lower part of the scene. Has a bright blue emissive colour with books all around it and it’s giving the kind of "look at me!" energy.
The desk and shelves full of books and papers, give visual weight, and drink force the context of the story the room tells.

I chose lavender as the flower for the room's pots for several reasons. Primarily, its purple color and silhouette provide a touch of color without being too striking. Its meaning is associated with purity, innocence, and love, which I directly relate to the essence of the diorama. Plants bring life to the environment, and I considered adding vines for their curved shapes.
I placed some butterflies around the bed, flying up towards the higher area, to add interest to the composition. Once I finished texturing and compositing, I exported everything to Marmoset. I typically prioritize lighting and post-processing. For the stained glass window, I positioned a white light in front of it to simulate incoming light.
The lower zone was mainly illuminated with emissive light emitted by the cauldron. Additionally, butterflies and candles served as small points of light, adding dynamism to the composition.

When I had the final render ready, I opened it in Photoshop for post-production.
I put a black background without much information since I intended to highlight that diorama with an emissive in the outline. For this emissive, I decided to use a purple colour. I added a touch of luminous operation to the areas where the candles were affecting the silhouette. using this resource, I was able to apply a realistic touch on the post-processing.
I followed this process with the main render, But I also made other snapshots. I focused on presenting enough information and showing the most interesting areas.
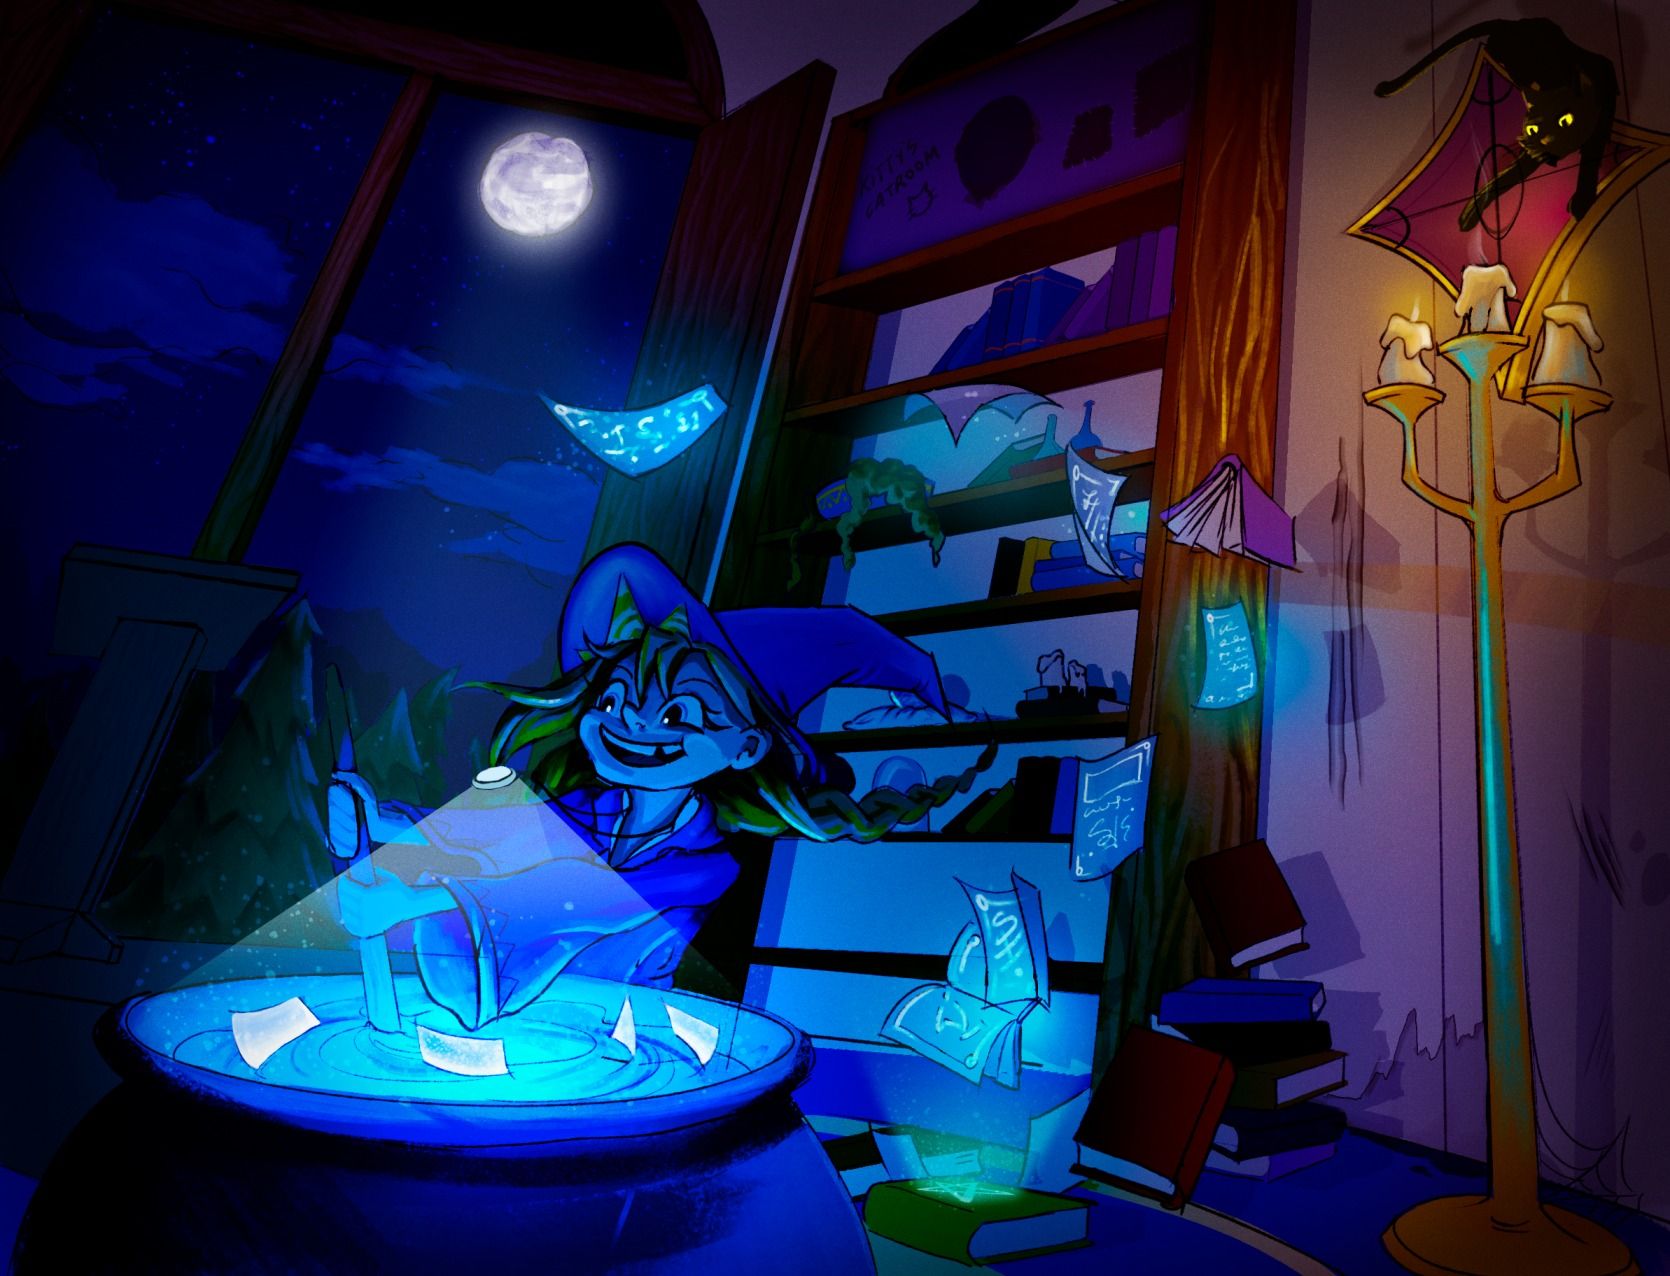
It has been an enriching work progress I am very happy with the results I have achieved. I wanted to take advantage of the concept, so I created some illustrative images of the little witch living in the room, so, I leave it here! :)

Hope you liked my work!
Reach out to Ana via her Rookies profile here.